Instructional Videos
Simple Practice Appointment Scheduling
This guide will walk you through the process of scheduling appointments in Simple Practice.
Go to secure.simplepractice.com
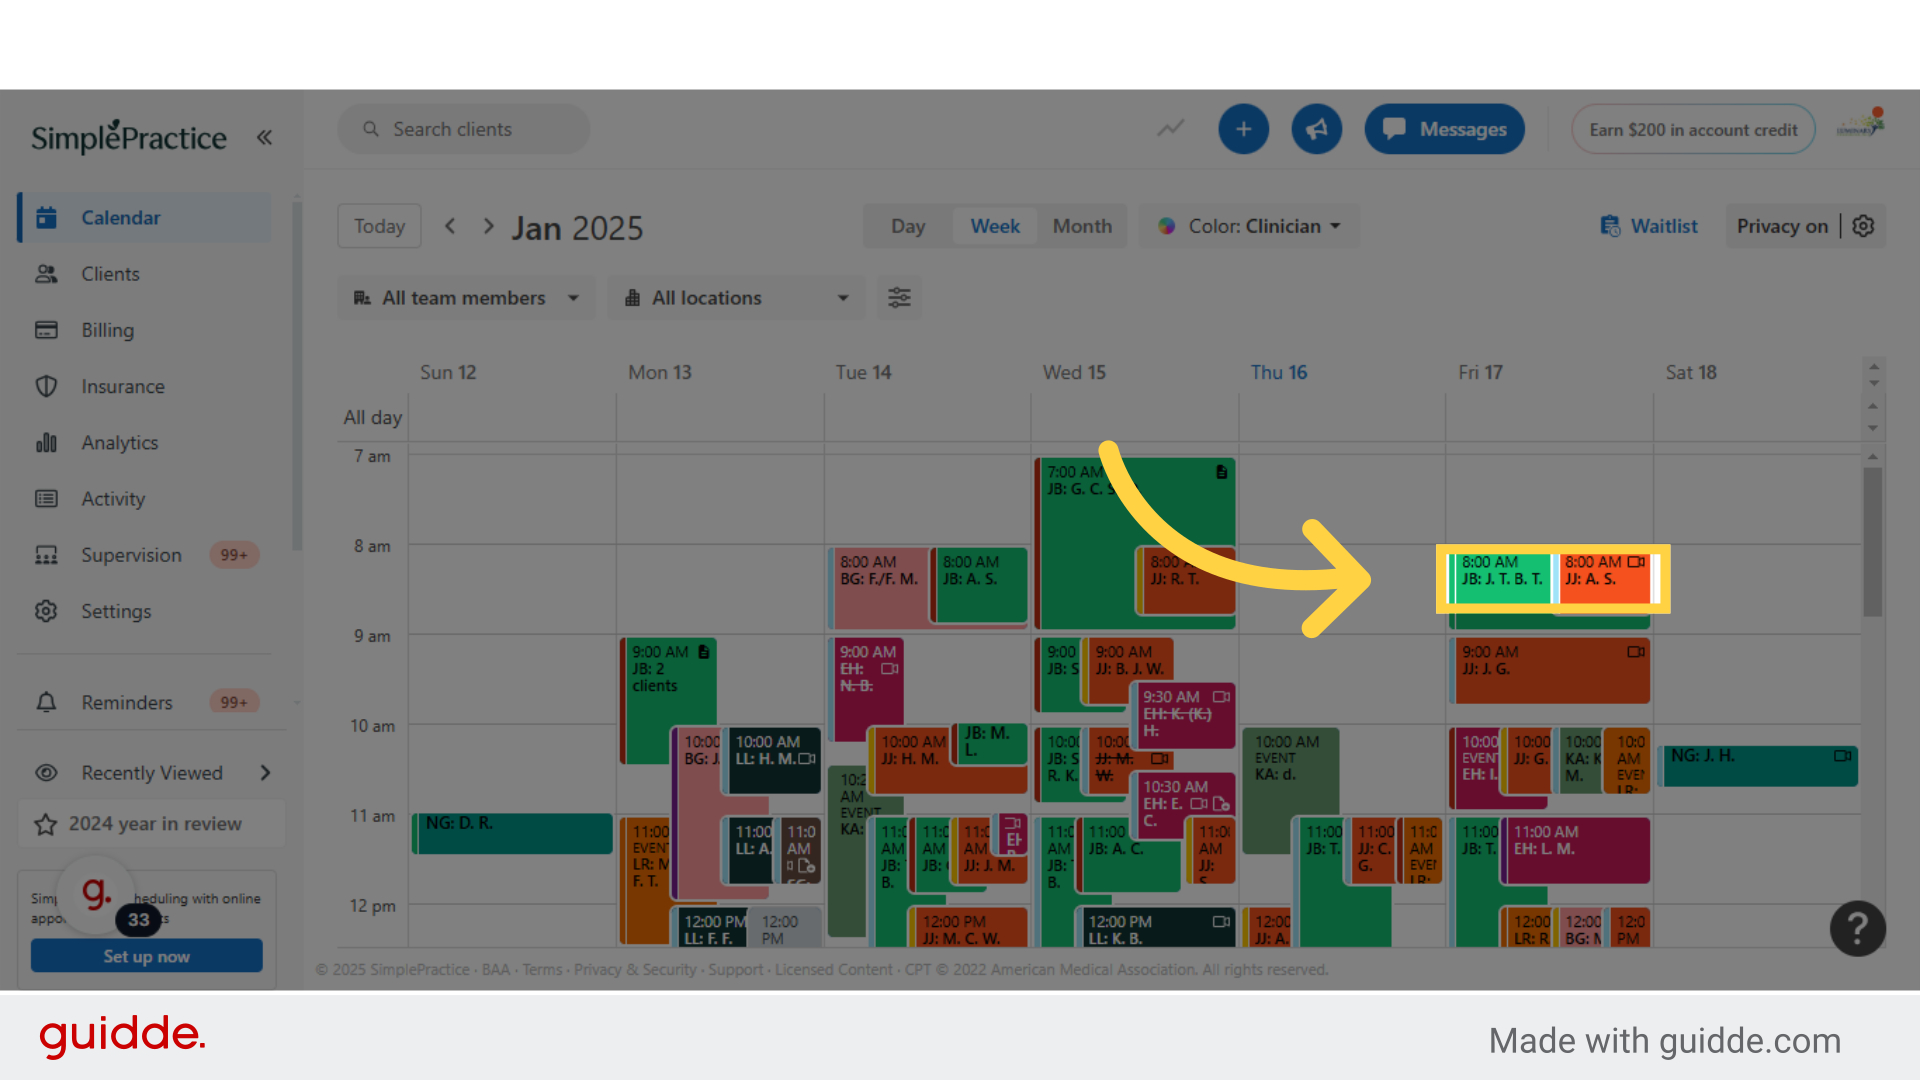
1. Click "No team members"
Before you schedule the appointment, you will need to make sure that the calendar you are viewing is accurate, so we are going to start with clicking the team member tab.
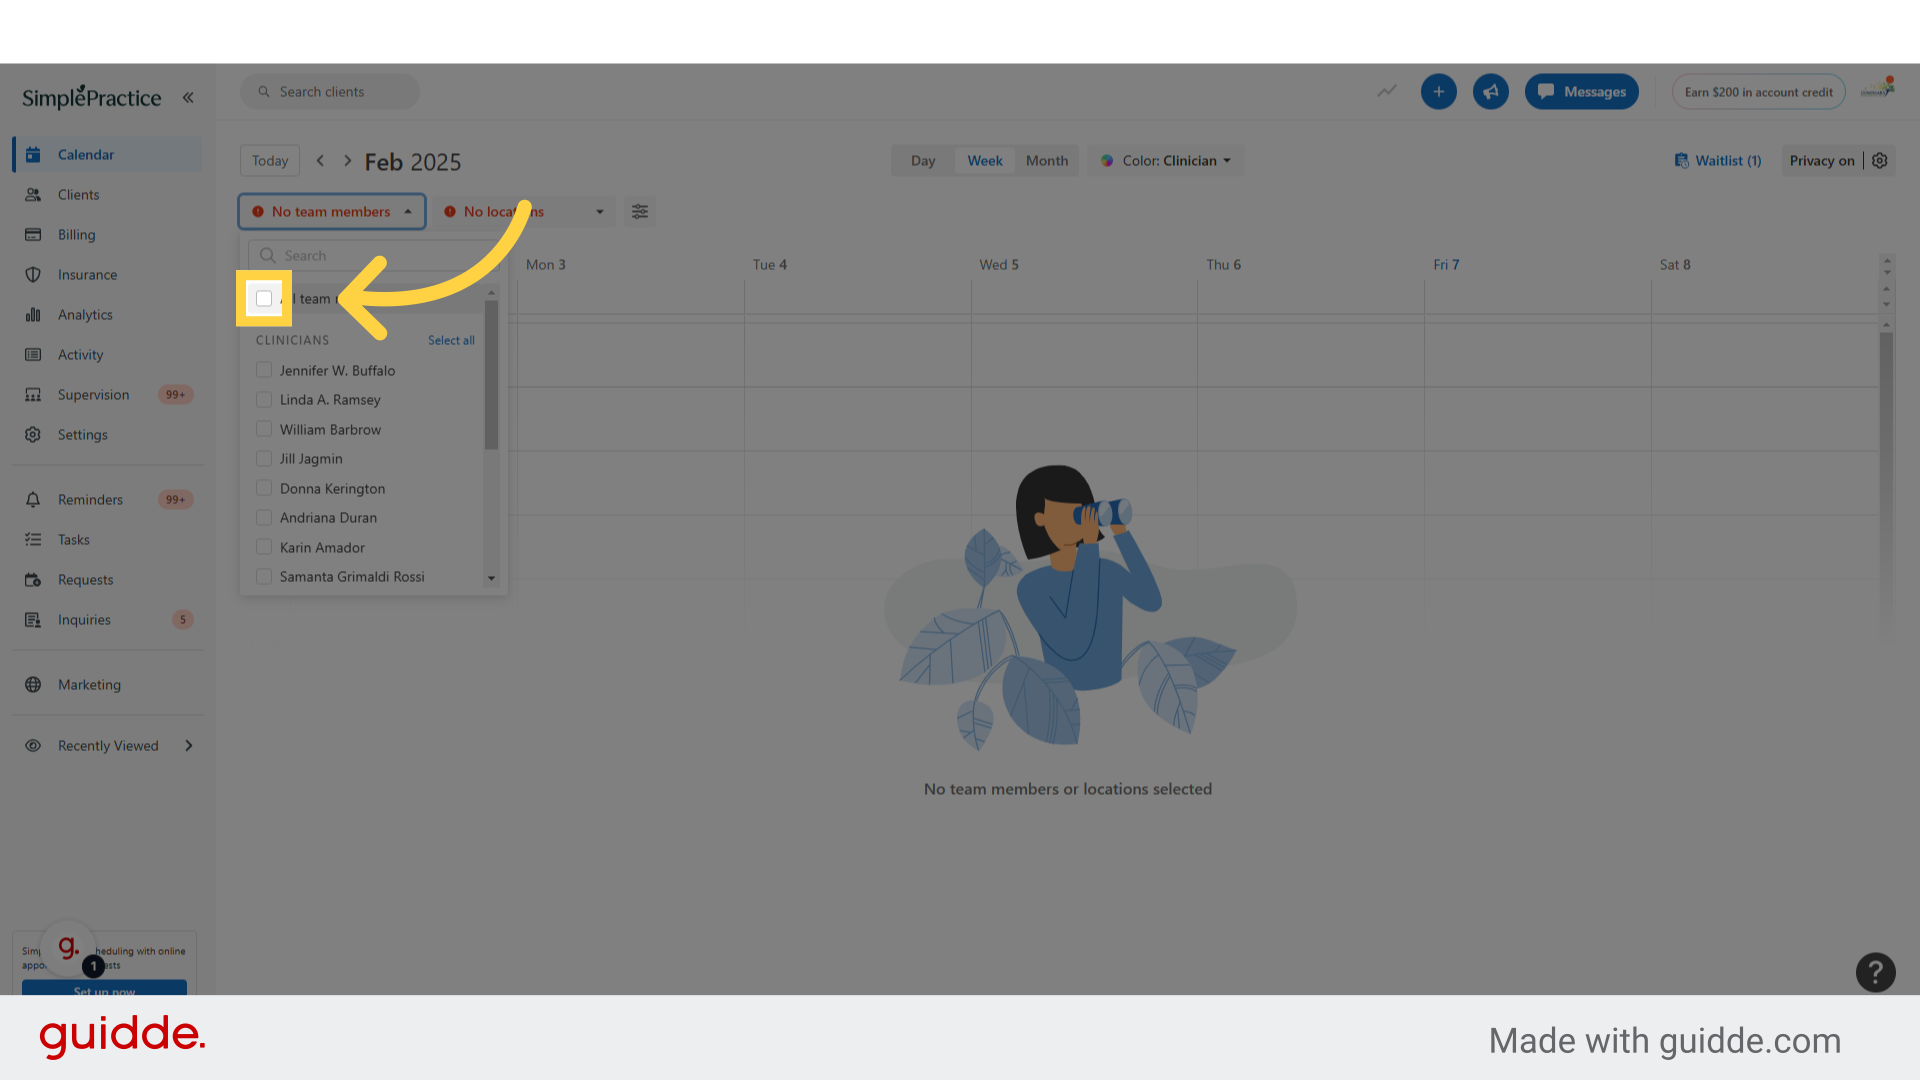
2. Check All team members box
Check the All team members box to make sure that you are viewing all the scheduled appointments for all clinicians. Make sure to check this everytime you schedule an appointment, as the system can default to only your schedule.
3. Click on the locations tab.
Click on the locations tab.
4. Find the room you want to book
Find the room you want to book and check the box next to that room on the drop down. For example: the green room. This indicates that I want to book the green room for an in office client appointment. If you were going to use the green room for a telehealth appointment, you would check the telehealth green room option lower down. Please note that the unassigned option at the very bottom of the drop down should not be used anymore, if you choose this option your scheduled appointment will not show up on the calendar view when other clinicians book their appointments. Unassigned is a default option that Simple Practice uses when practices don't input their own locations, so it cannot be removed from our drop down options.
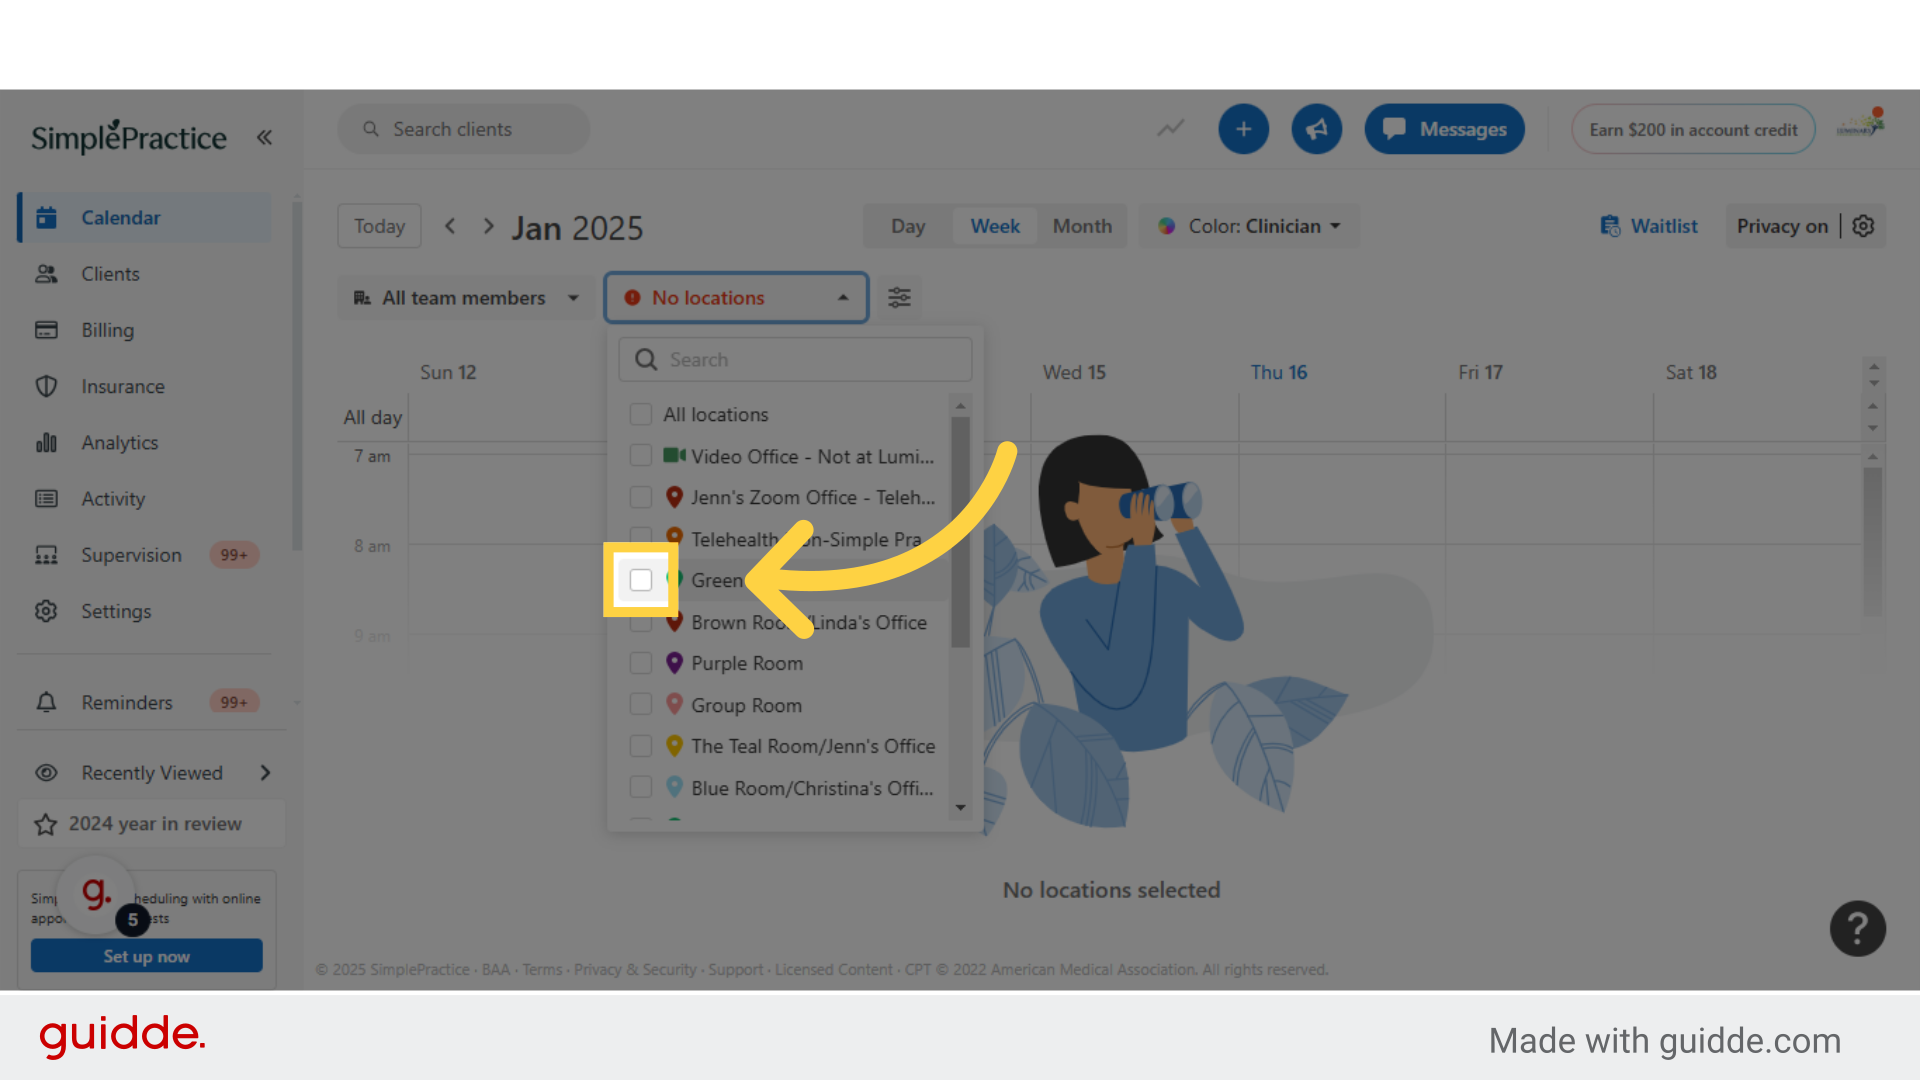
5. Check the box next to green room
Make sure the box is checked before moving on. If you want to check multiple rooms, this is where you would check the box next to the rooms you are interested in booking, to check availability.

6. Click the color tab
Next click the color tab
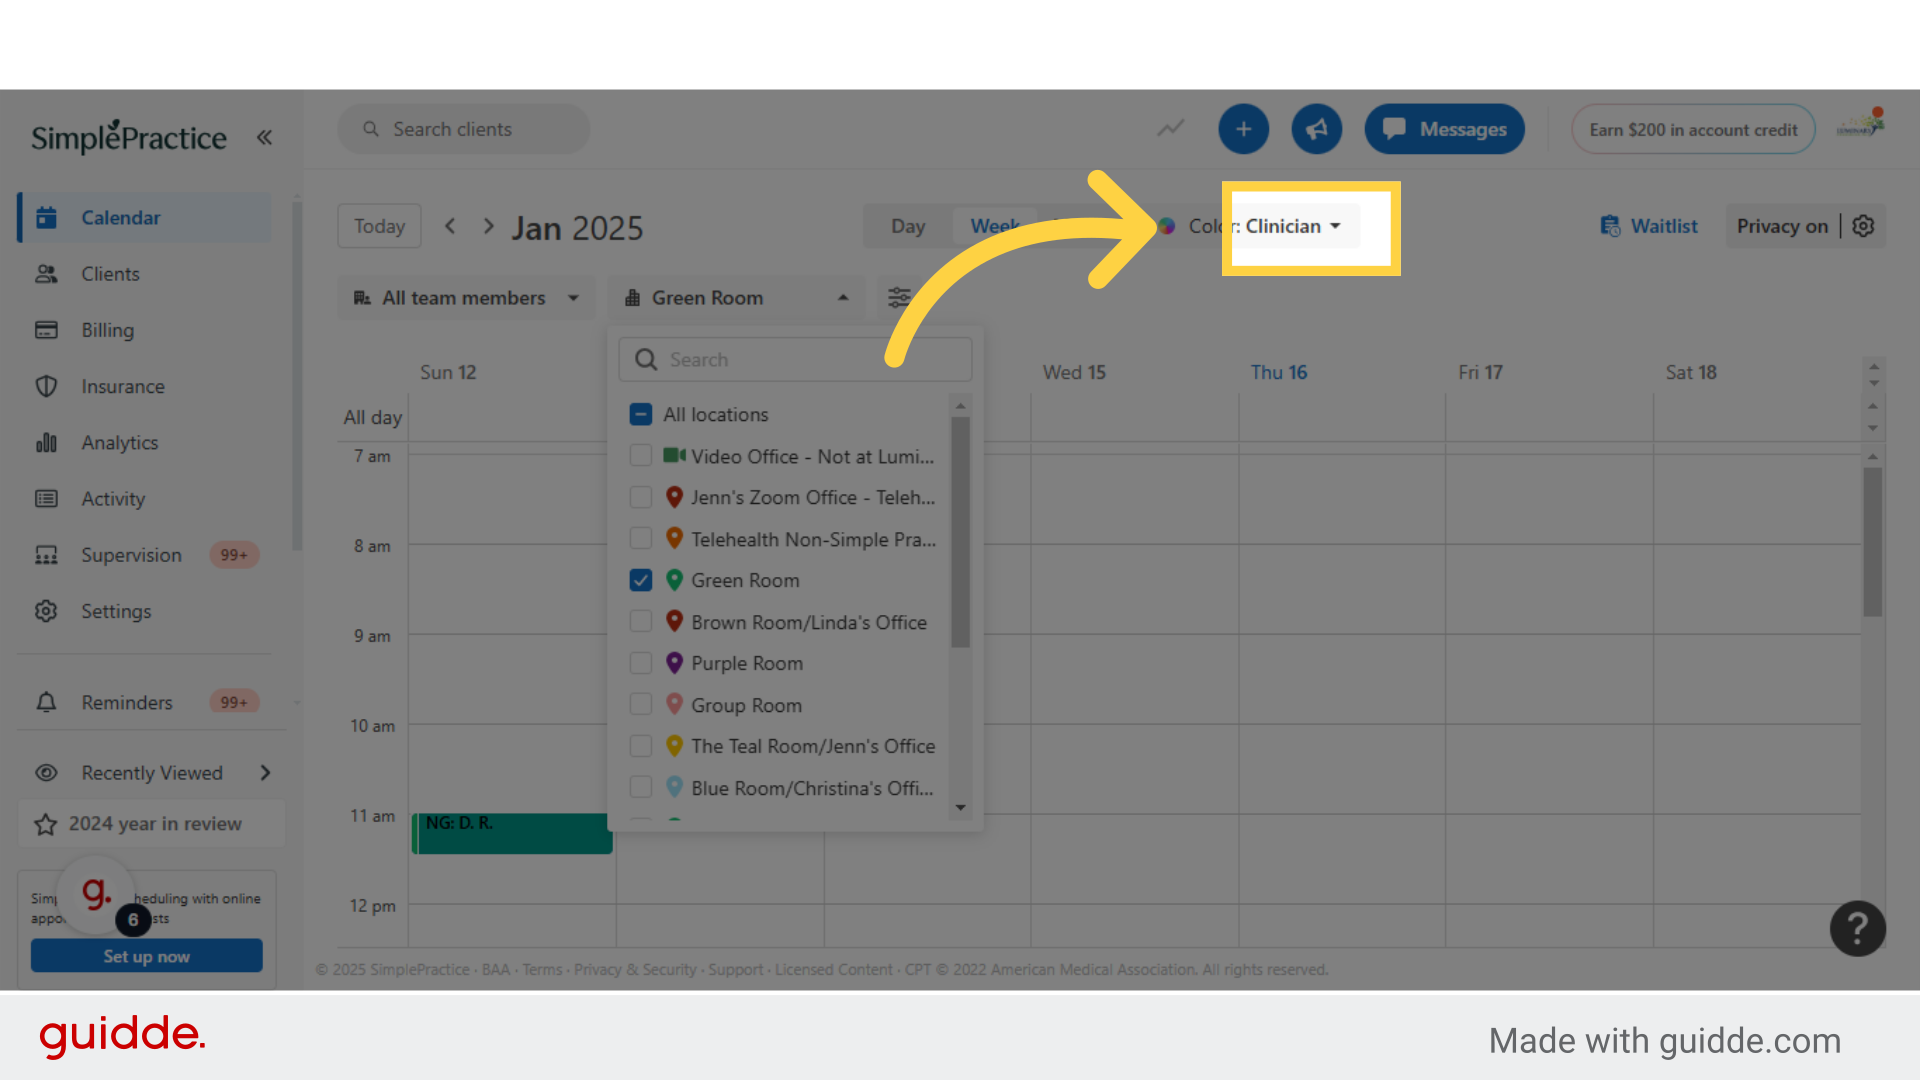
7. Click "Clinician"
Next, on the drop down you will select Clinician, this will help differentiate the clinician appointments by a separate color on the calendar view.

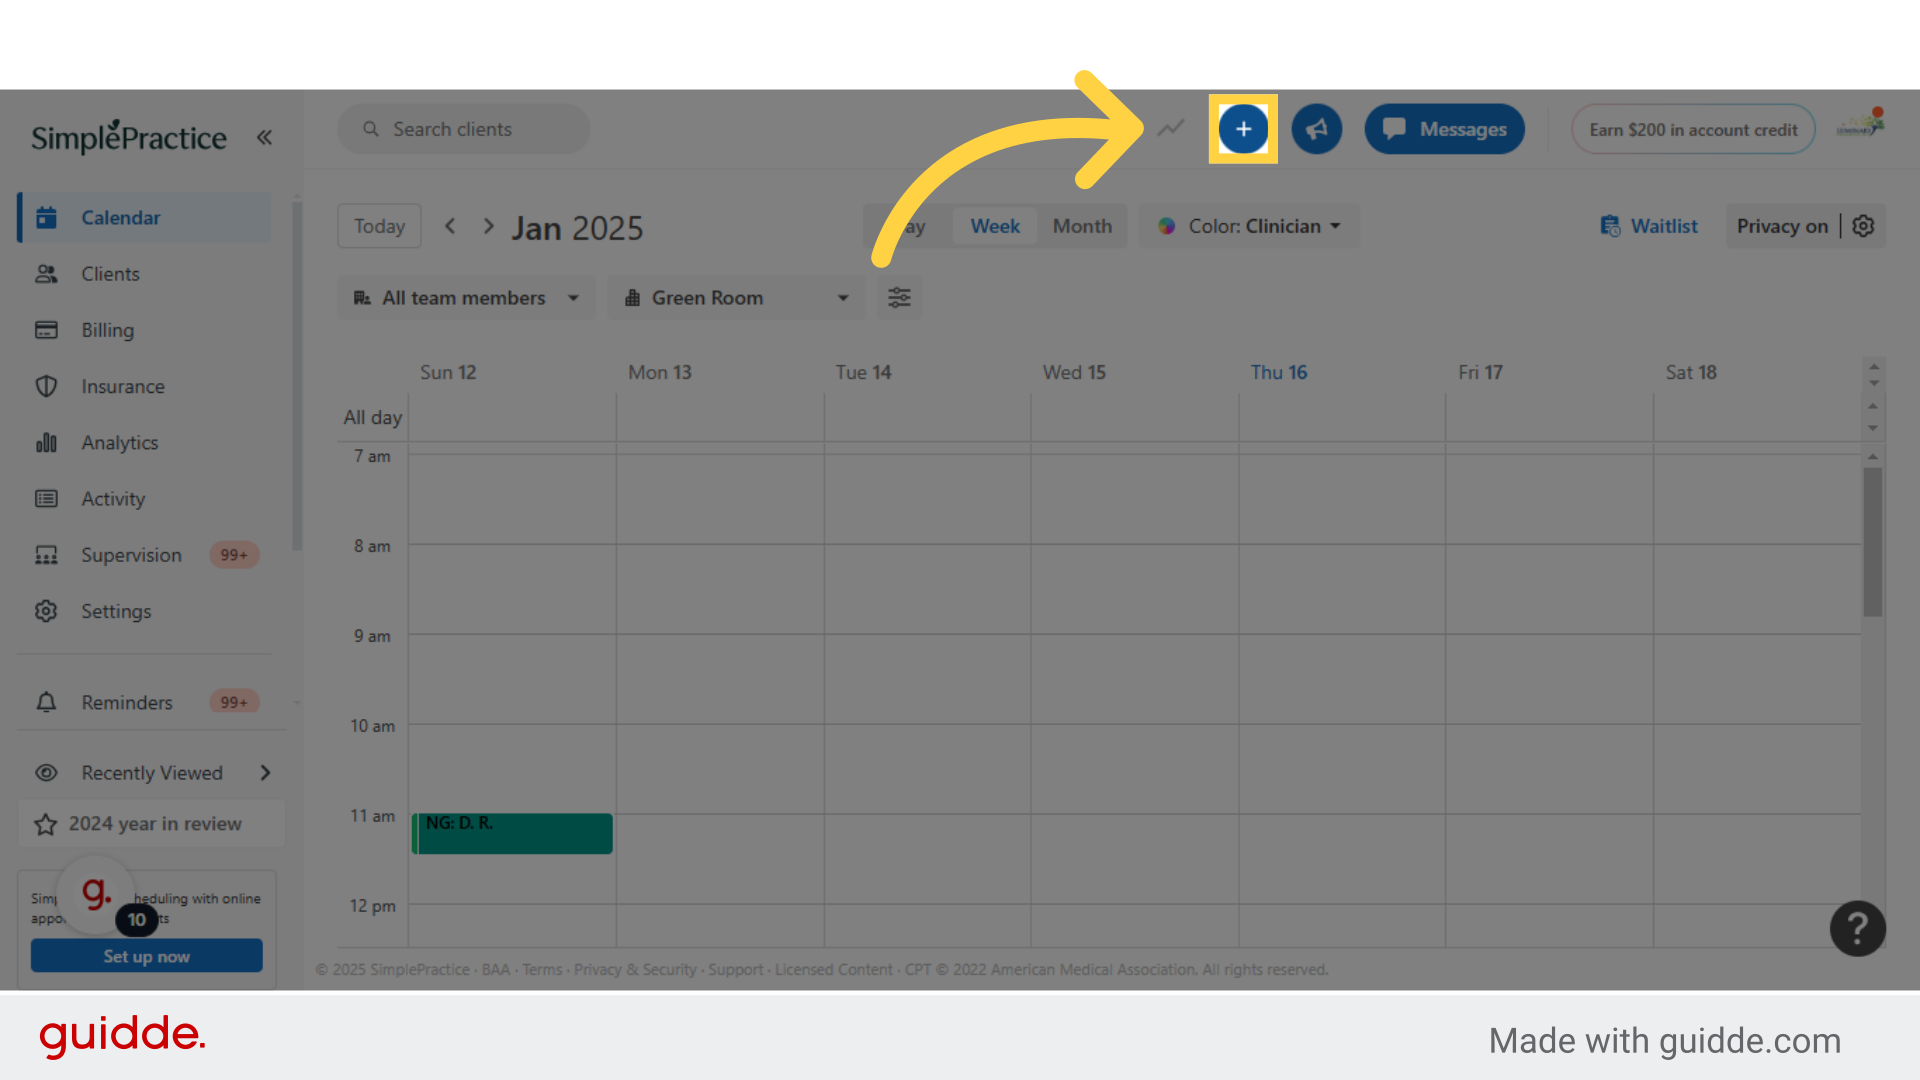
8. Click the blue plus button at the top of the page
You should now be viewing all appointments scheduled in the green room on your calendar view, based on your selections. This is when you would confirm that the day and time you want in the green room is available before moving on. Next we are going to schedule an appointment. Start by clicking the blue plus button at the top of the page.
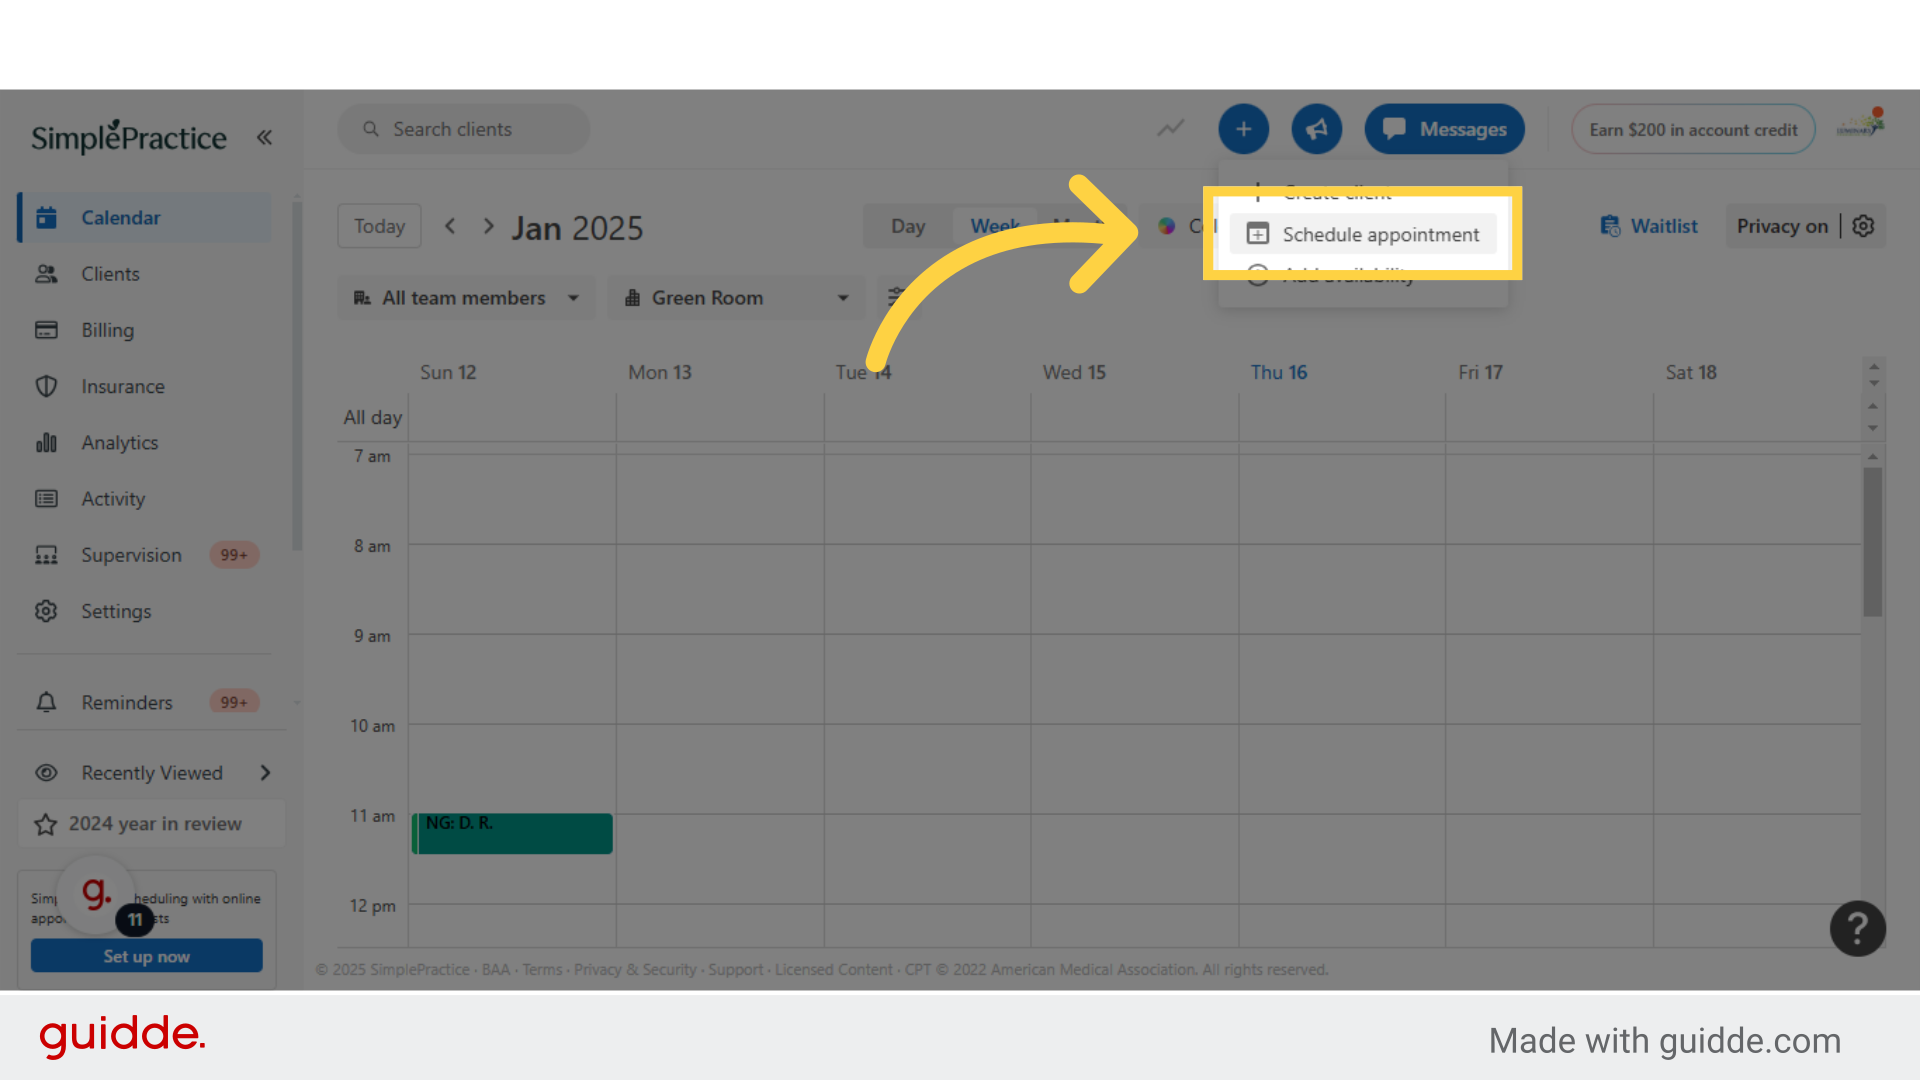
9. Click "Schedule appointment"
Initiate the appointment scheduling process and click schedule appointment.
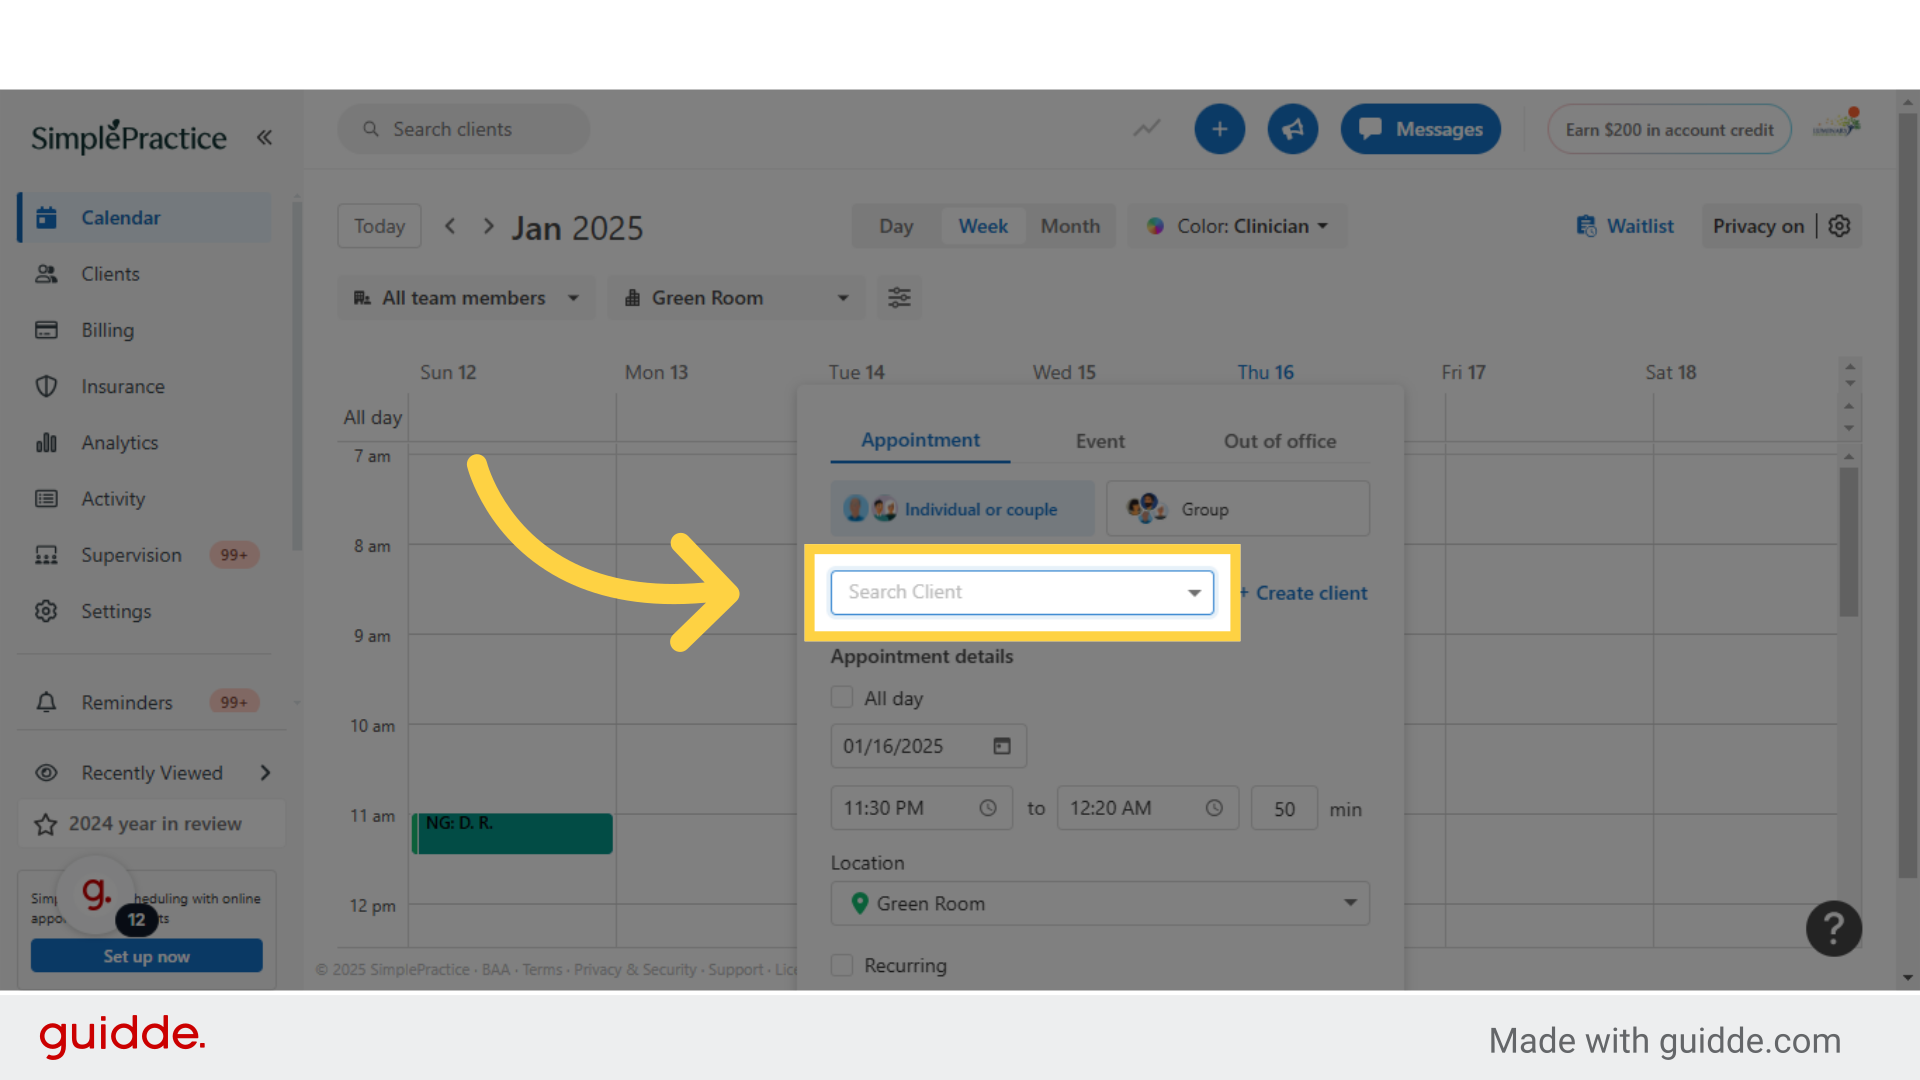
10. Click "Search Client"
This will generate a pop up box, where you will complete scheduling the appointment details. First, we will search for the client you want to schedule. I am going to use a test client as an example.
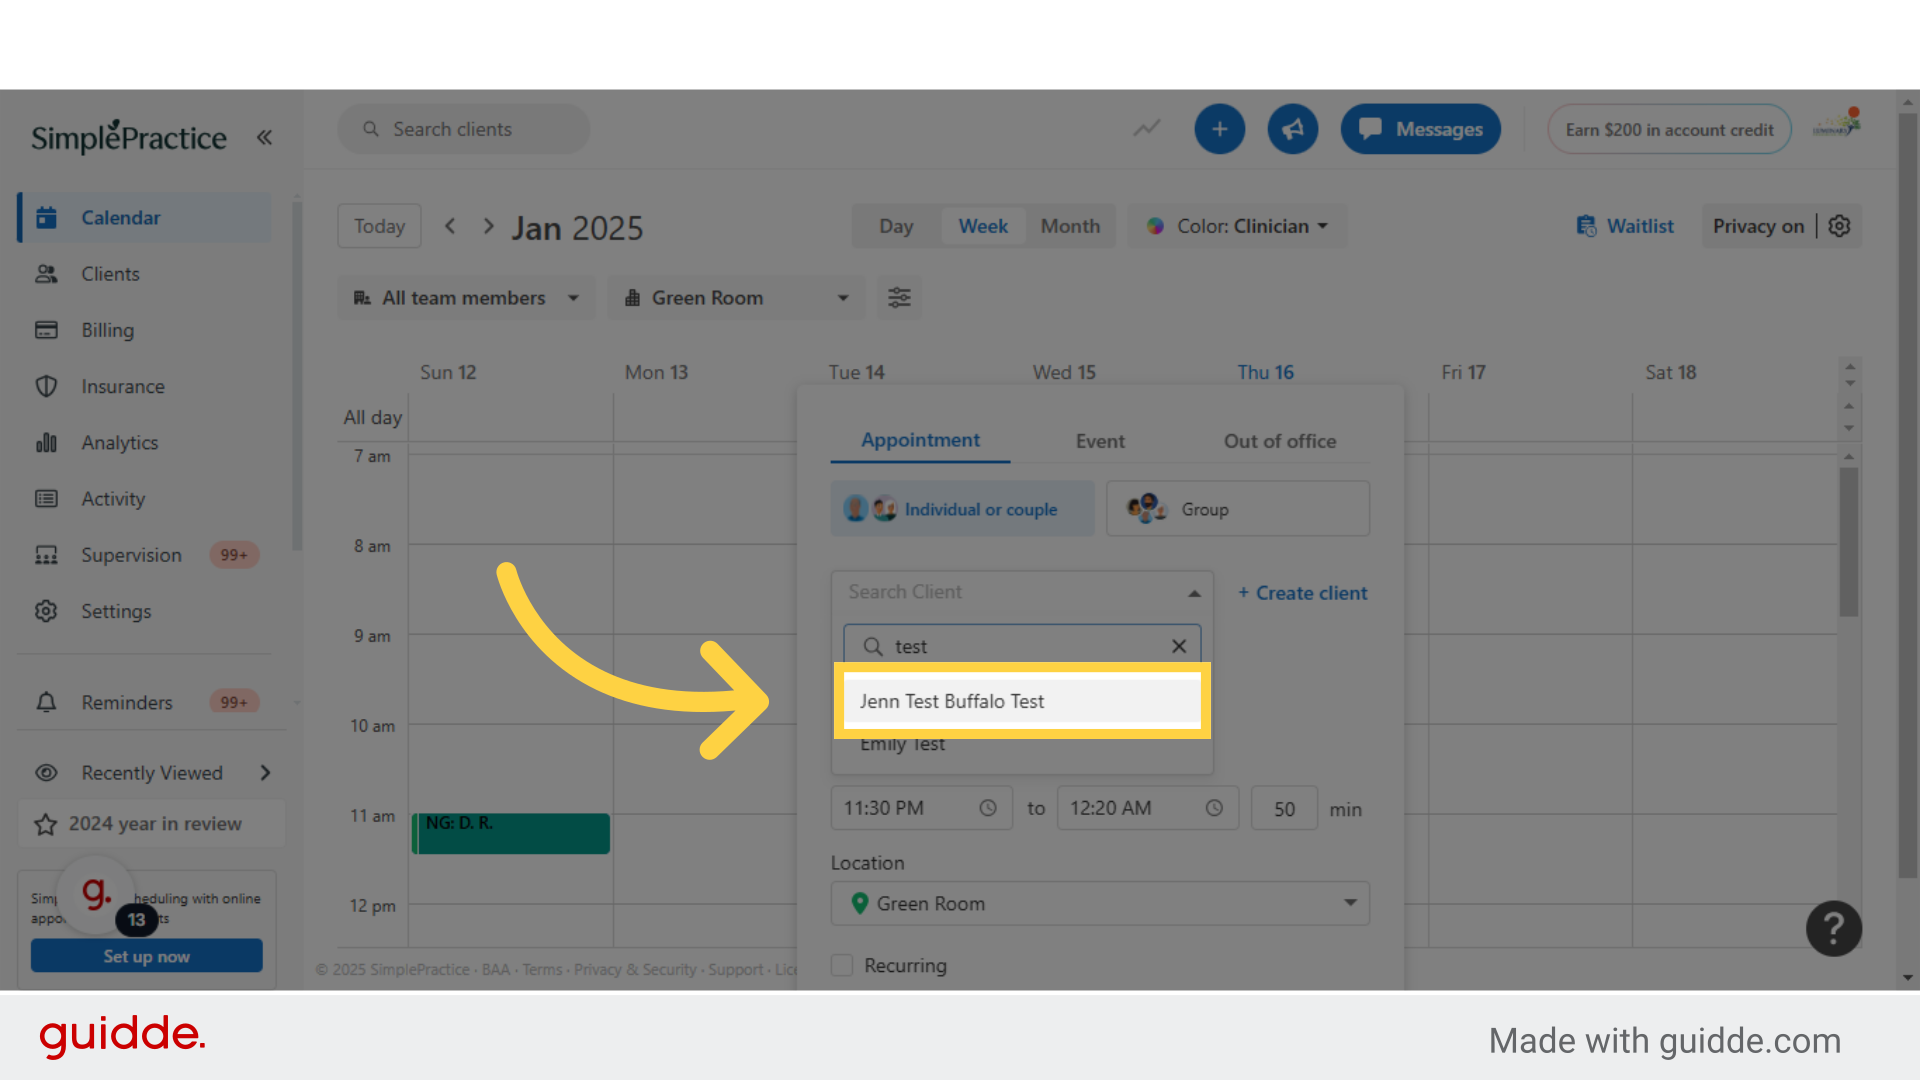
11. Click "Jenn Test Buffalo Test"
I searched for test and this is the client name I will be using to scheduled this test appointment.
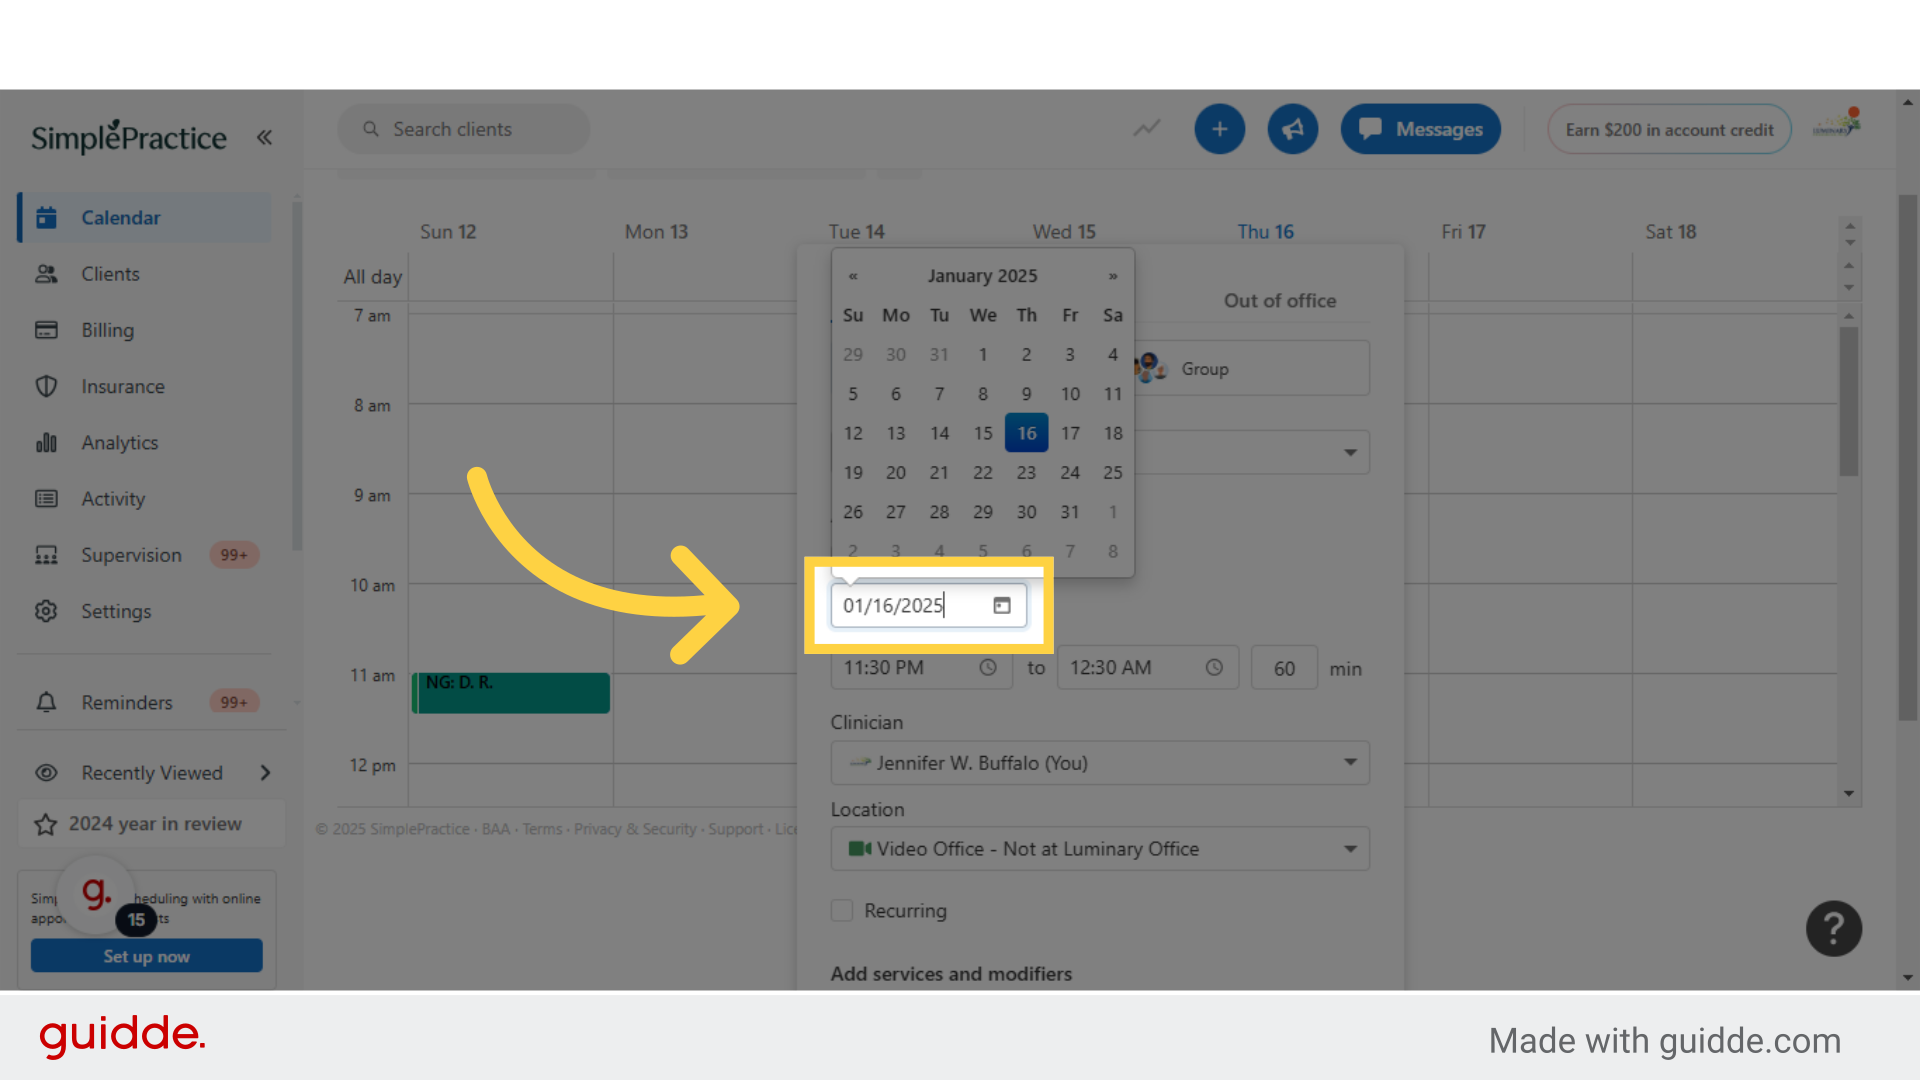
12. Click on the date tab and pick the date
Next click on the date tab and this will show you the calendar for the month we are in, you can scroll through to find the month you would like to schedule the appointment in.
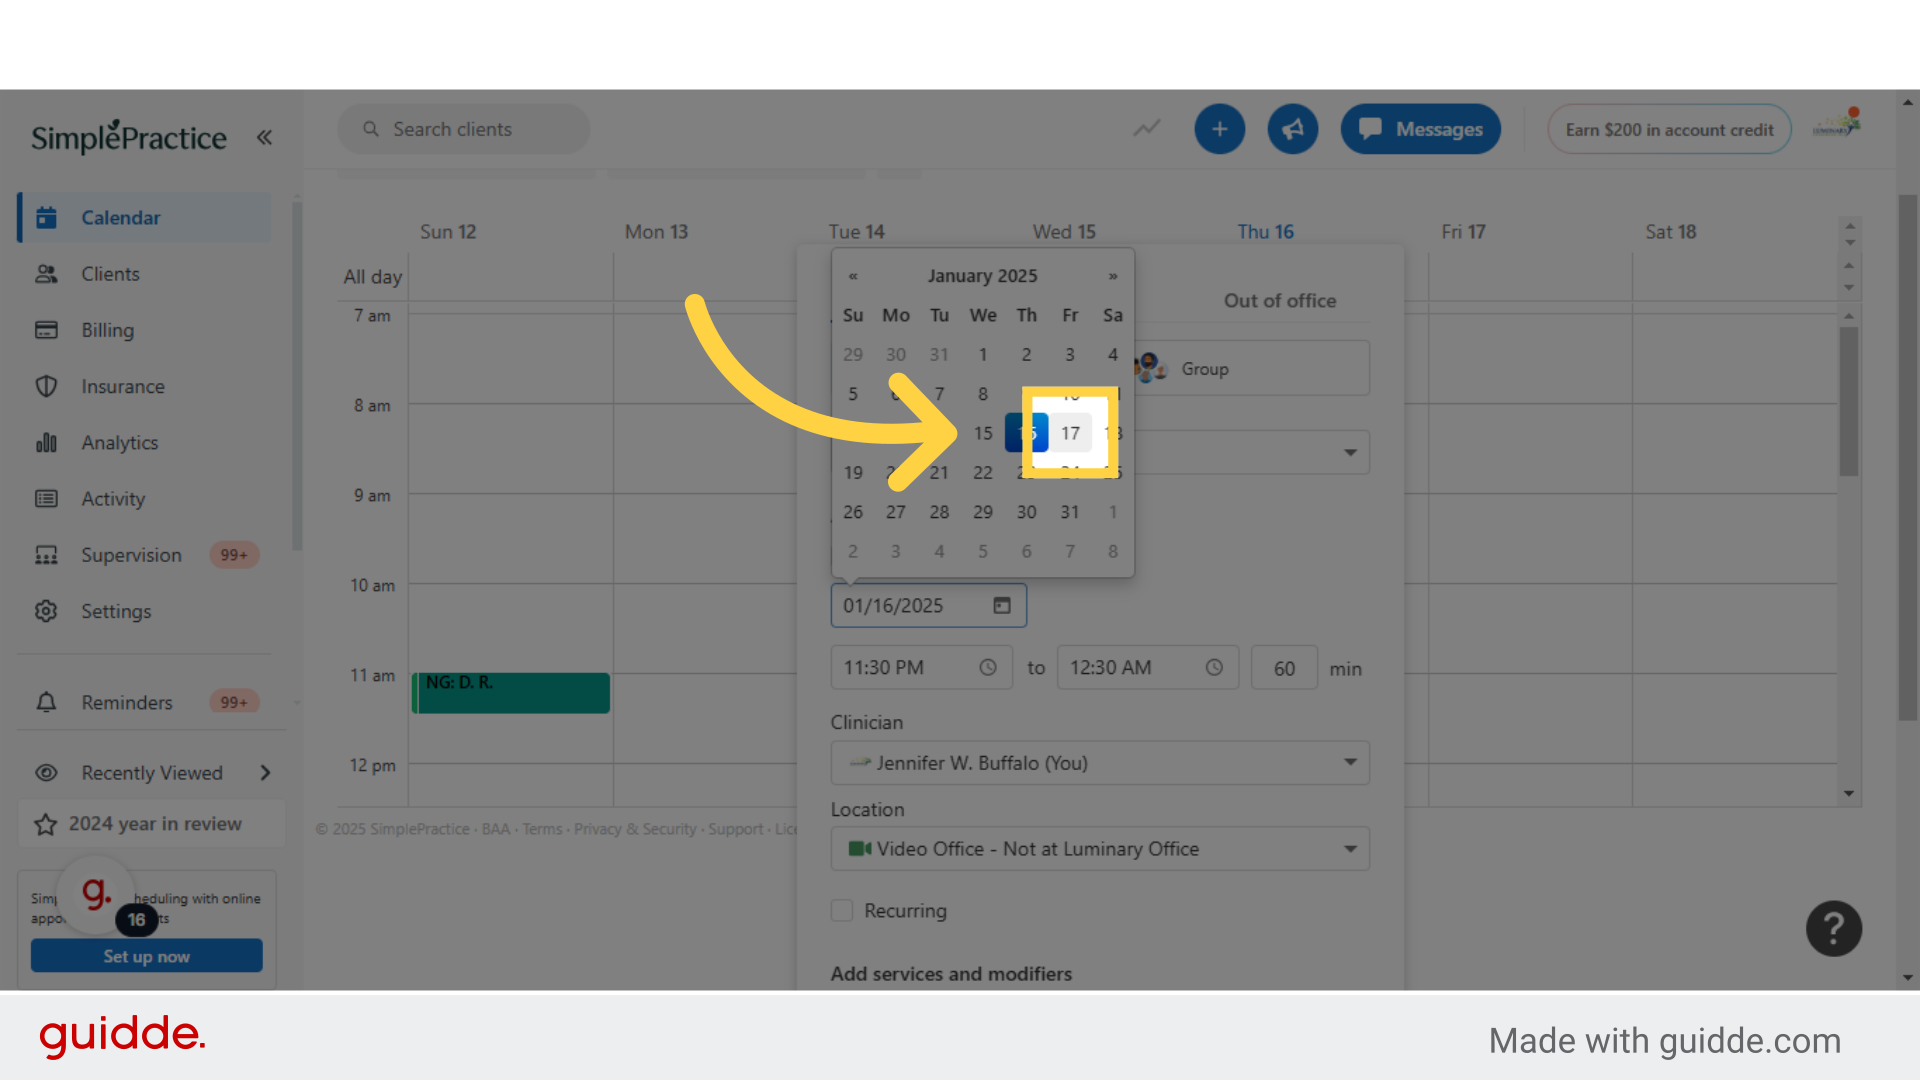
13. Click the day you would like to schedule on
Once you are in the correct month, you can select the day you would like to schedule the appointment.
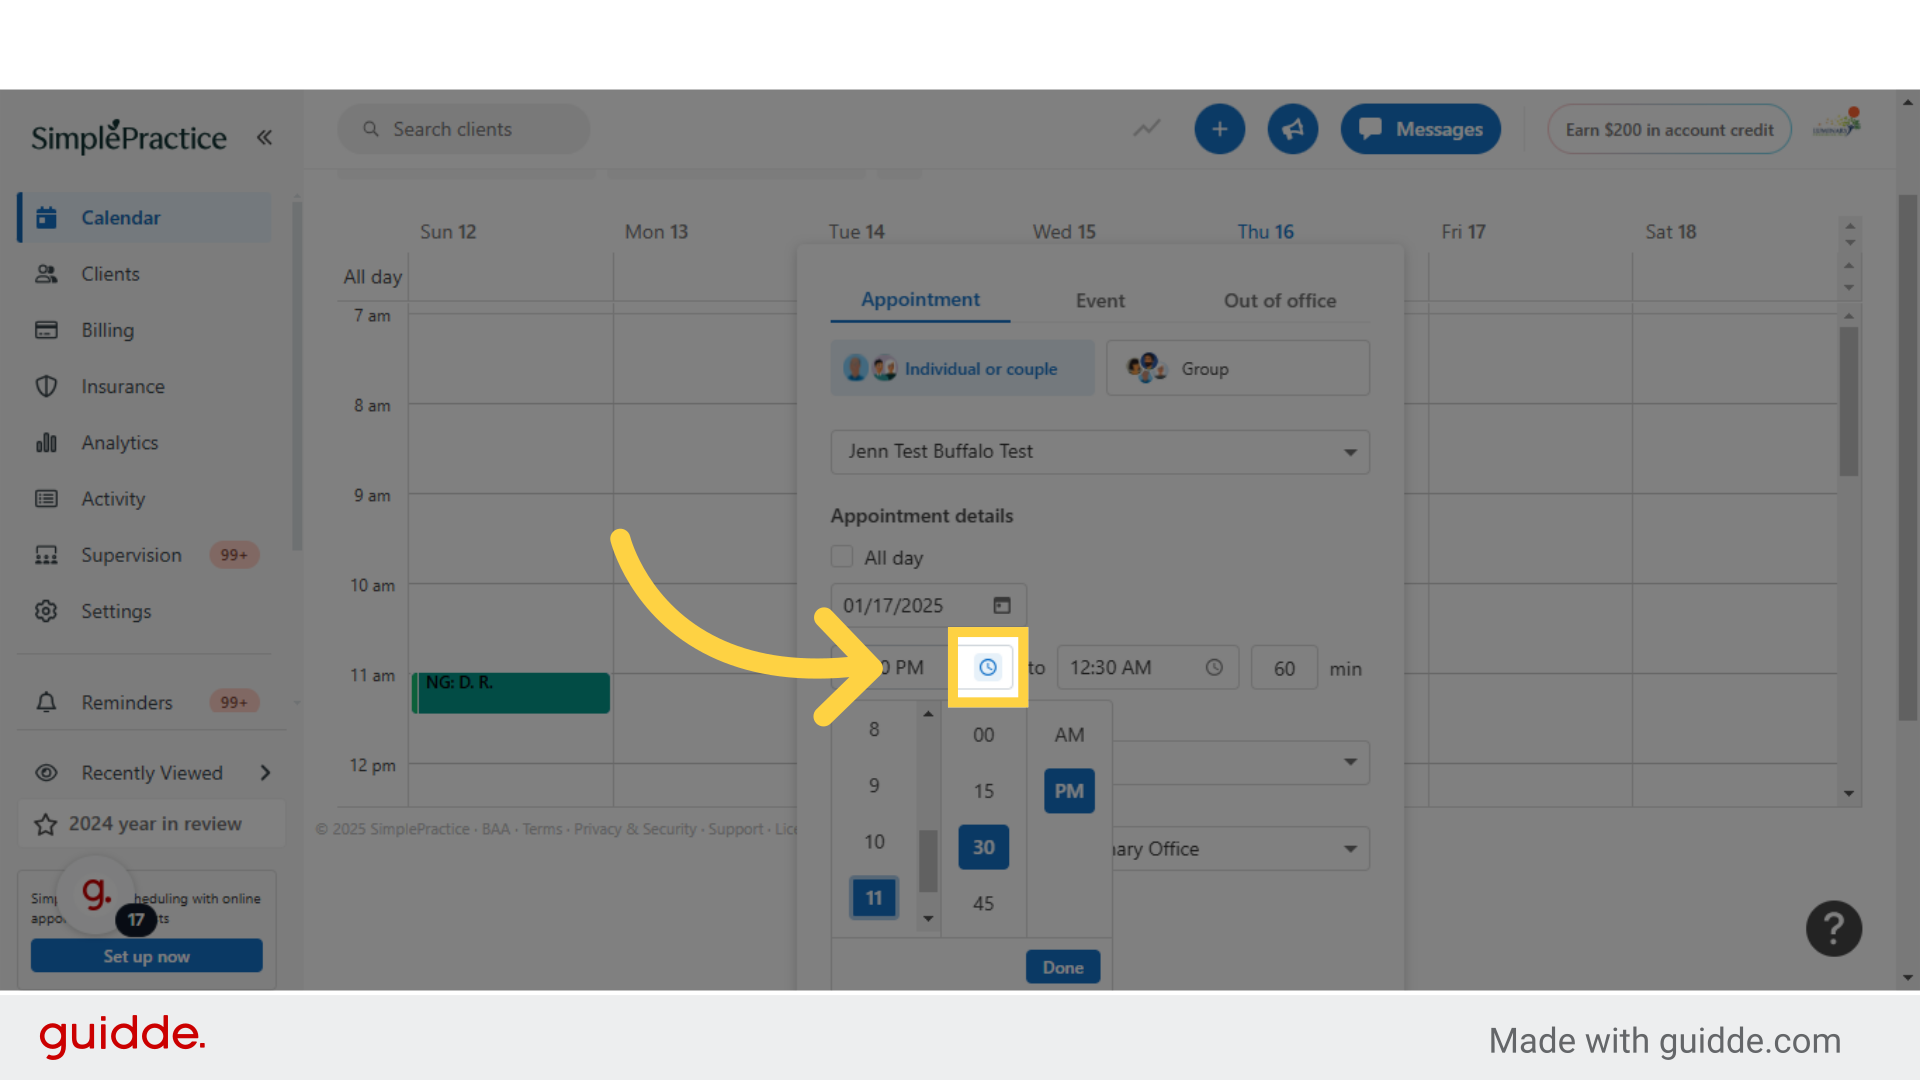
14. Click the start time box
To populate the start time options click here.
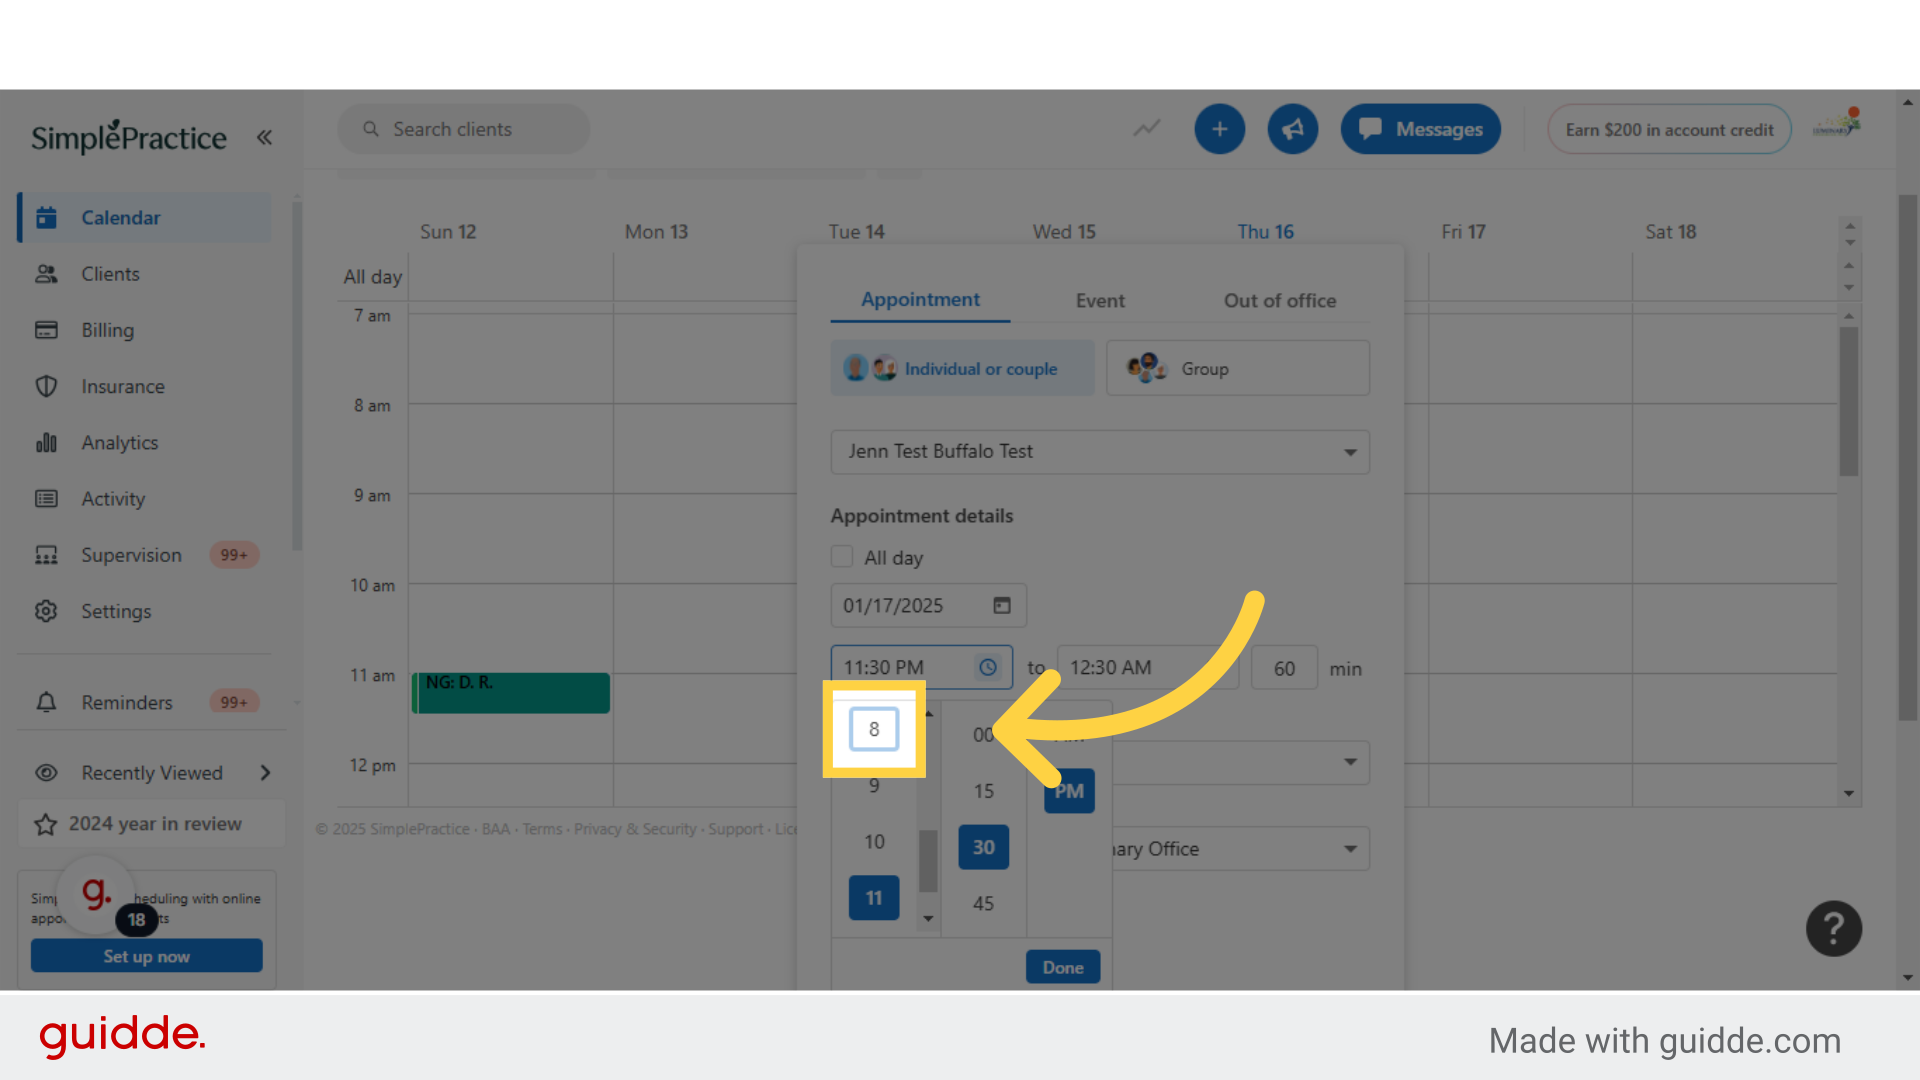
15. Select the time you want to schedule the appointment.
Next you will select the start time hour.
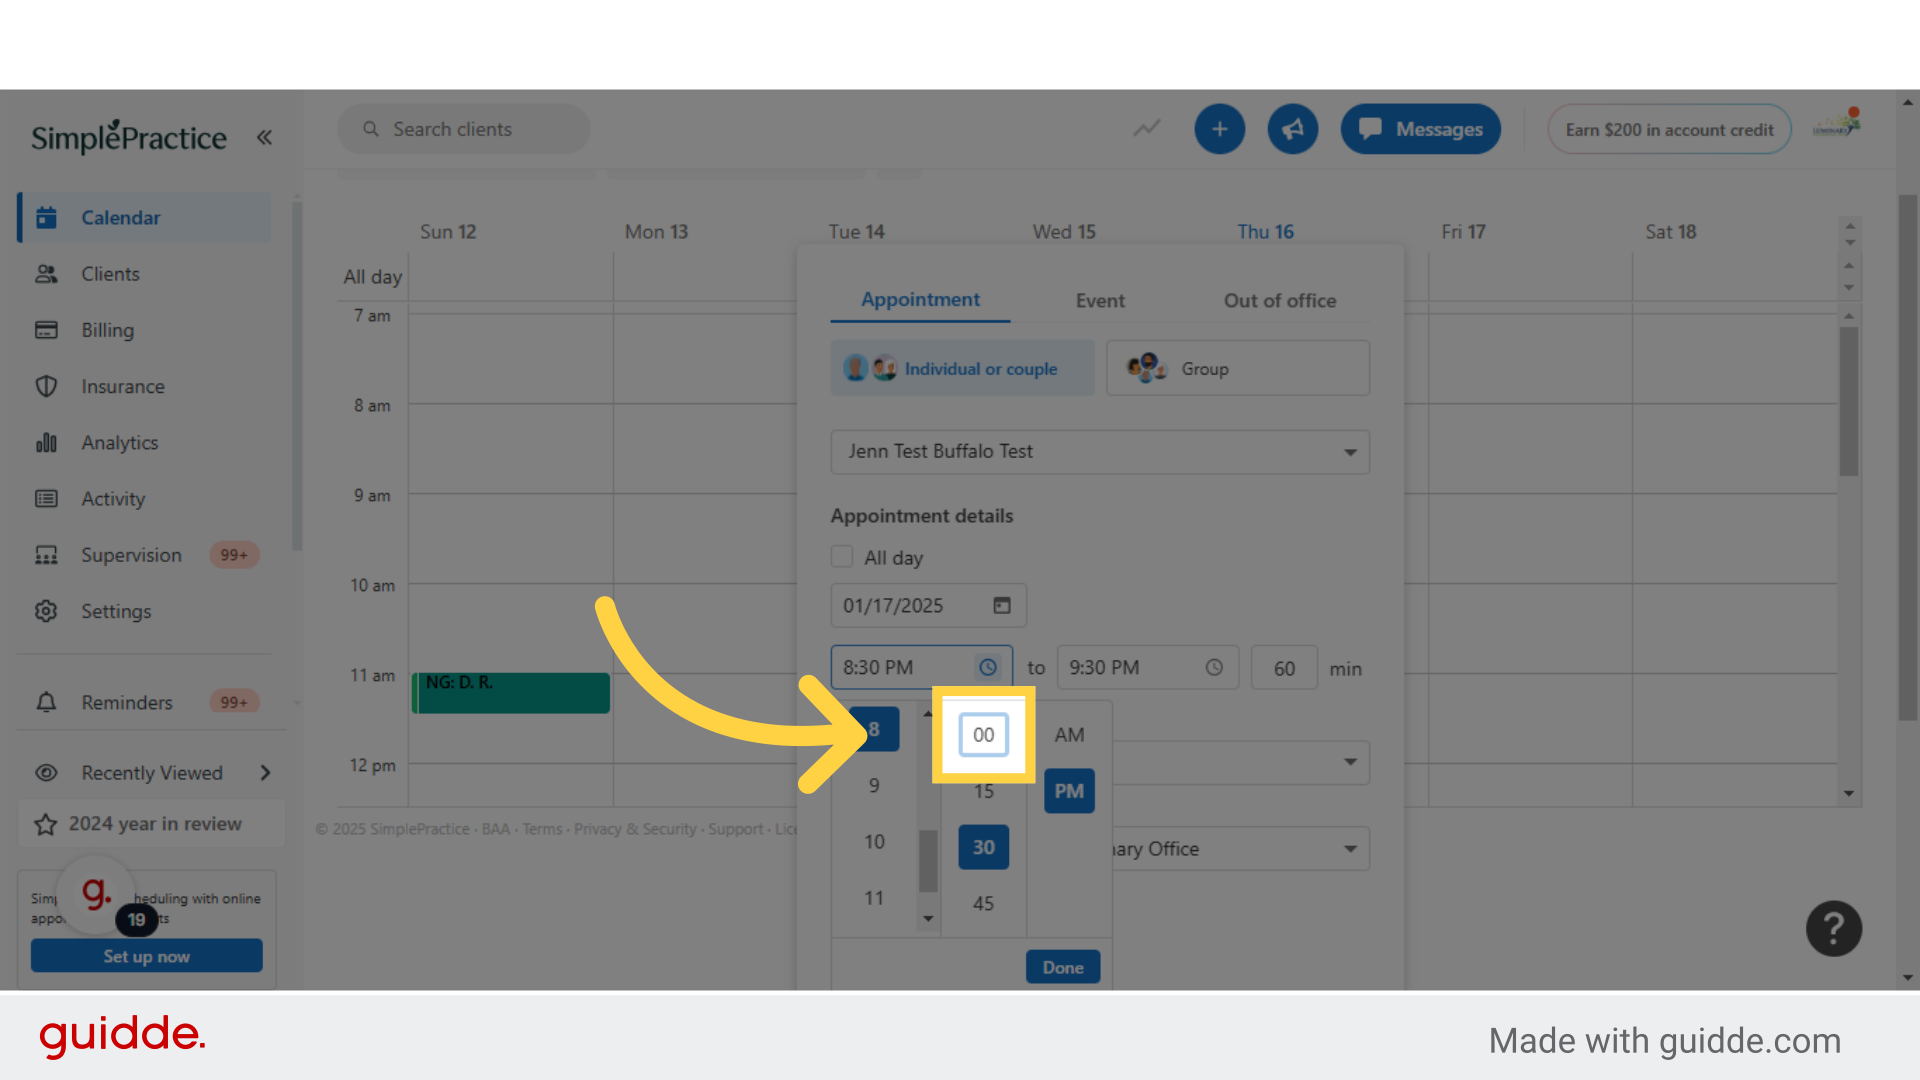
16. Click the minutes you would like to schedule
Then you will click the minute selection
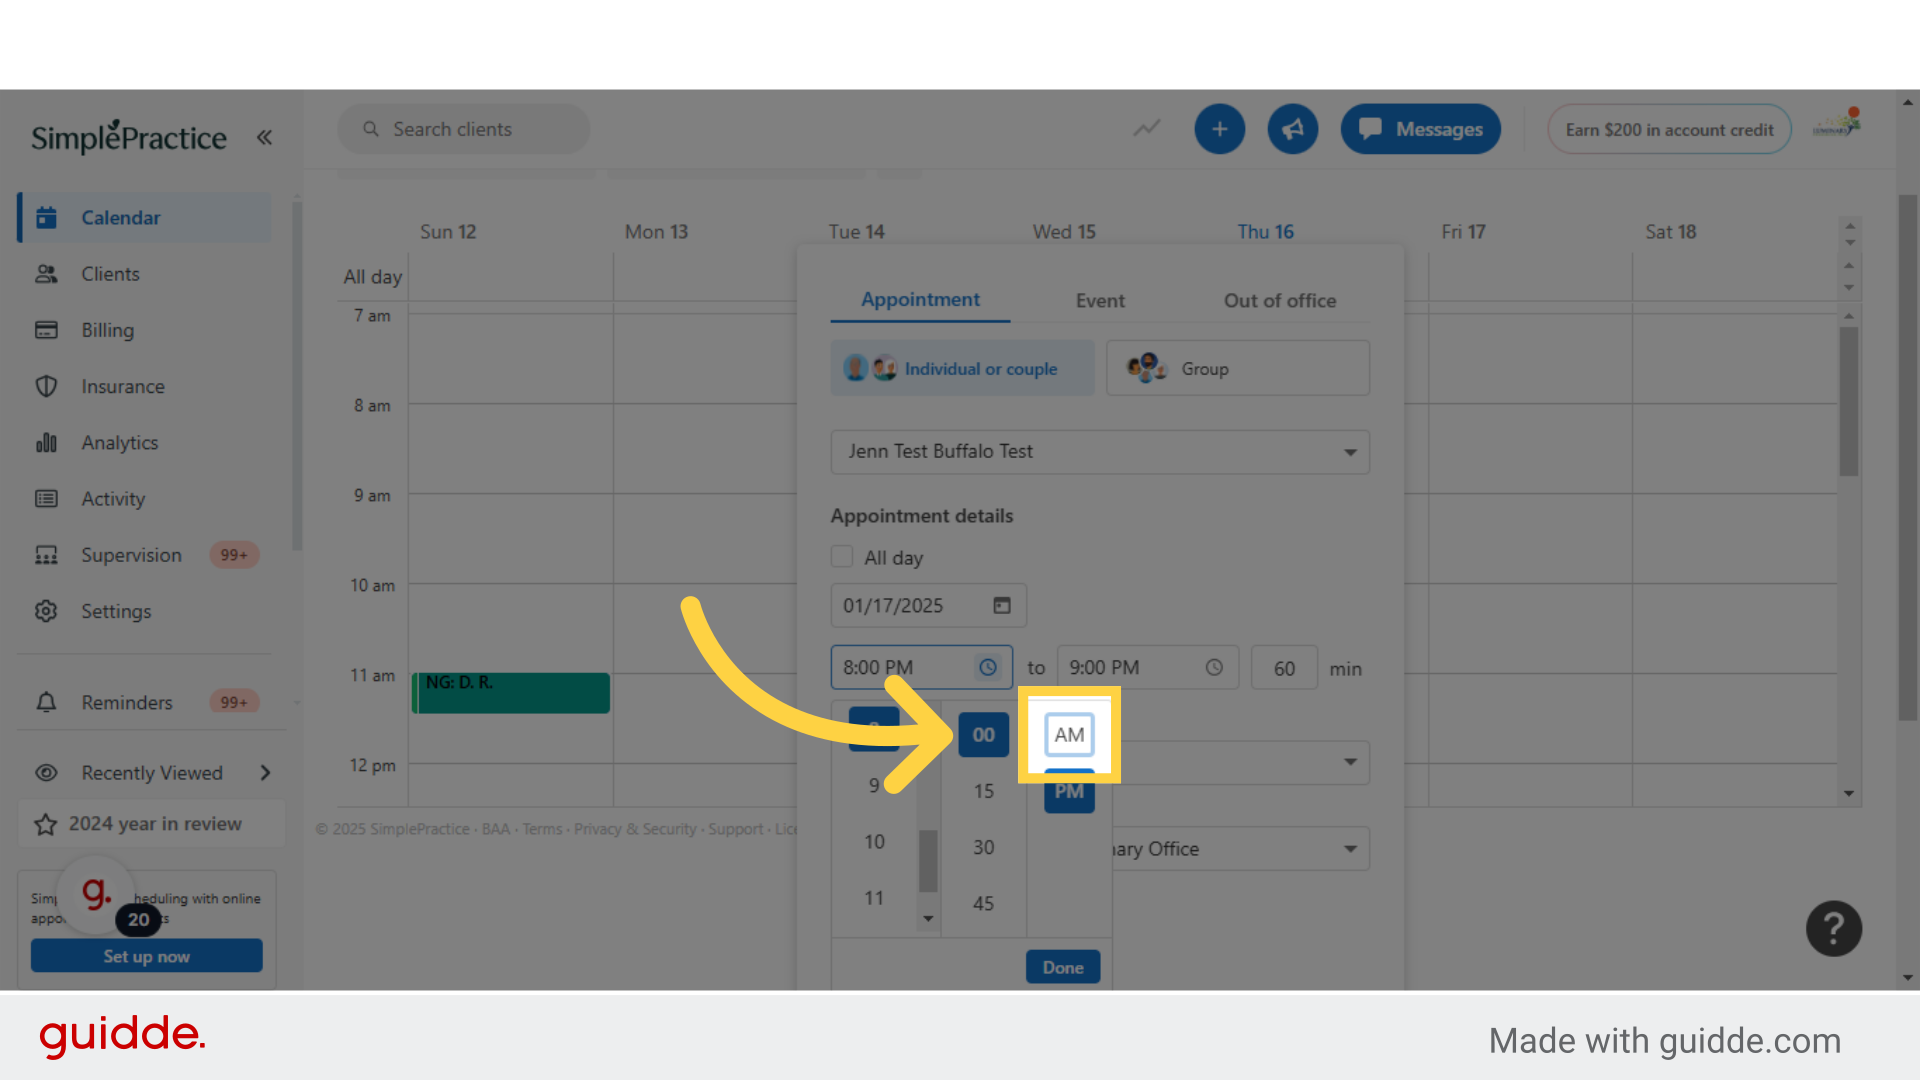
17. Click "AM" or"PM"
Then you will select the A.M. or P.M. option.
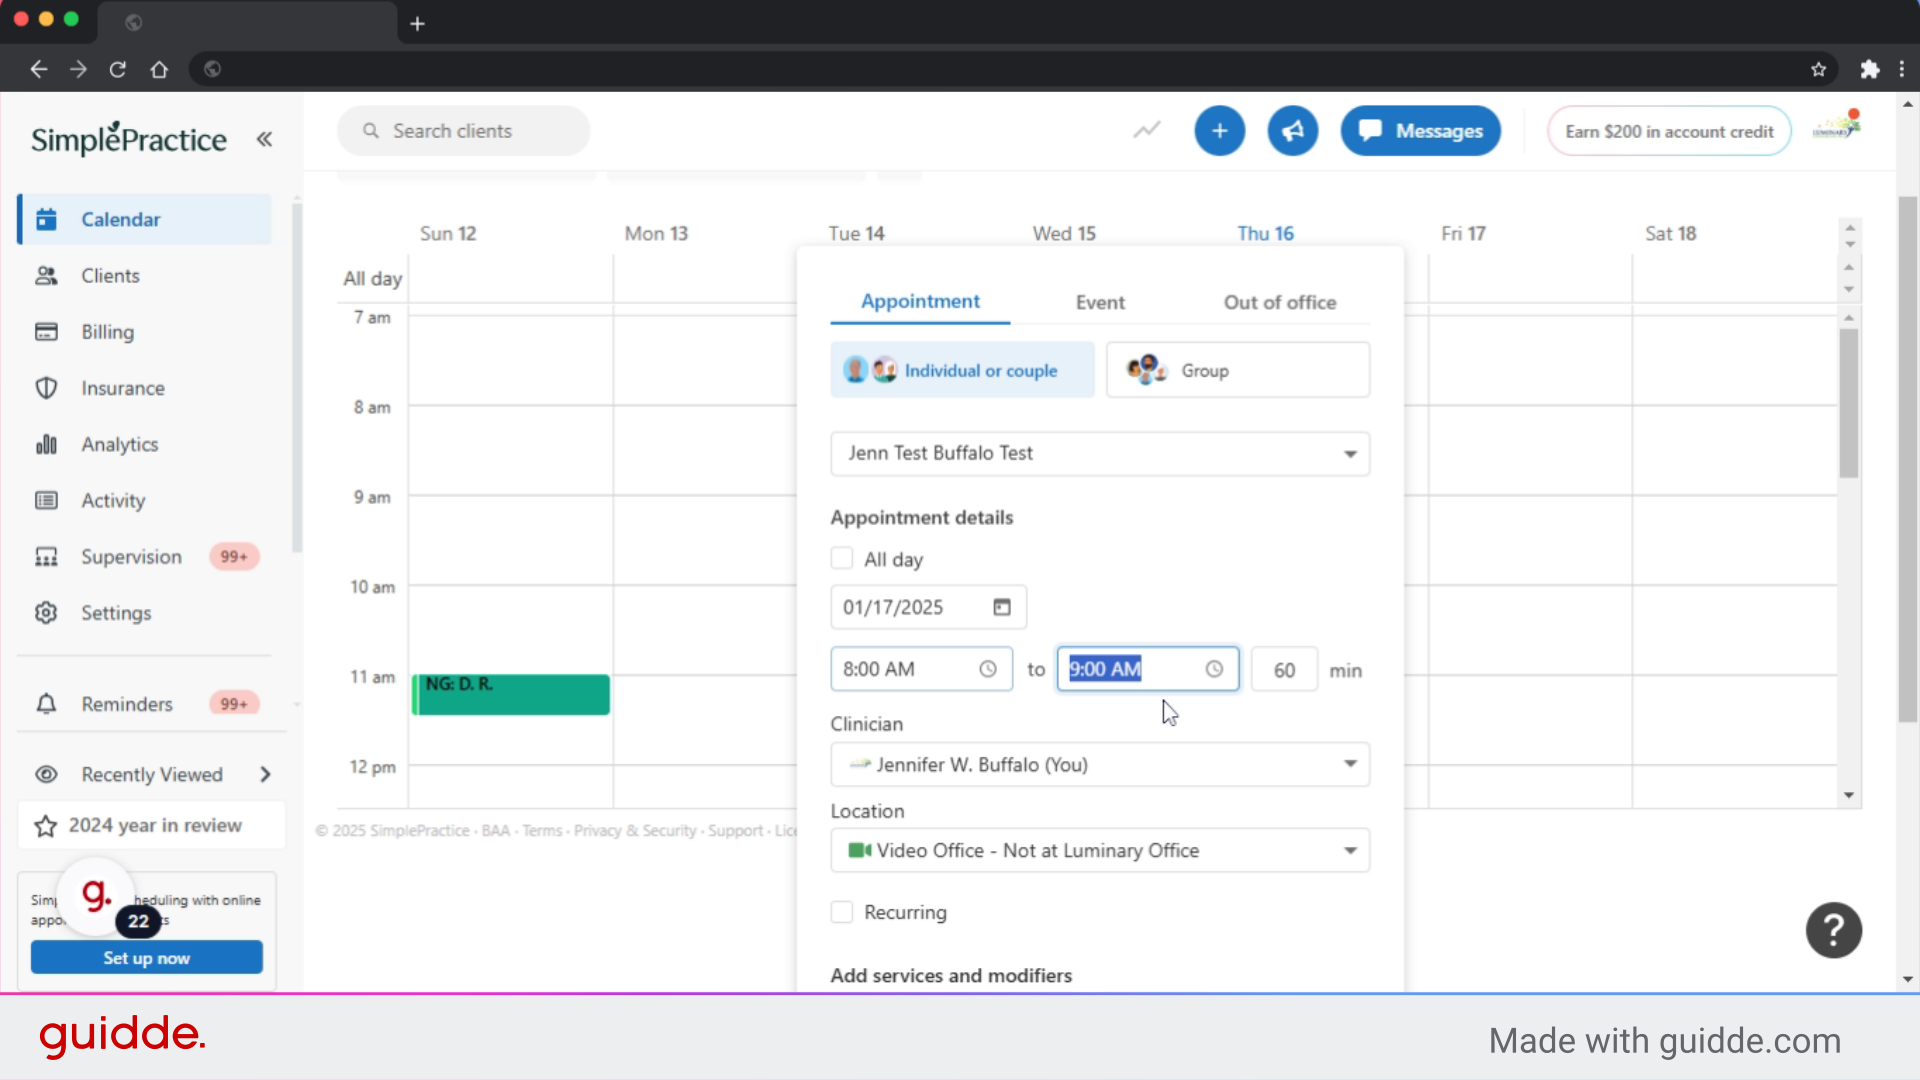
18. View end time
You will see that the end time was automatically populated at 1 hour after the start time you selected. If this is correct, you can move on. If this is incorrect, you can adjust the end time here for your session.
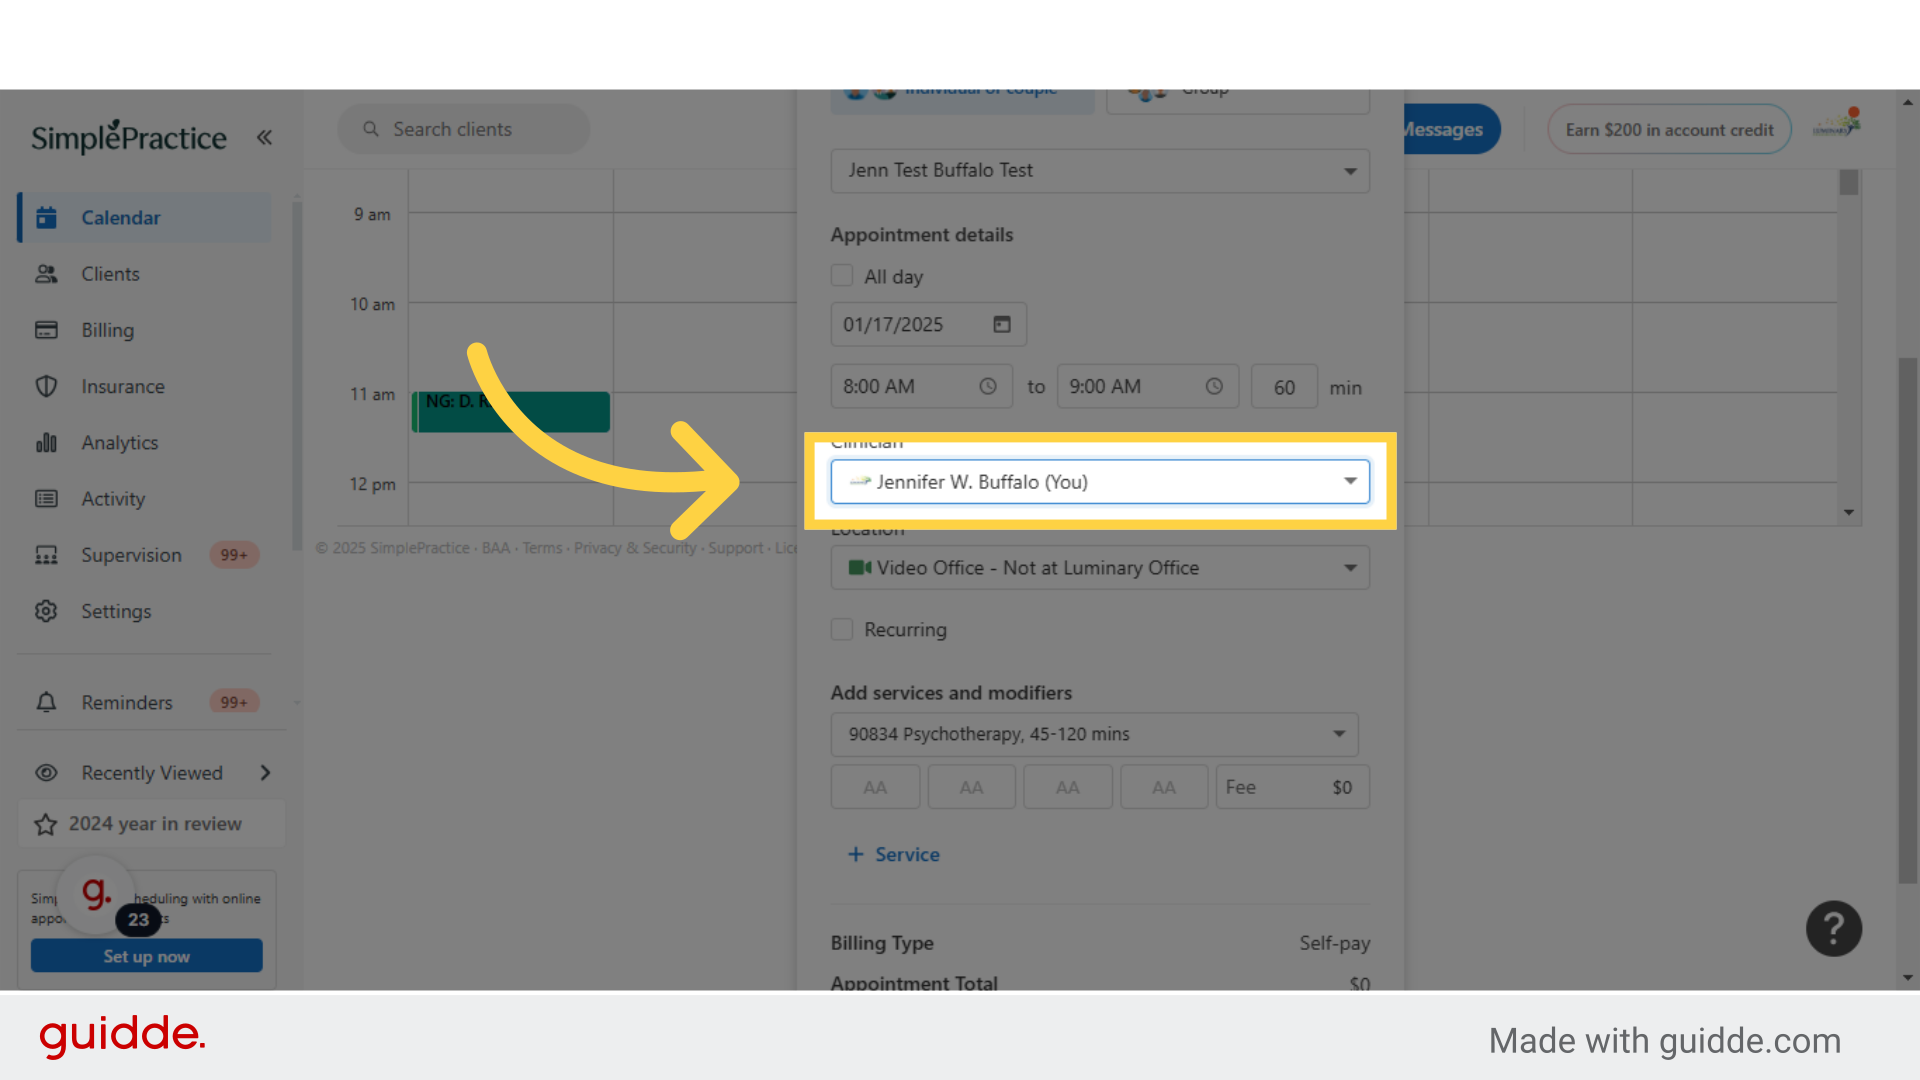
19. Click on your name
Next you will see your name is pre-populated as the clinician for this appointment.
20. Click "Video Office - Not at Luminary Office"
Now we will select the location for your appointment. Click on the location box to populate the drop down. You will see all the office locations in this drop down. Remember, your calendar view is only showing the rooms you selected in the beginning when you were searching a specific room. If you would like to use a room other than the green room, you will need to go back to the location tab at the top of the calendar to show the room availability for the room you would now like to book. We will continue with the green room selection from this drop down for the example.

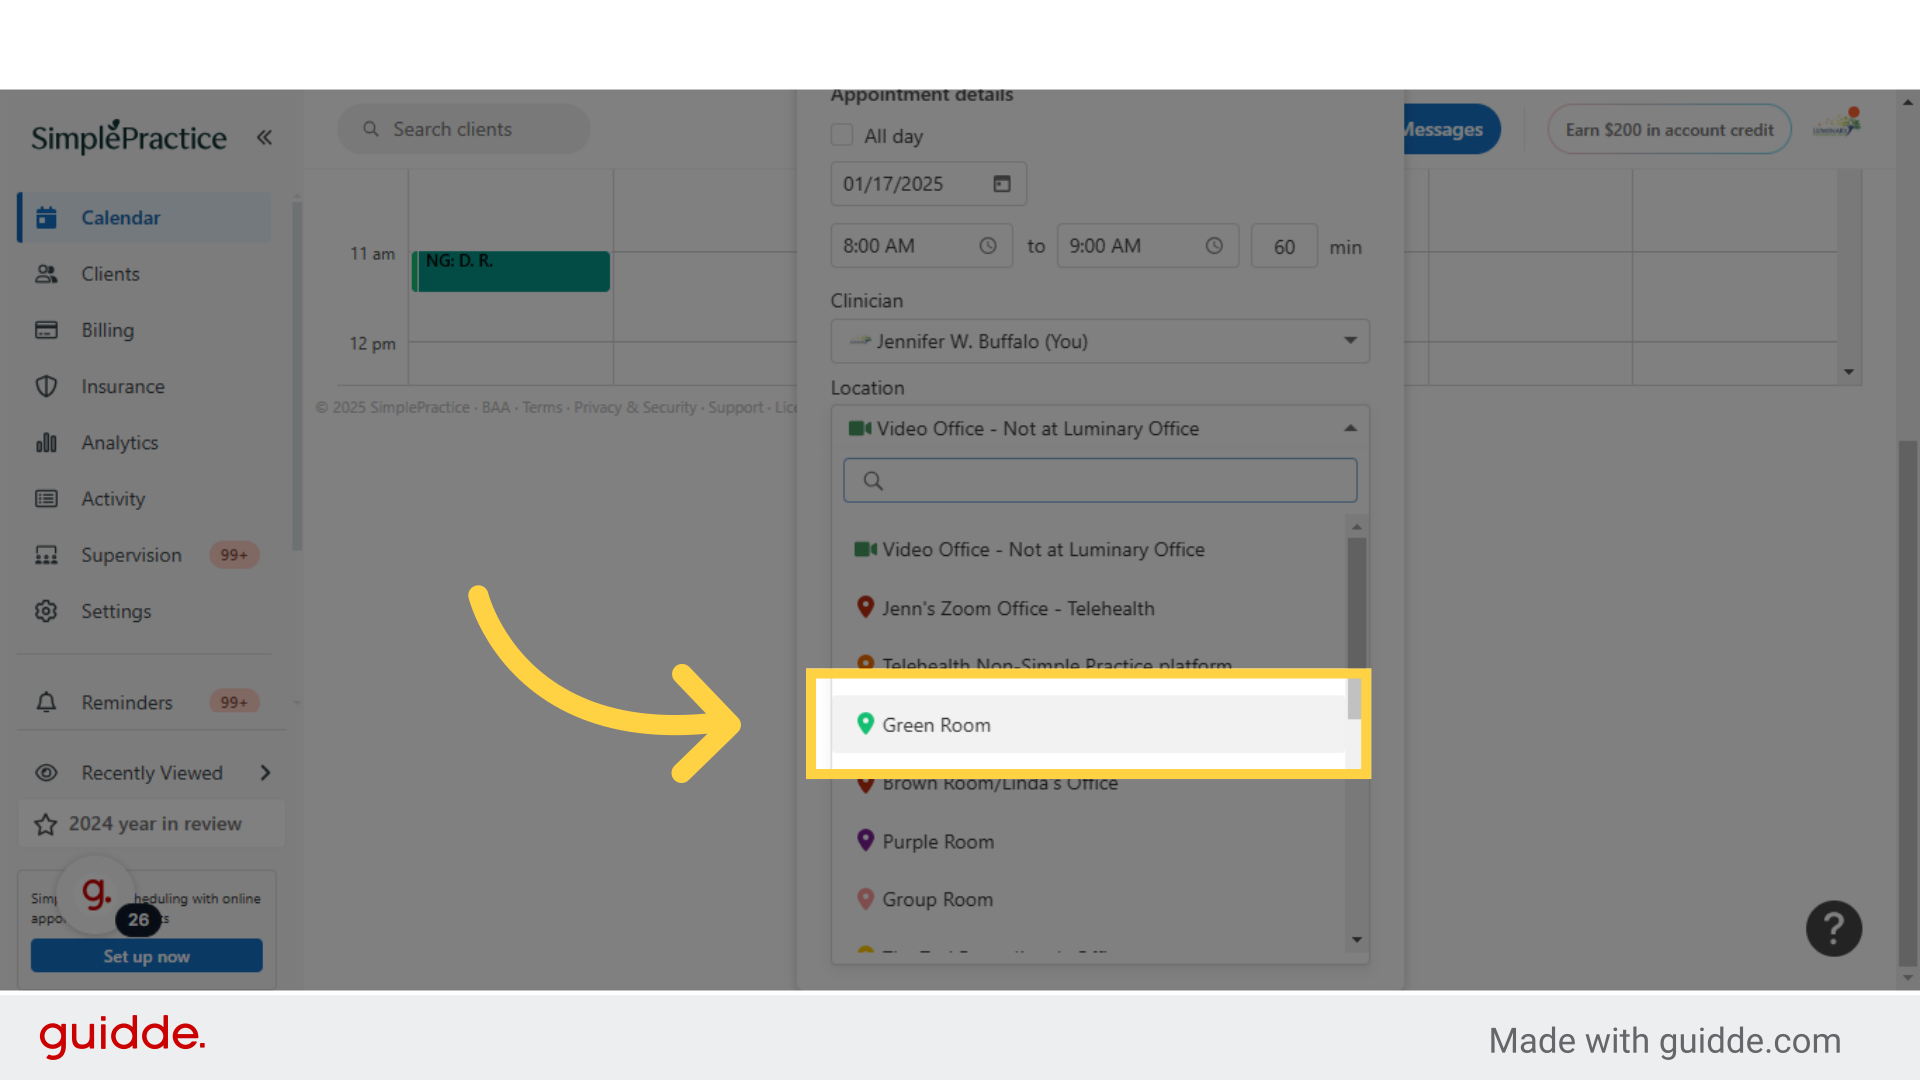
21. Click "Green Room"
Choose the "Green Room".
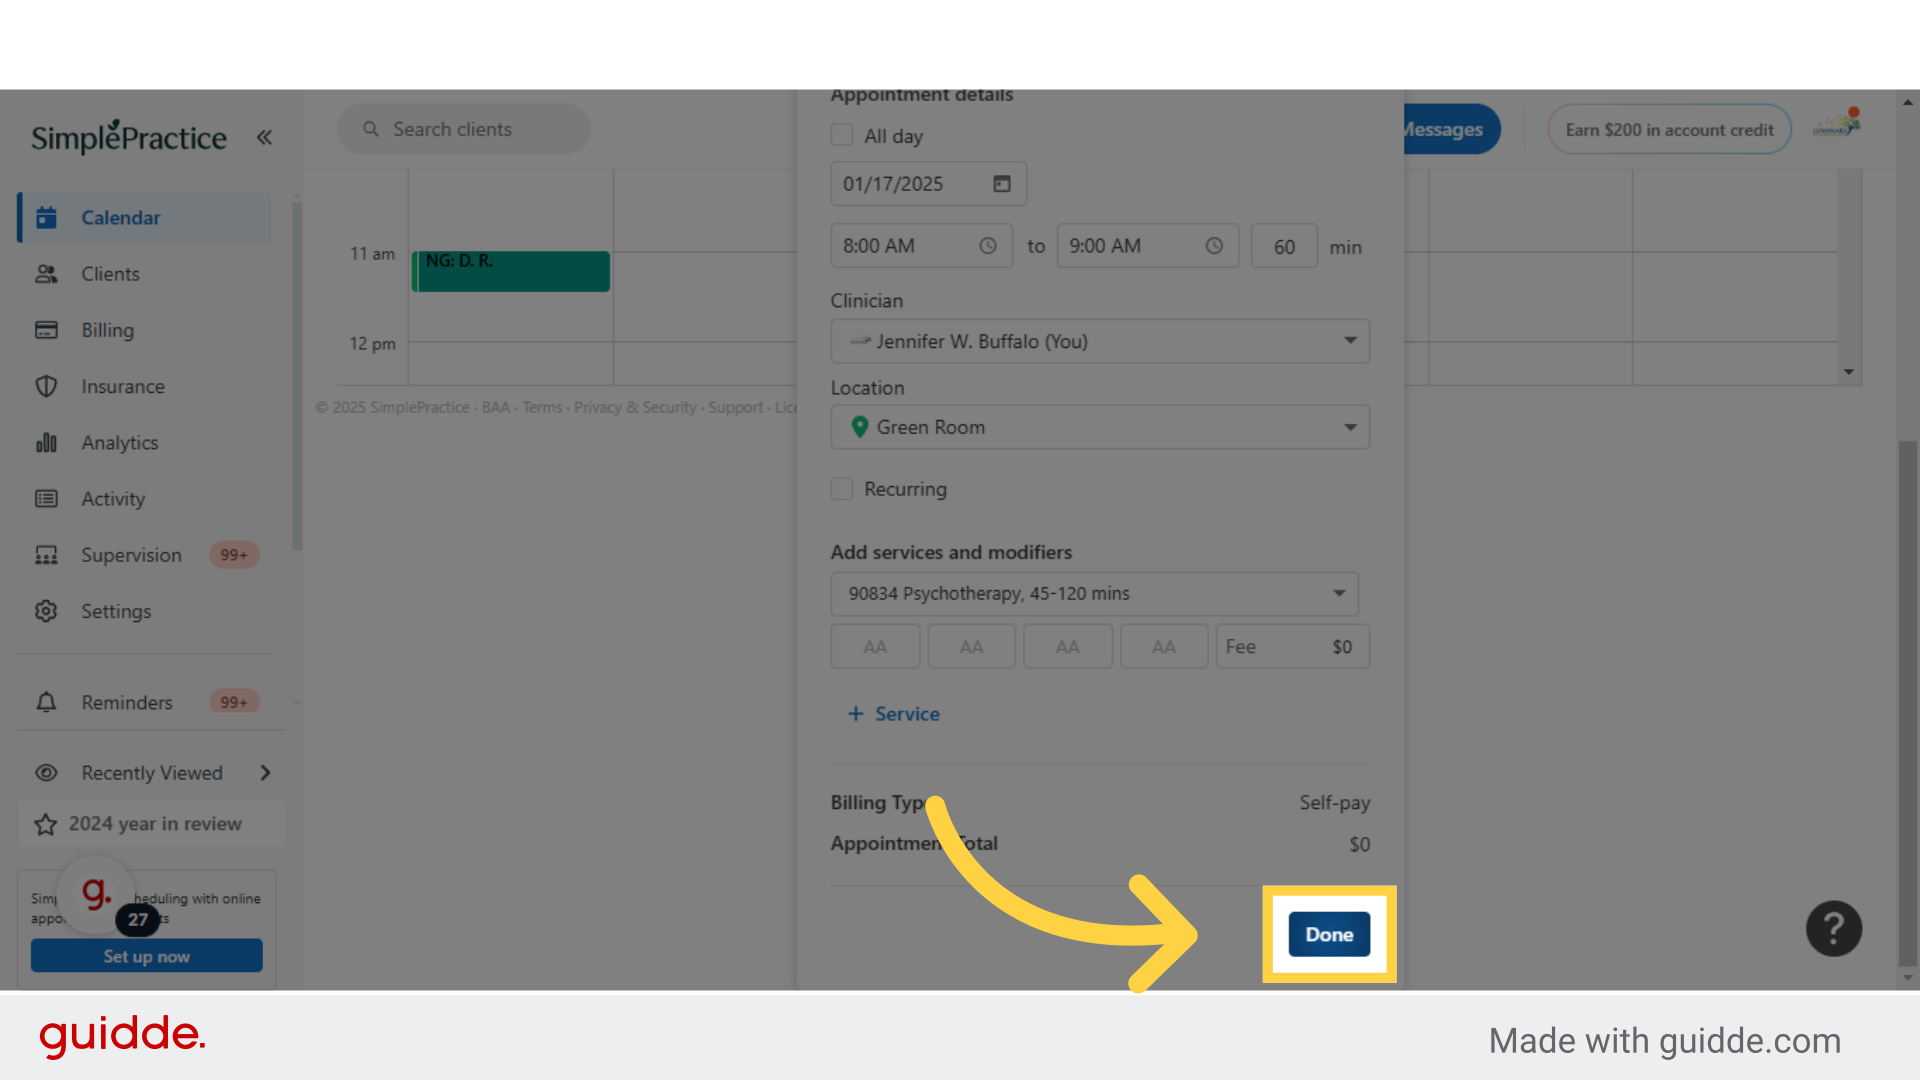
22. Click "Done"
That's it, now you can complete the appointment scheduling by clicking "Done".
23. Confirm your appointment shows on the calendar
Lastly, confirm your appointment was scheduled correctly and it shows up on the calendar. You will repeat this process to schedule all your client appointments as of Feb 1st, 2025. To avoid double bookings, please make sure you review the calendar carefully to confirm that the room you would like to book is available. All clinicians have access to view what rooms are booked and when. If you have any questions on this process, please reach out to Mel at [email protected] or 512-698-5066.
Please save this video for easy reference.
Scheduling An Event For Video Office Appointments In Luminary Office
Learn how to schedule an event for video office appointments in Luminary Office with this guide
Go to secure.simplepractice.com
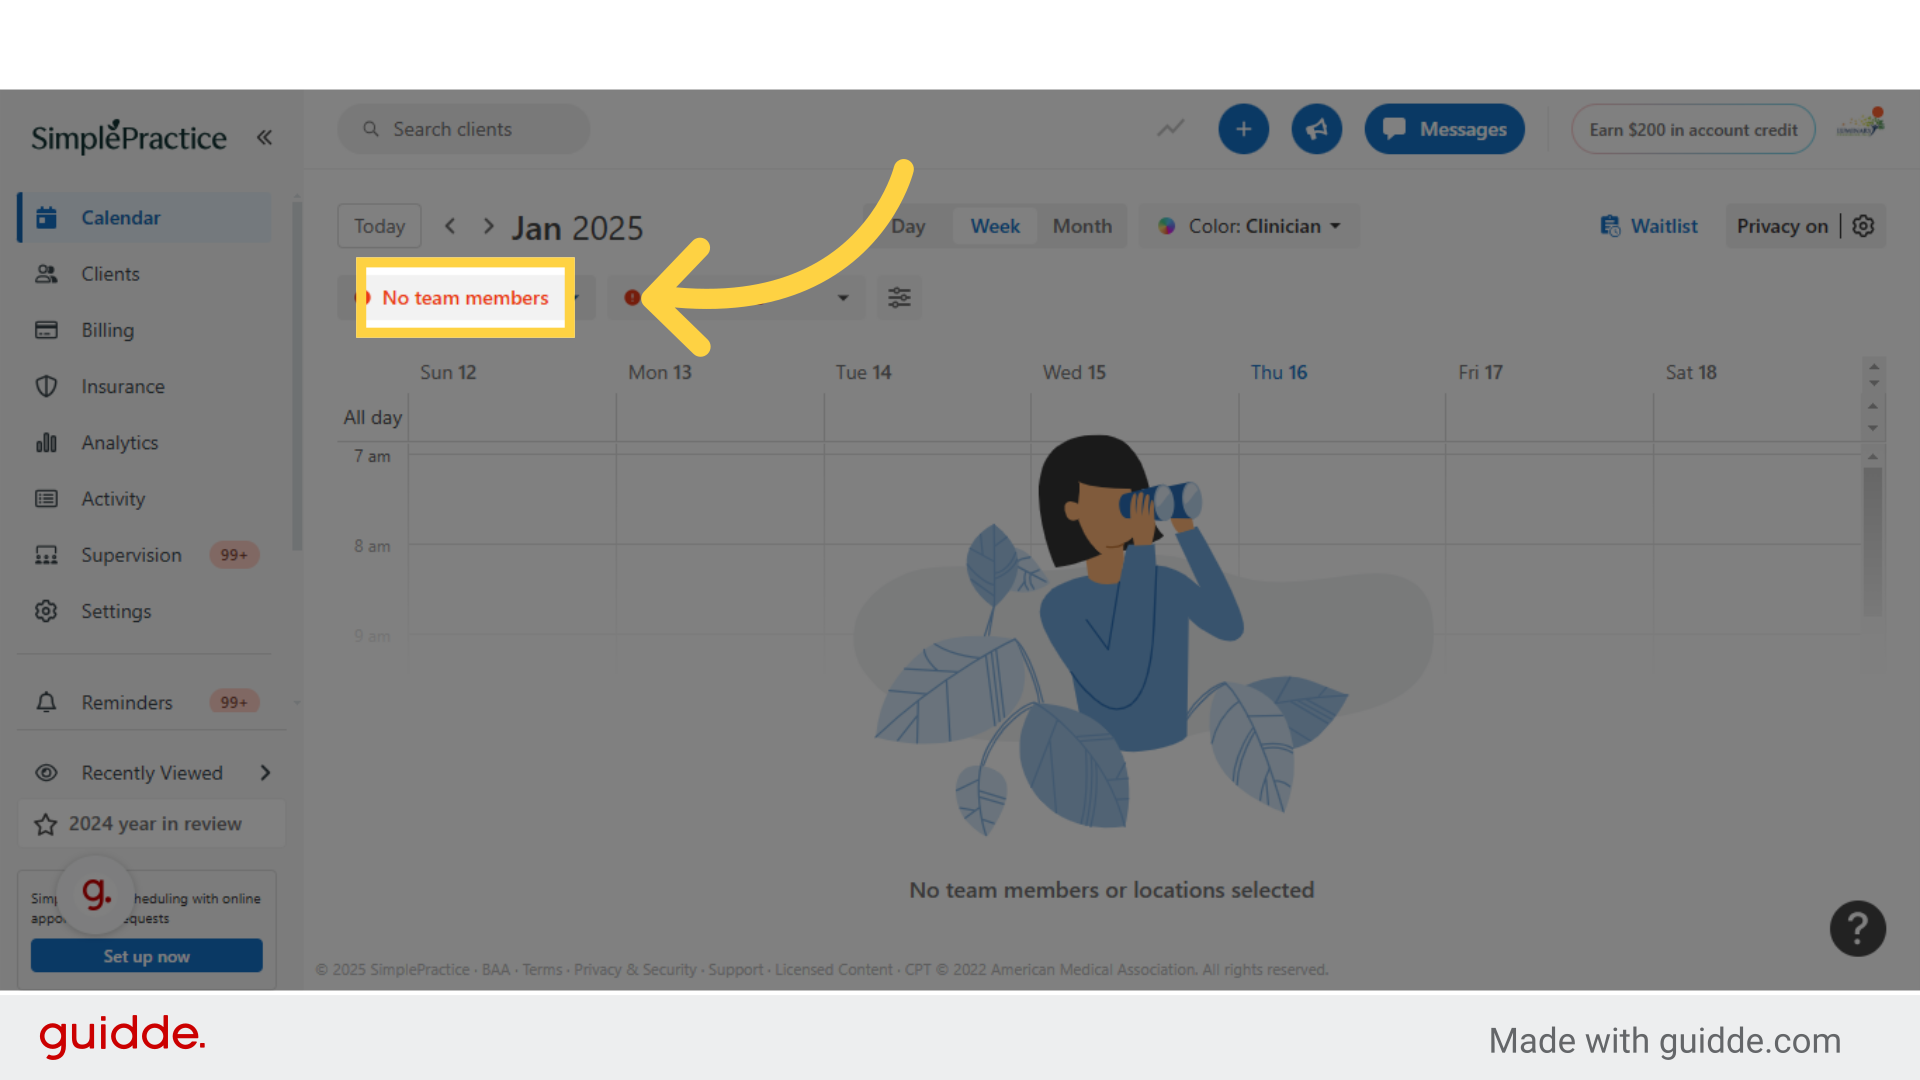
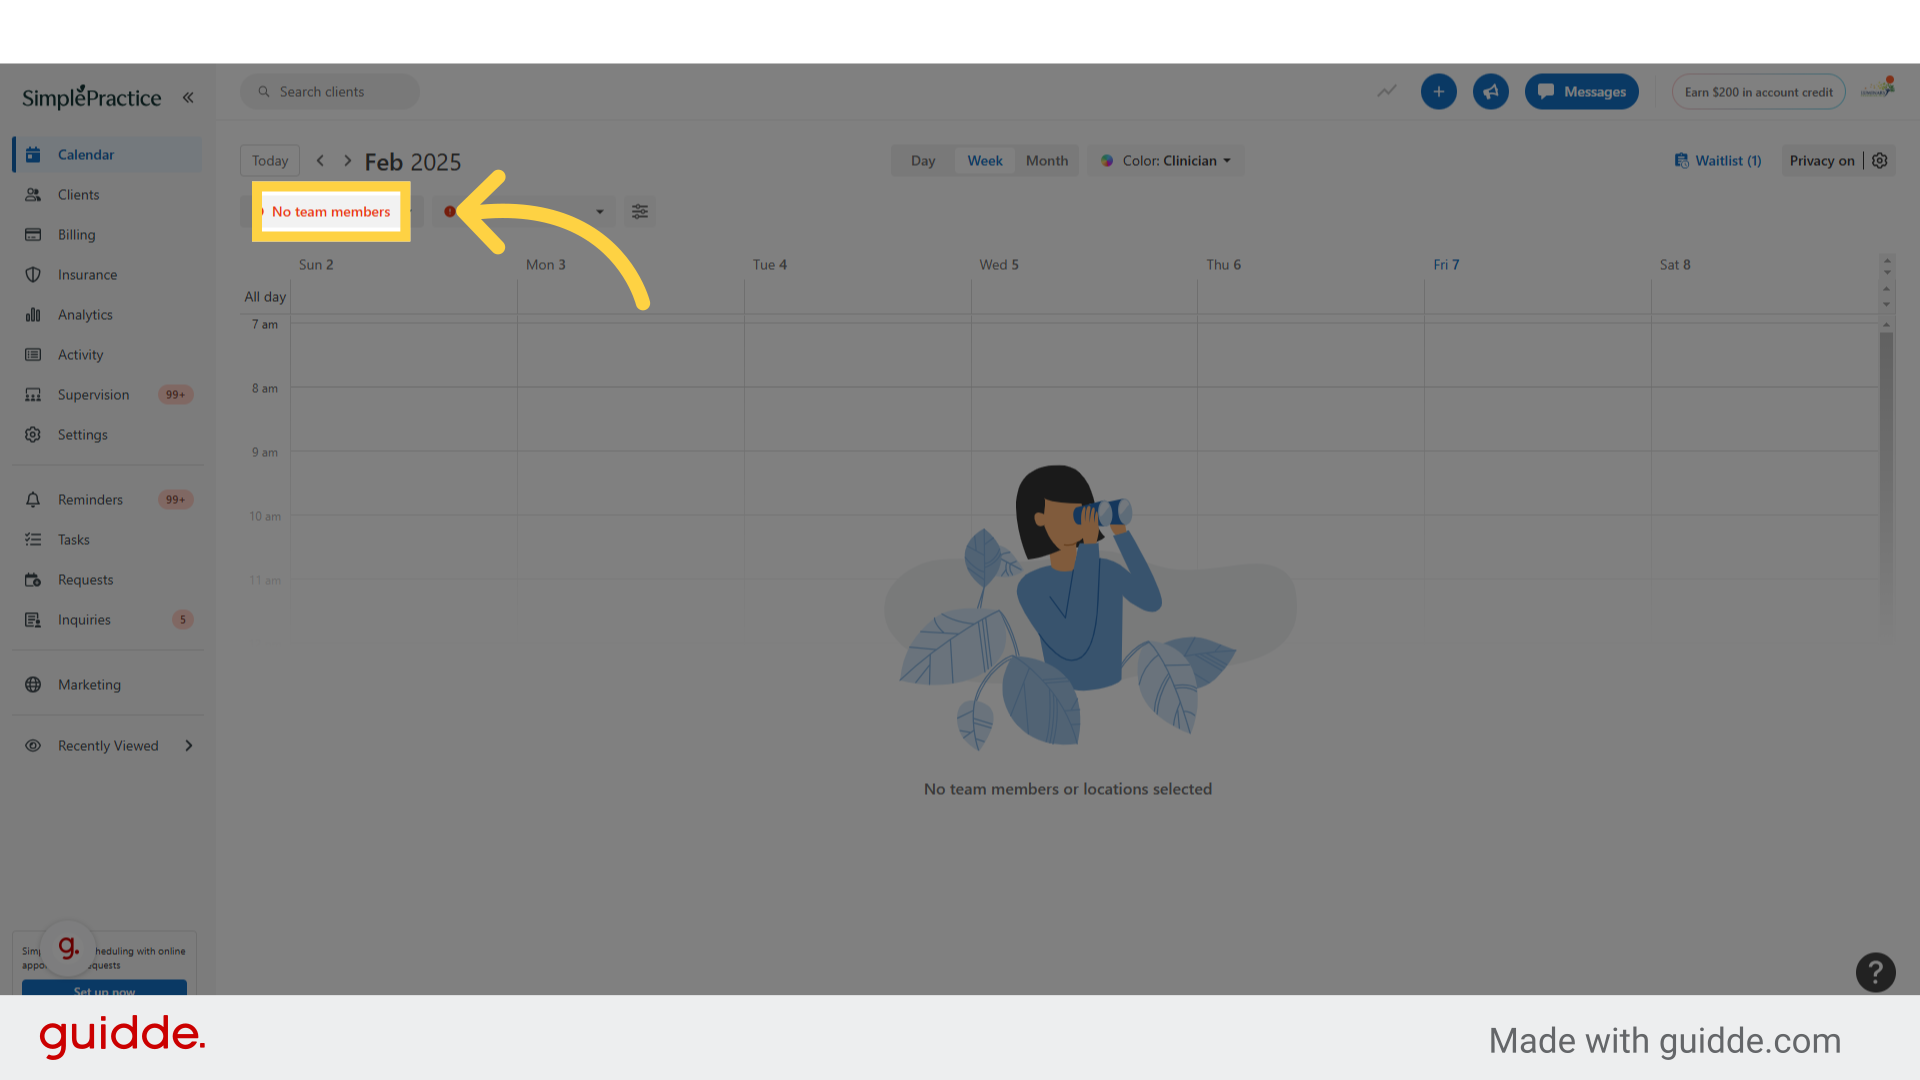
1. Click "No team members"
Begin by selecting "No team members."
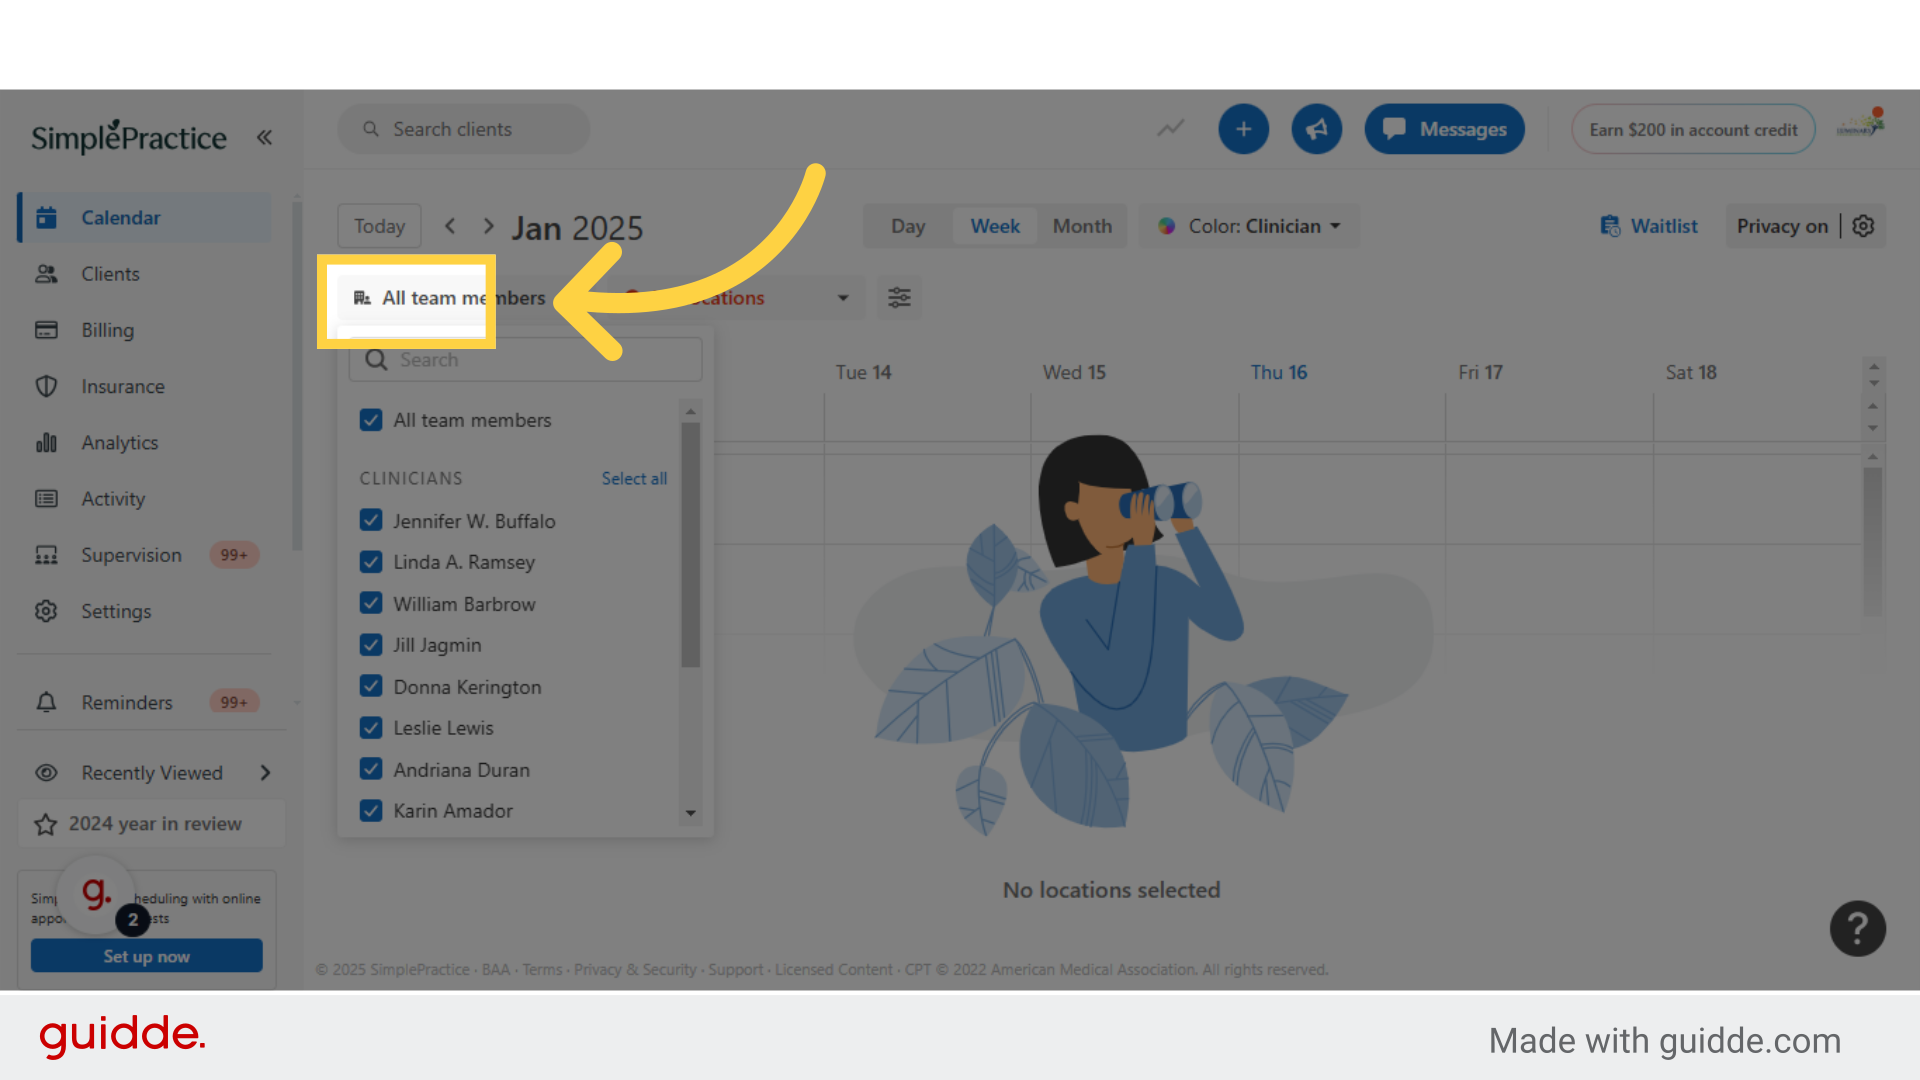
2. Check "All Team Members" box
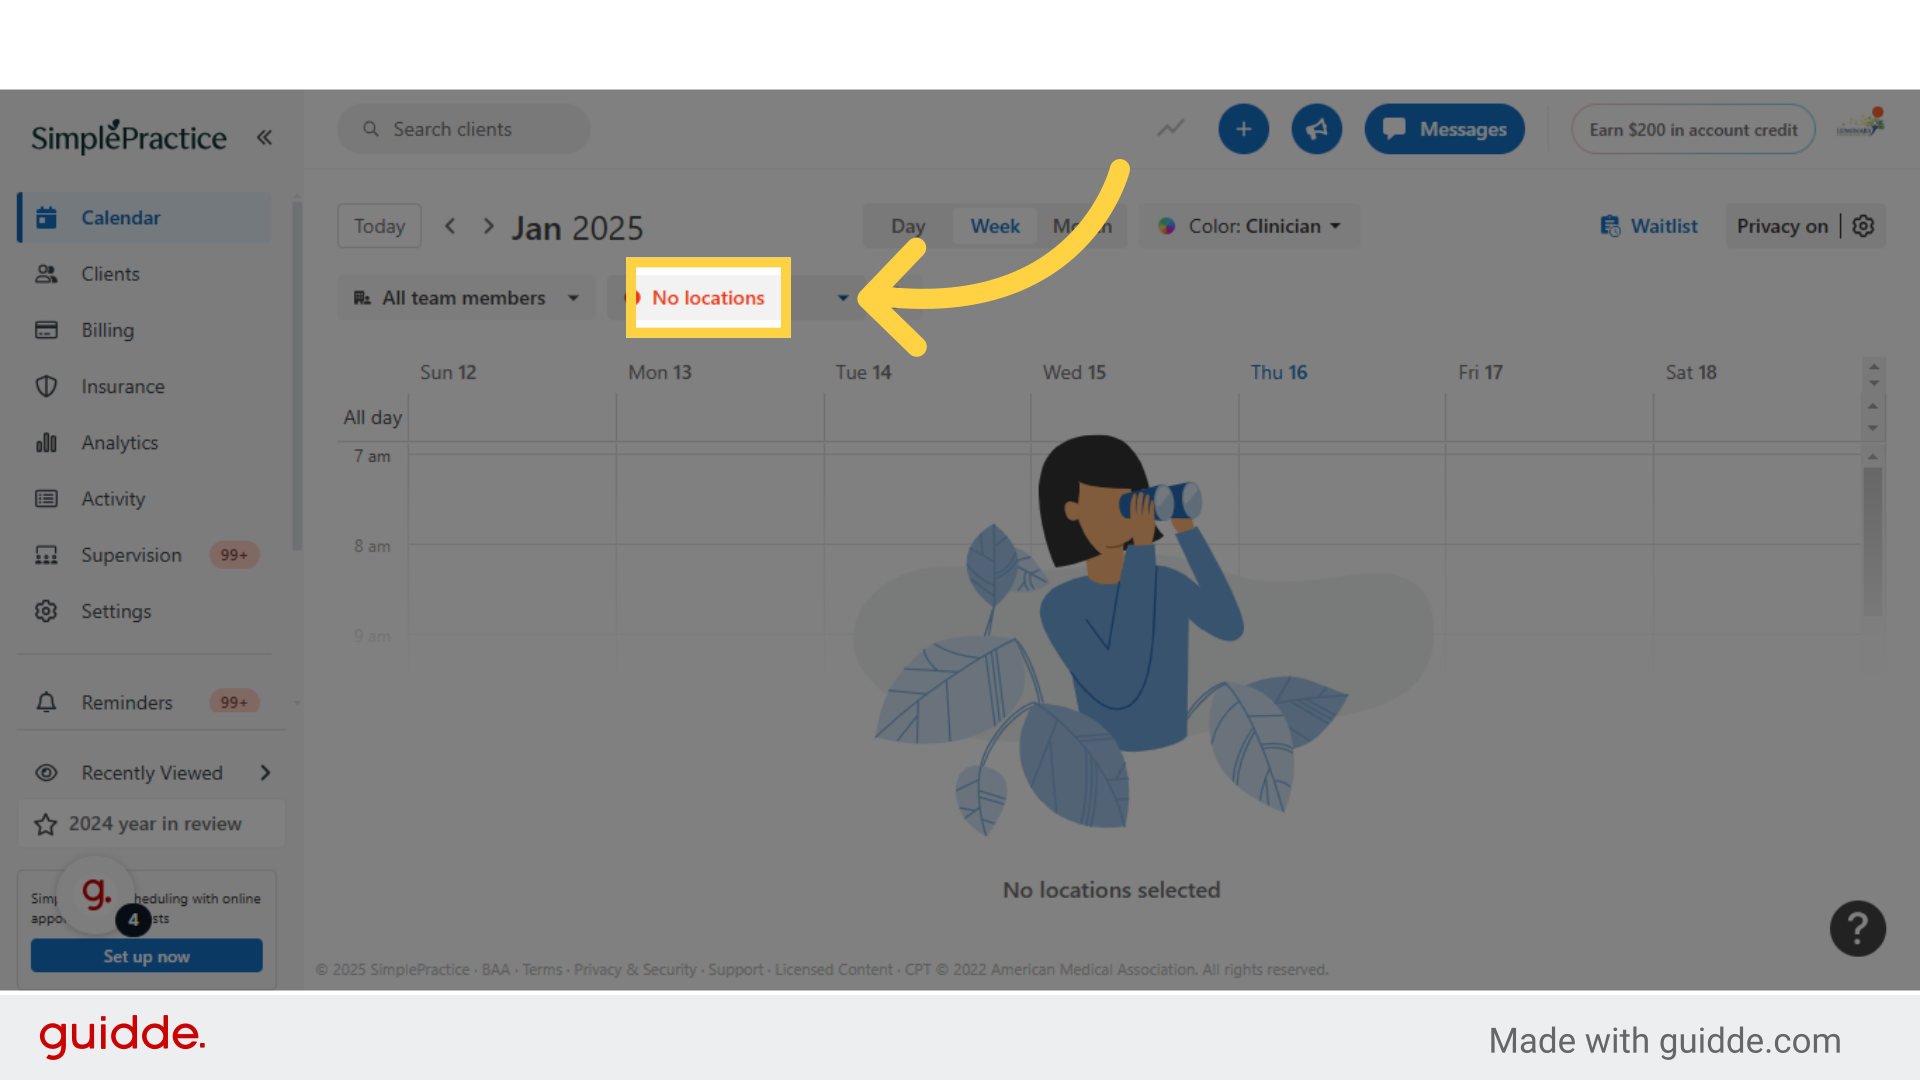
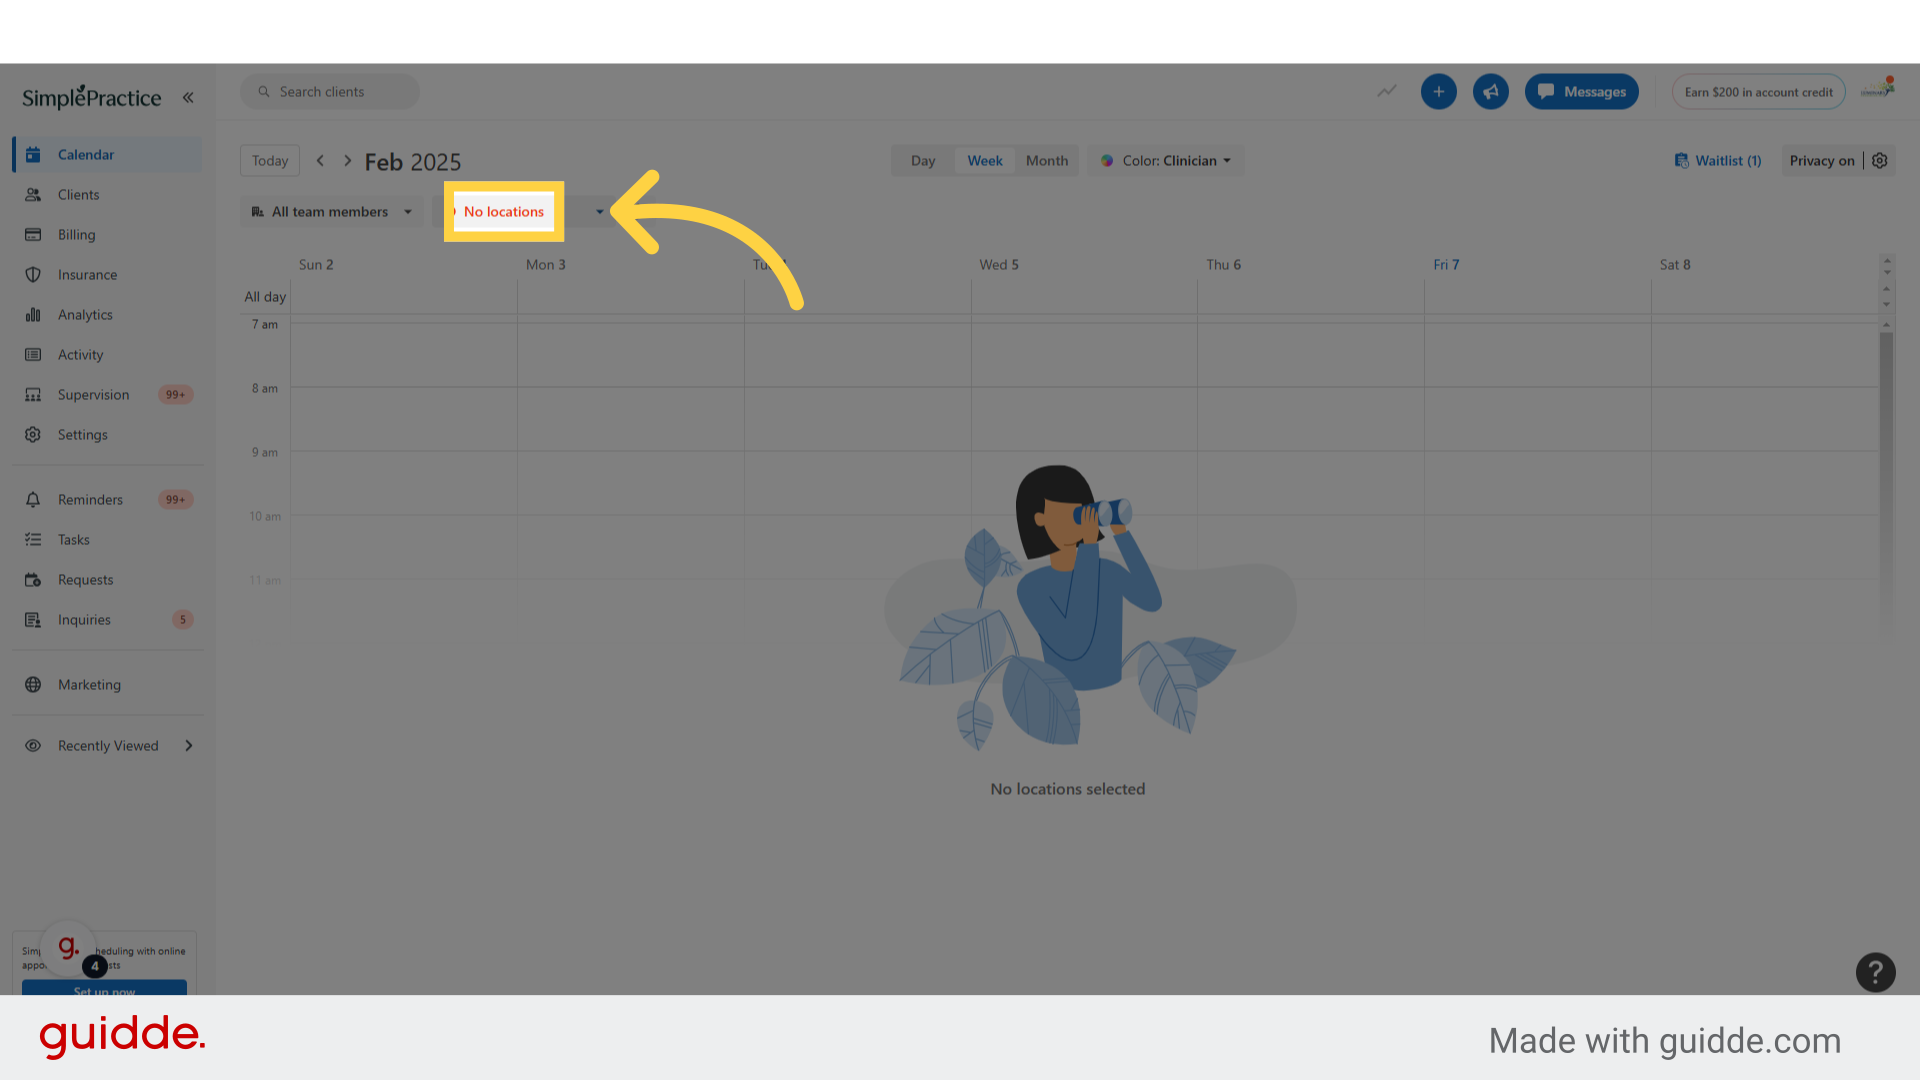
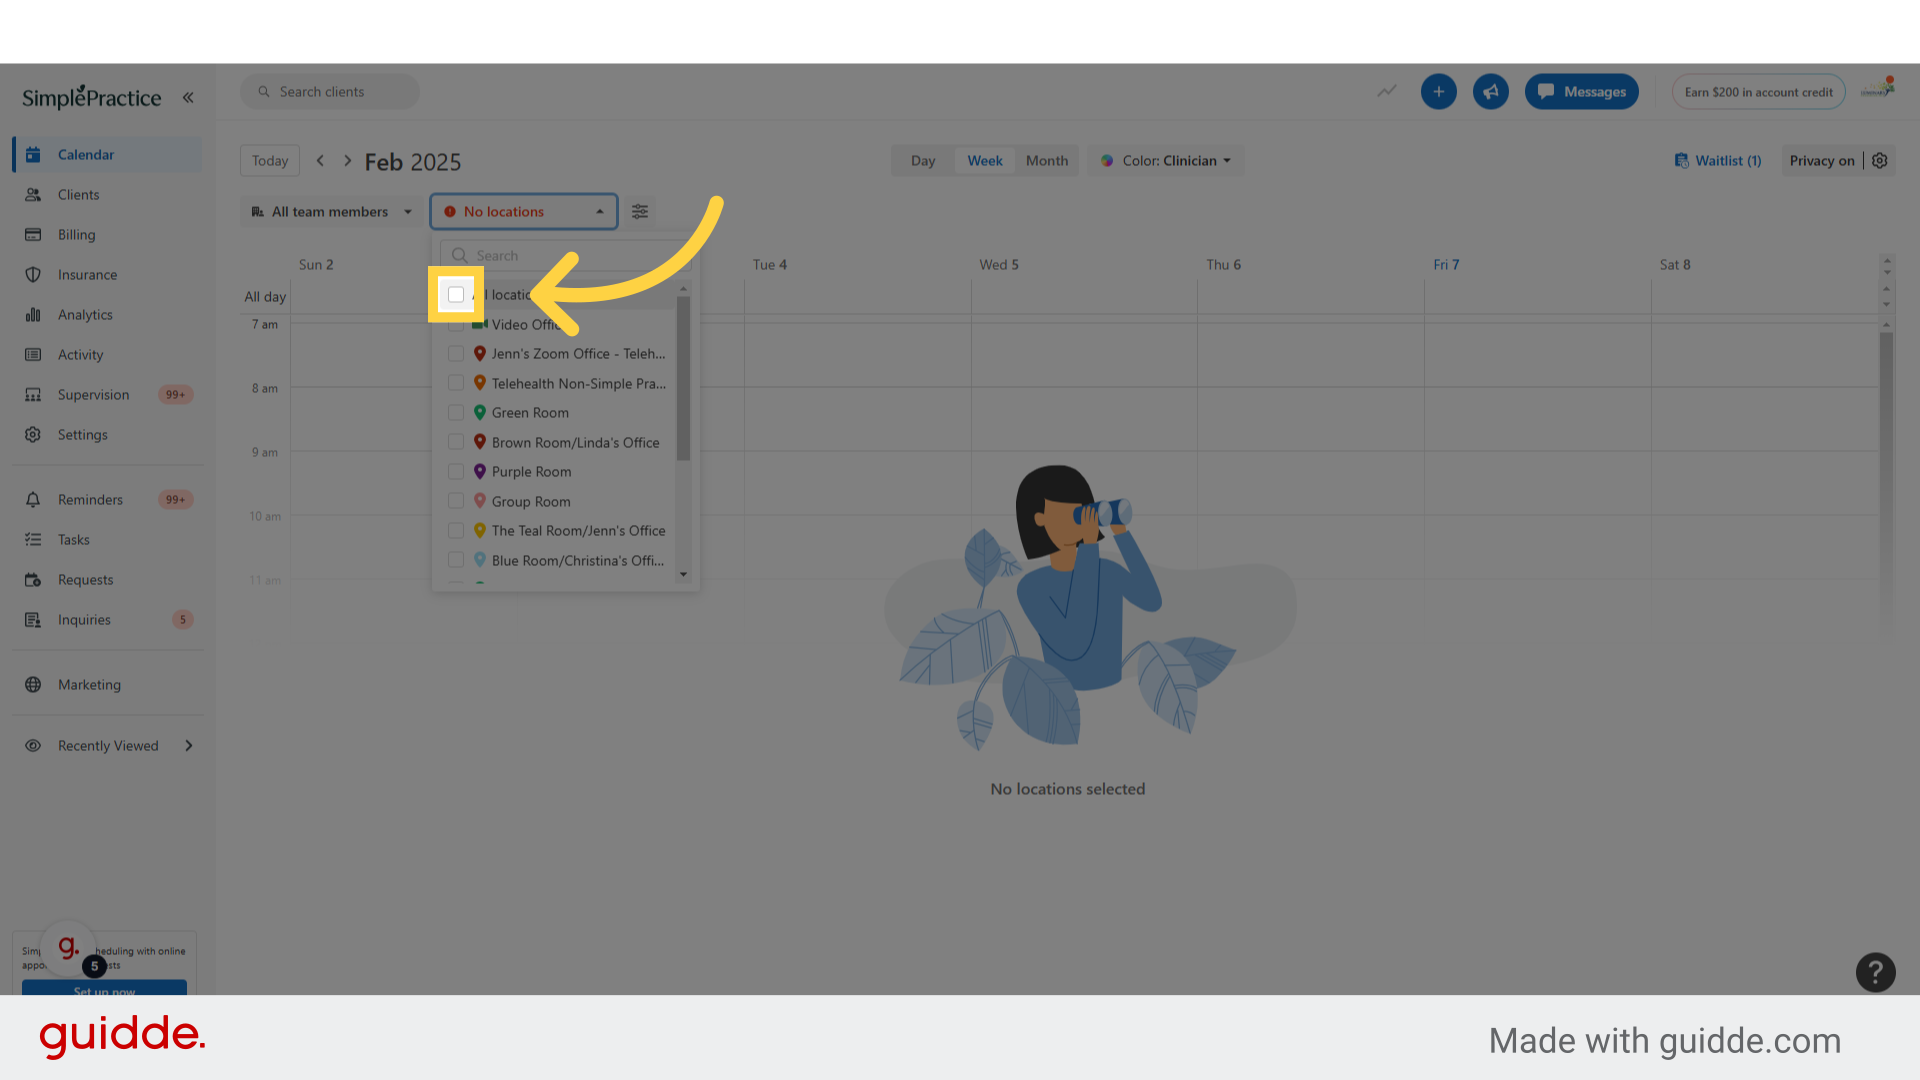
3. Click "No locations"
This will present the drop down of all available locations.
4. Check "All locations" box
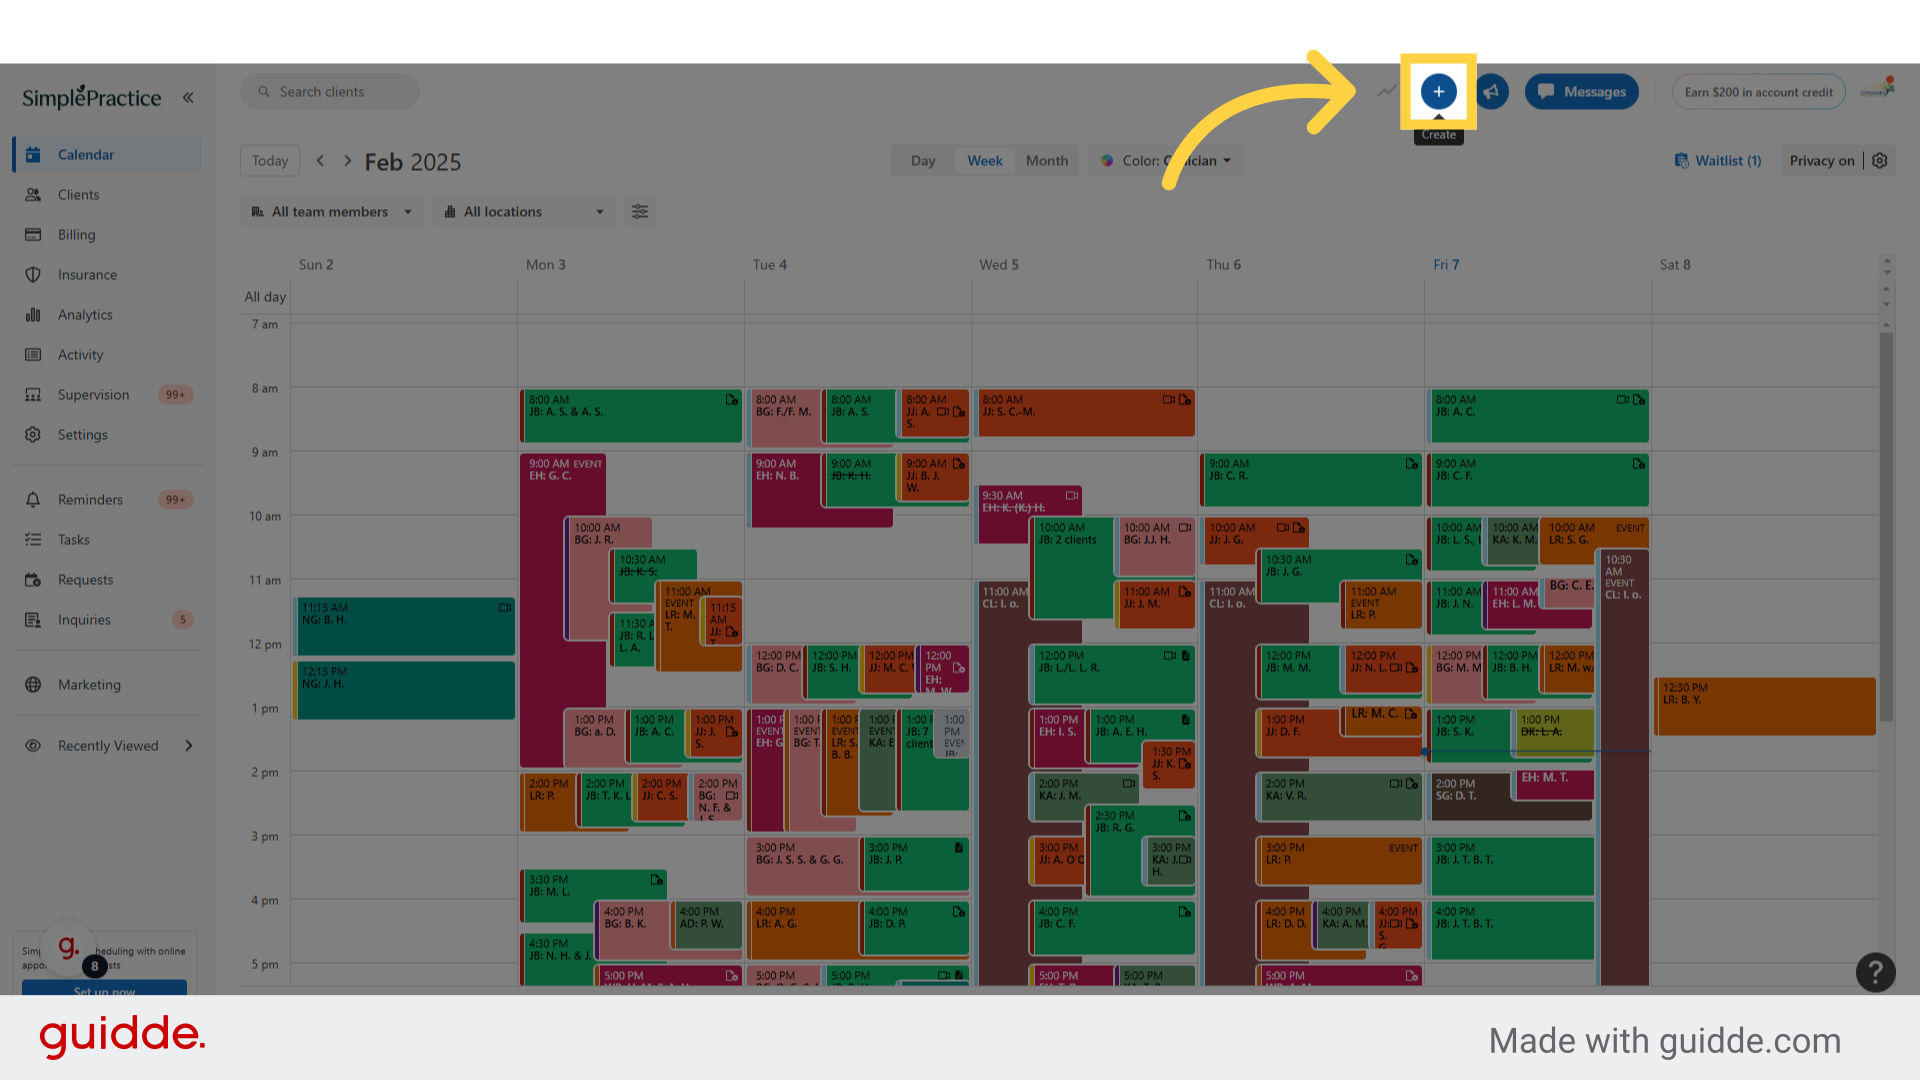
5. Click "+" at the top of the page
6. Click "Schedule appointment"

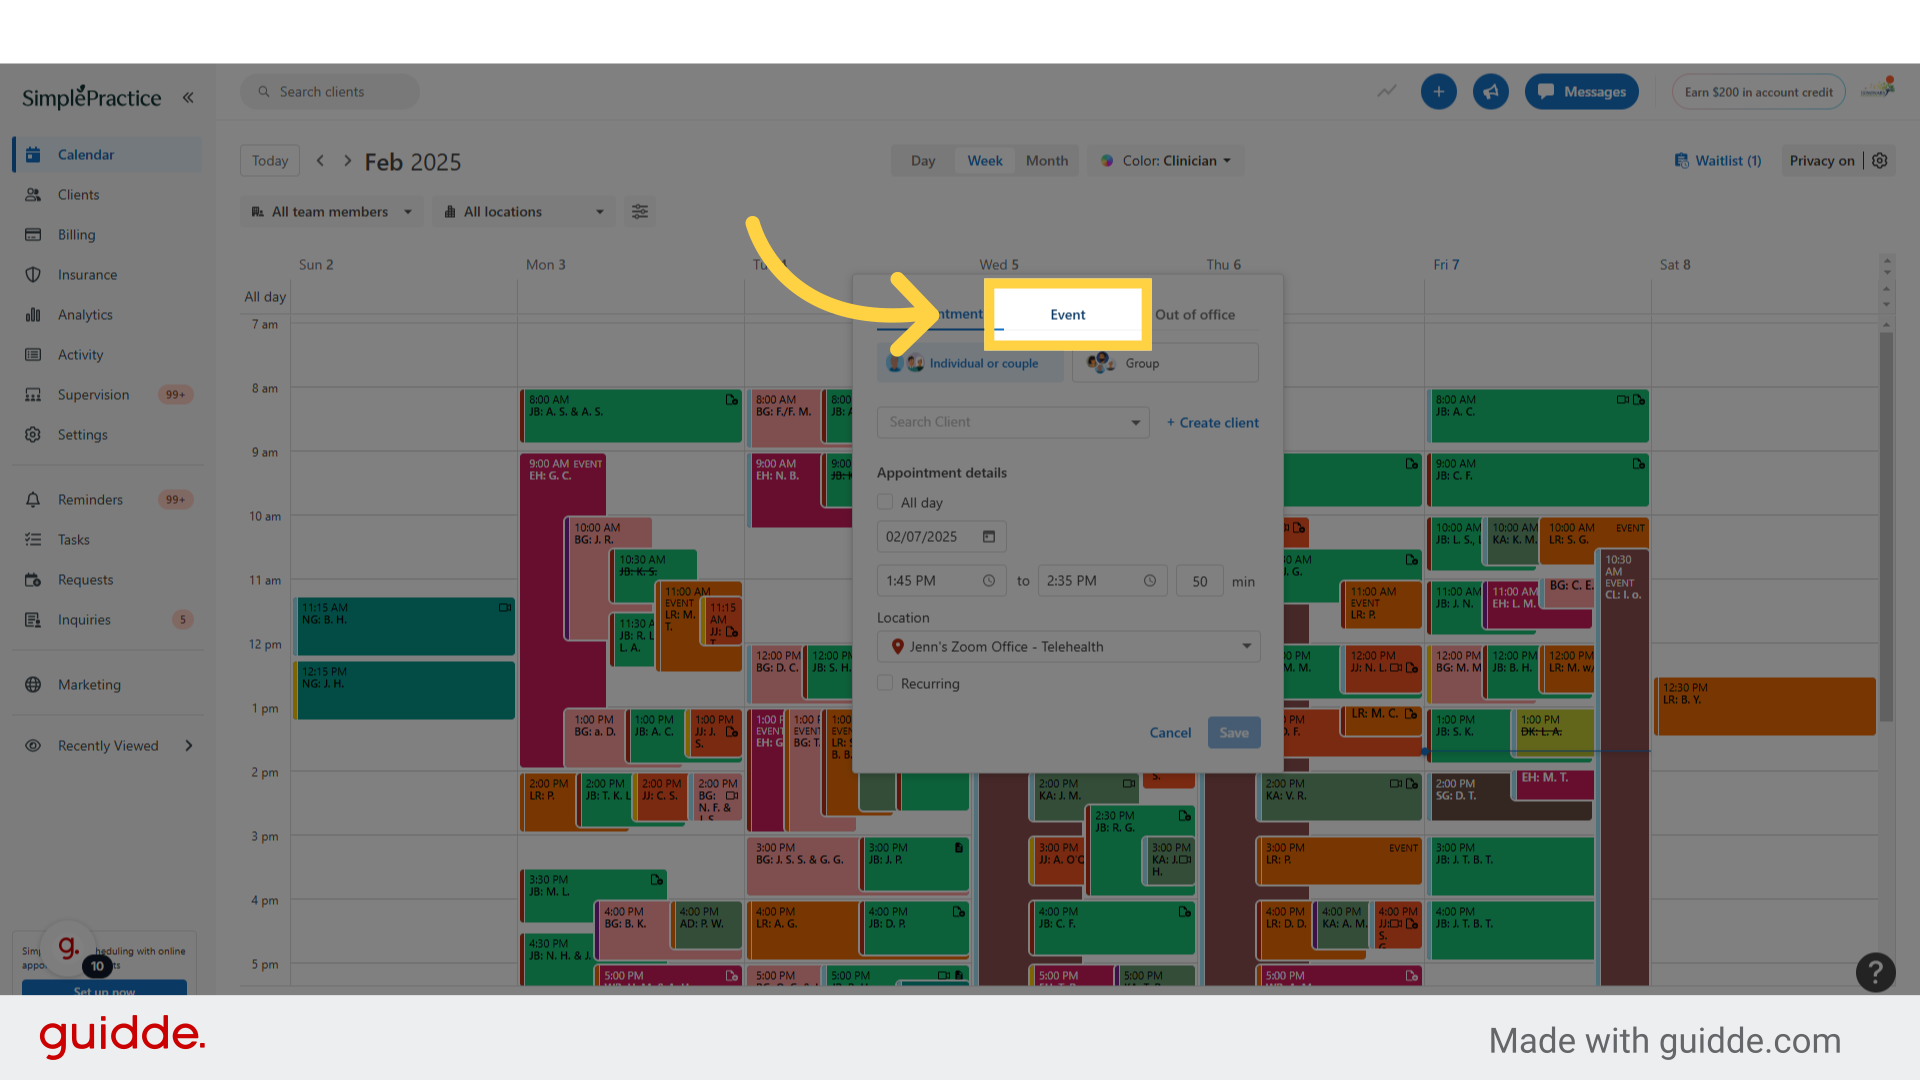
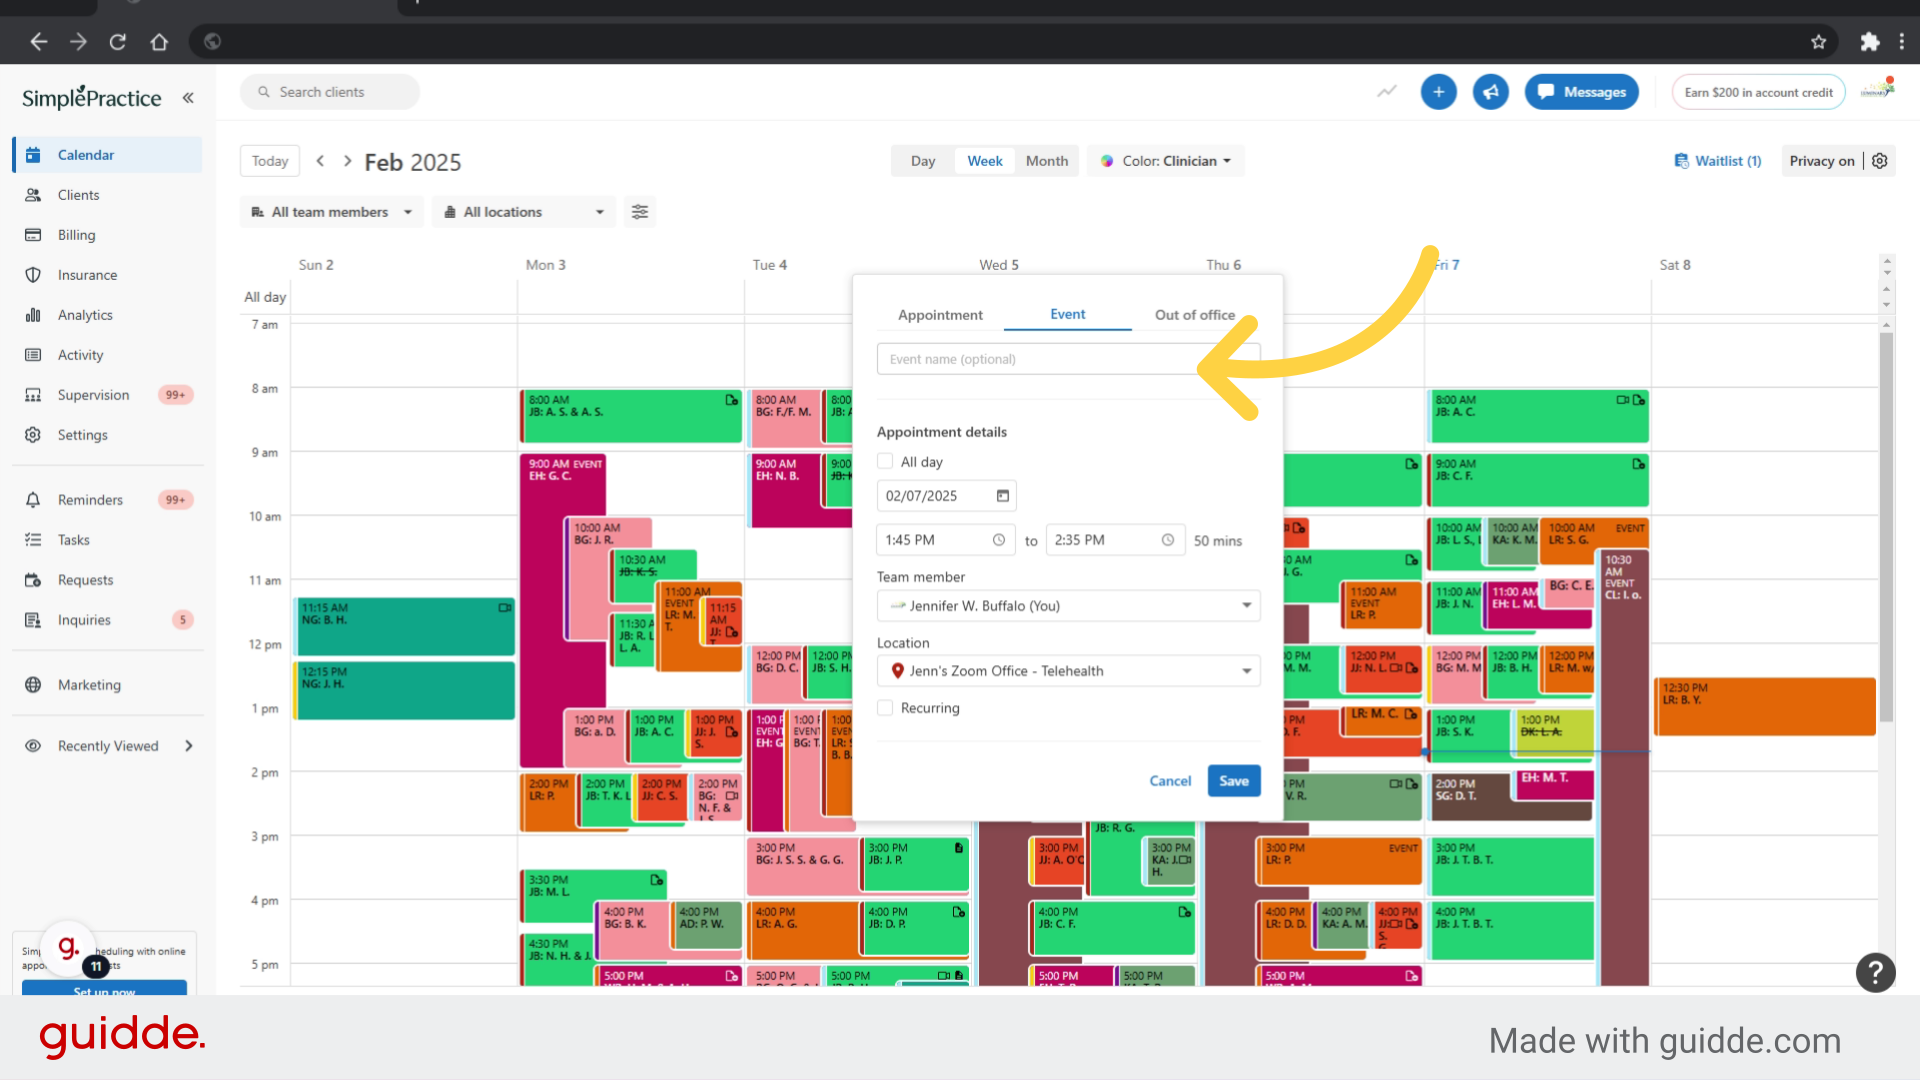
7. Click "Event" tab
8. Click "Event name (optional)"
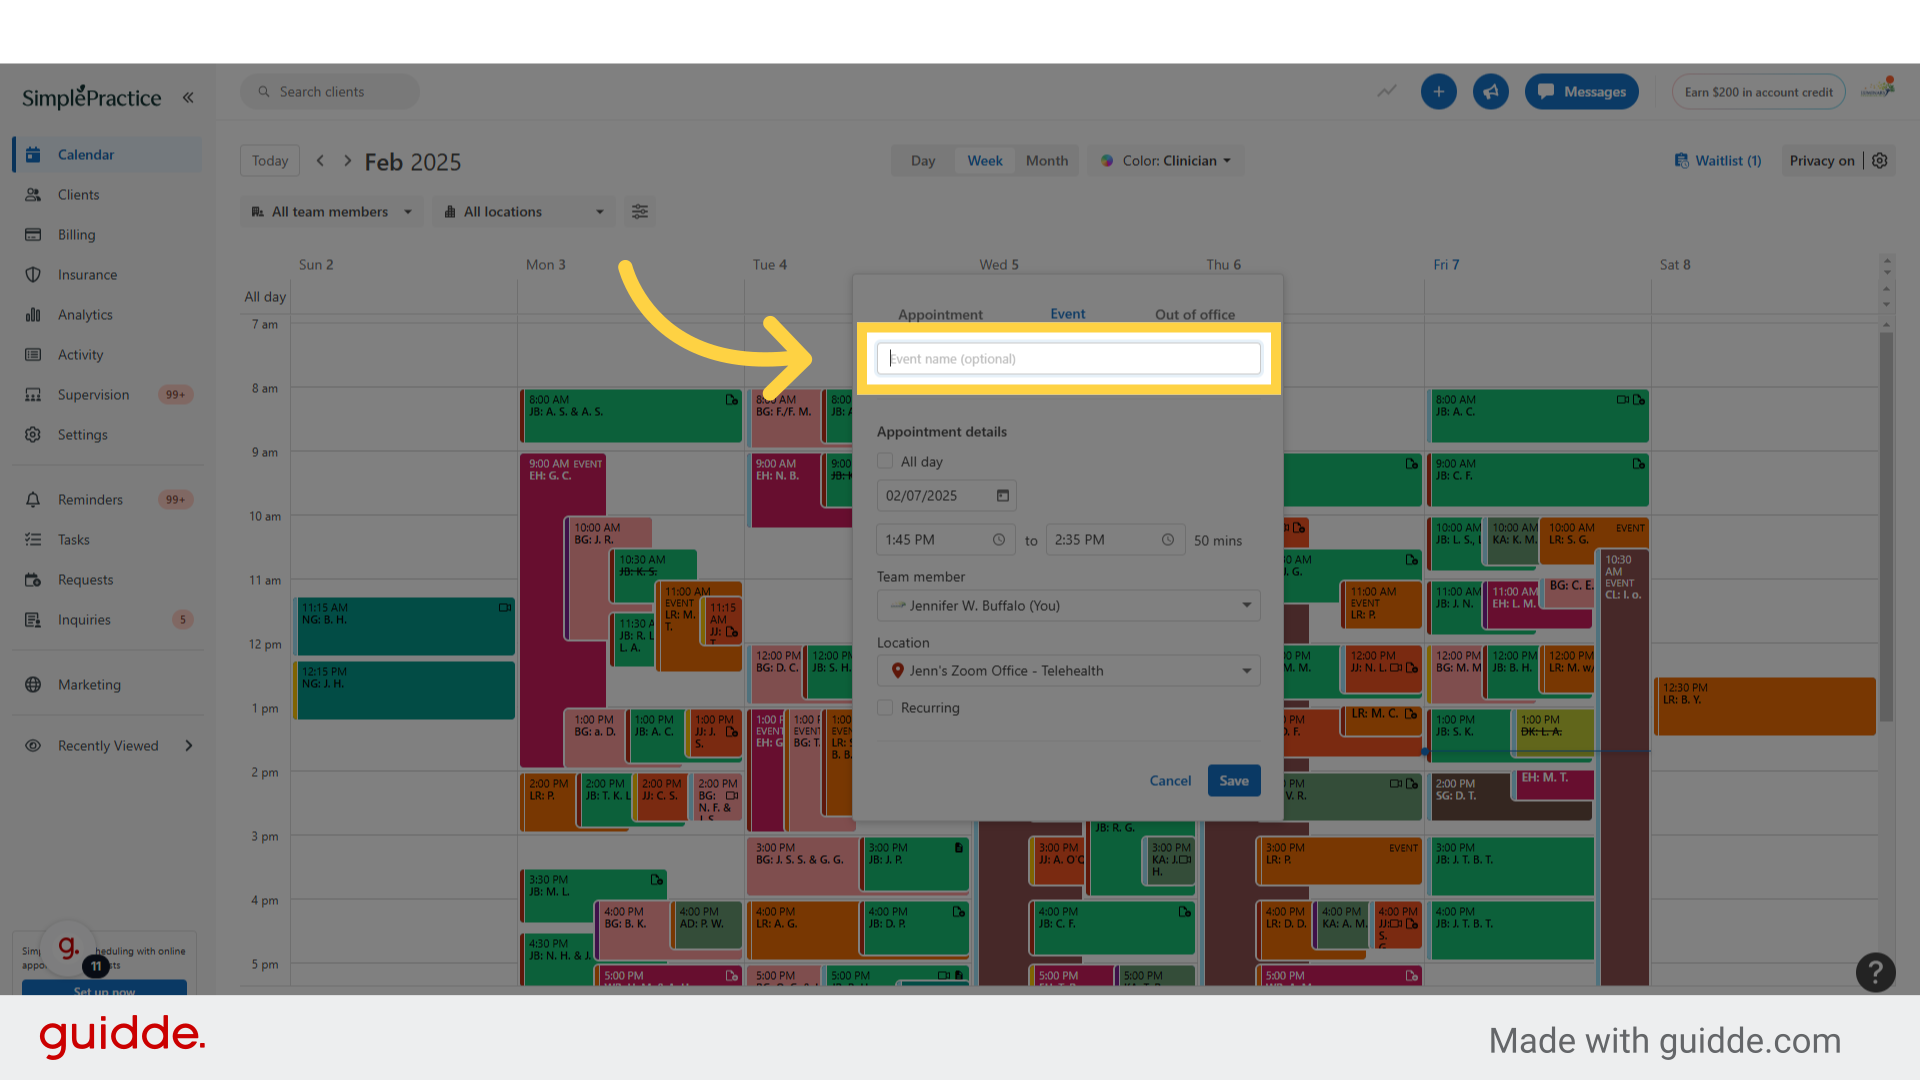
9. Fill in the text box with "Telehealth"
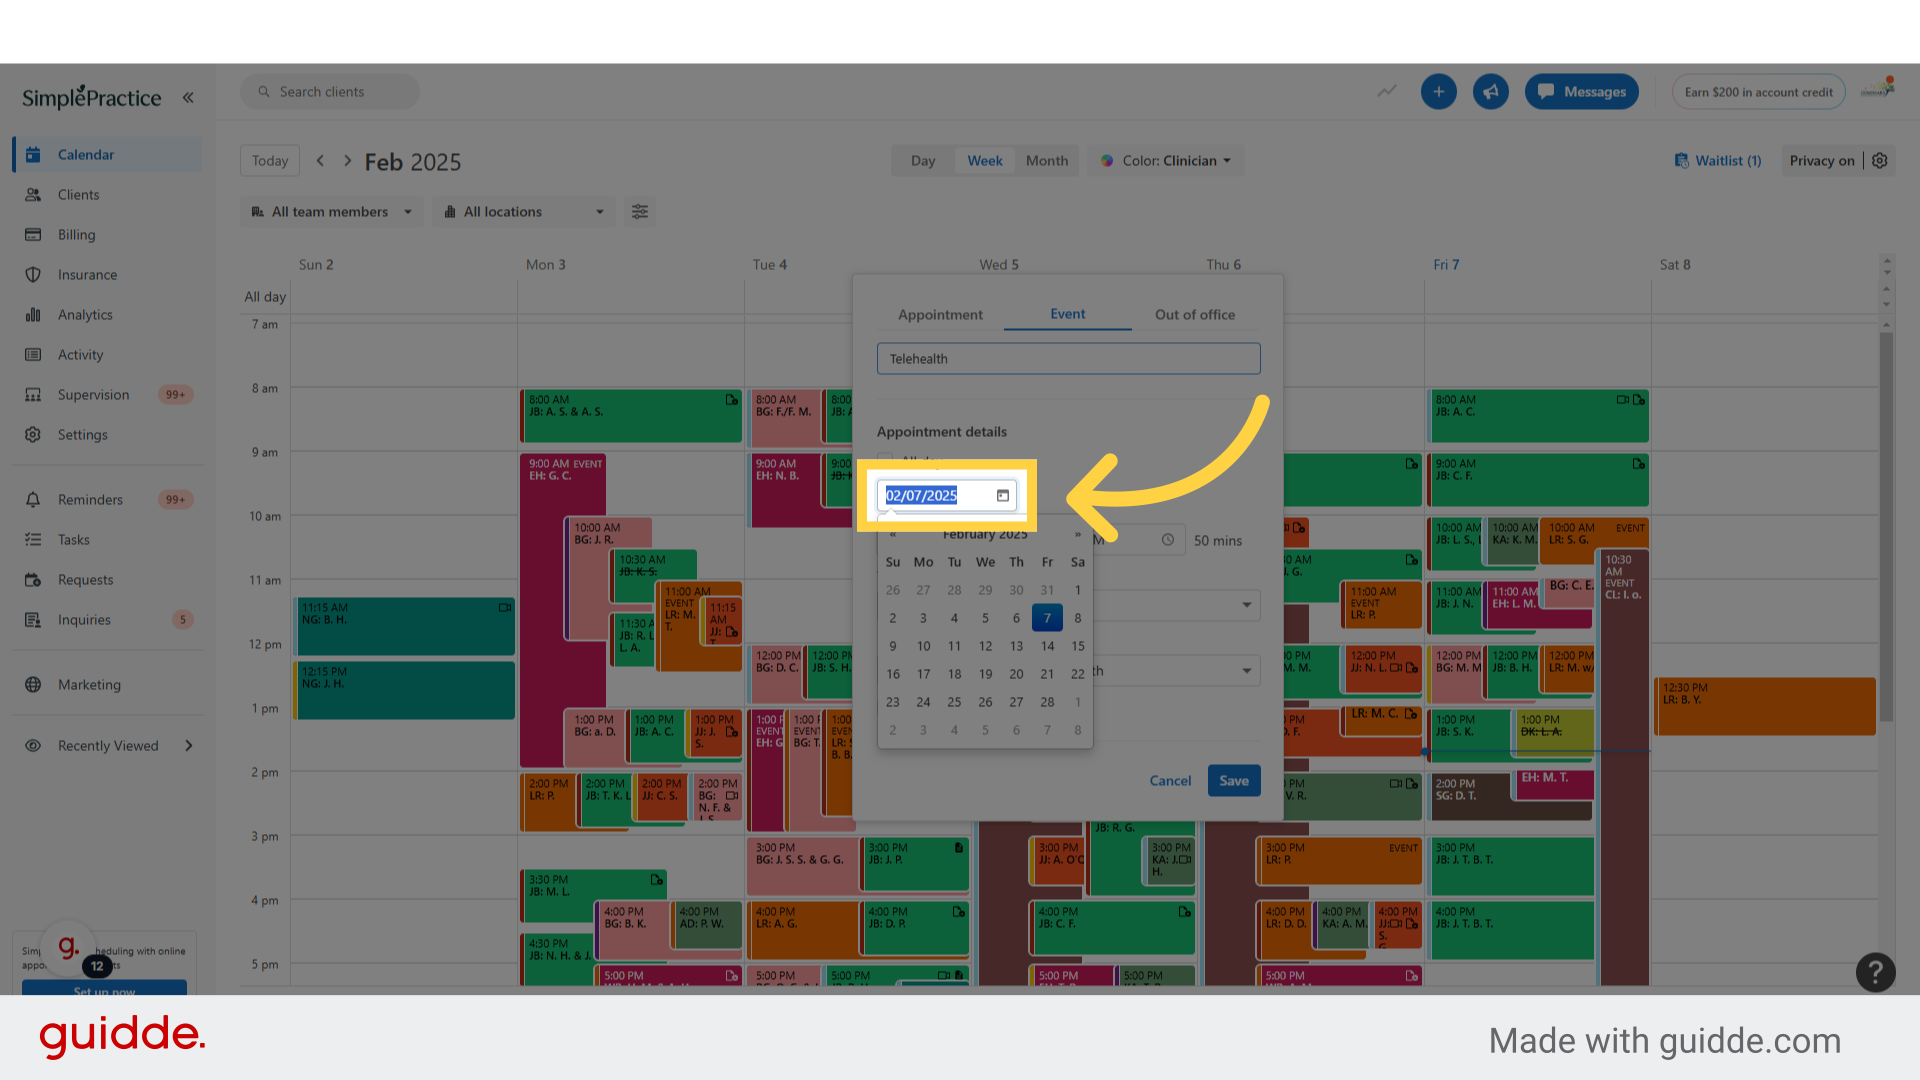
10. Chose the correct date for the event
Clicking on the date box will present the month's calendar drop down
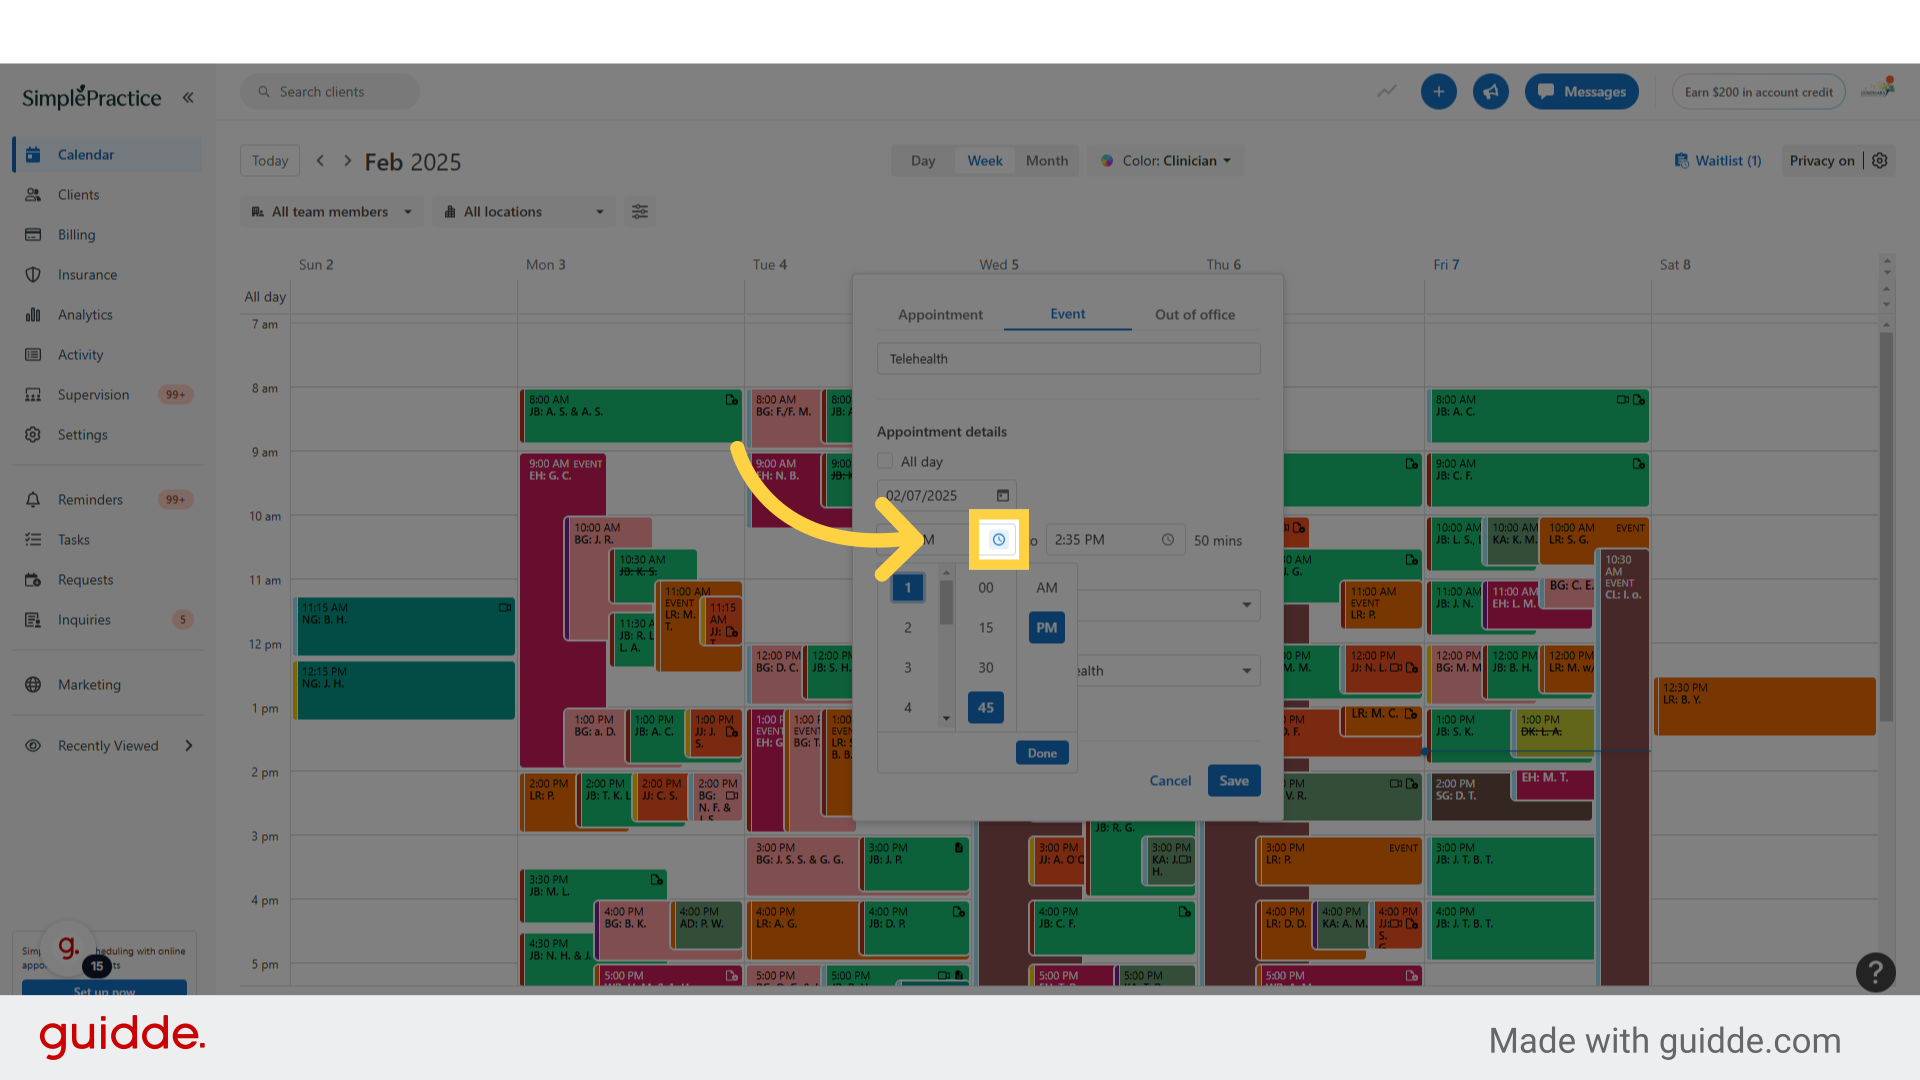
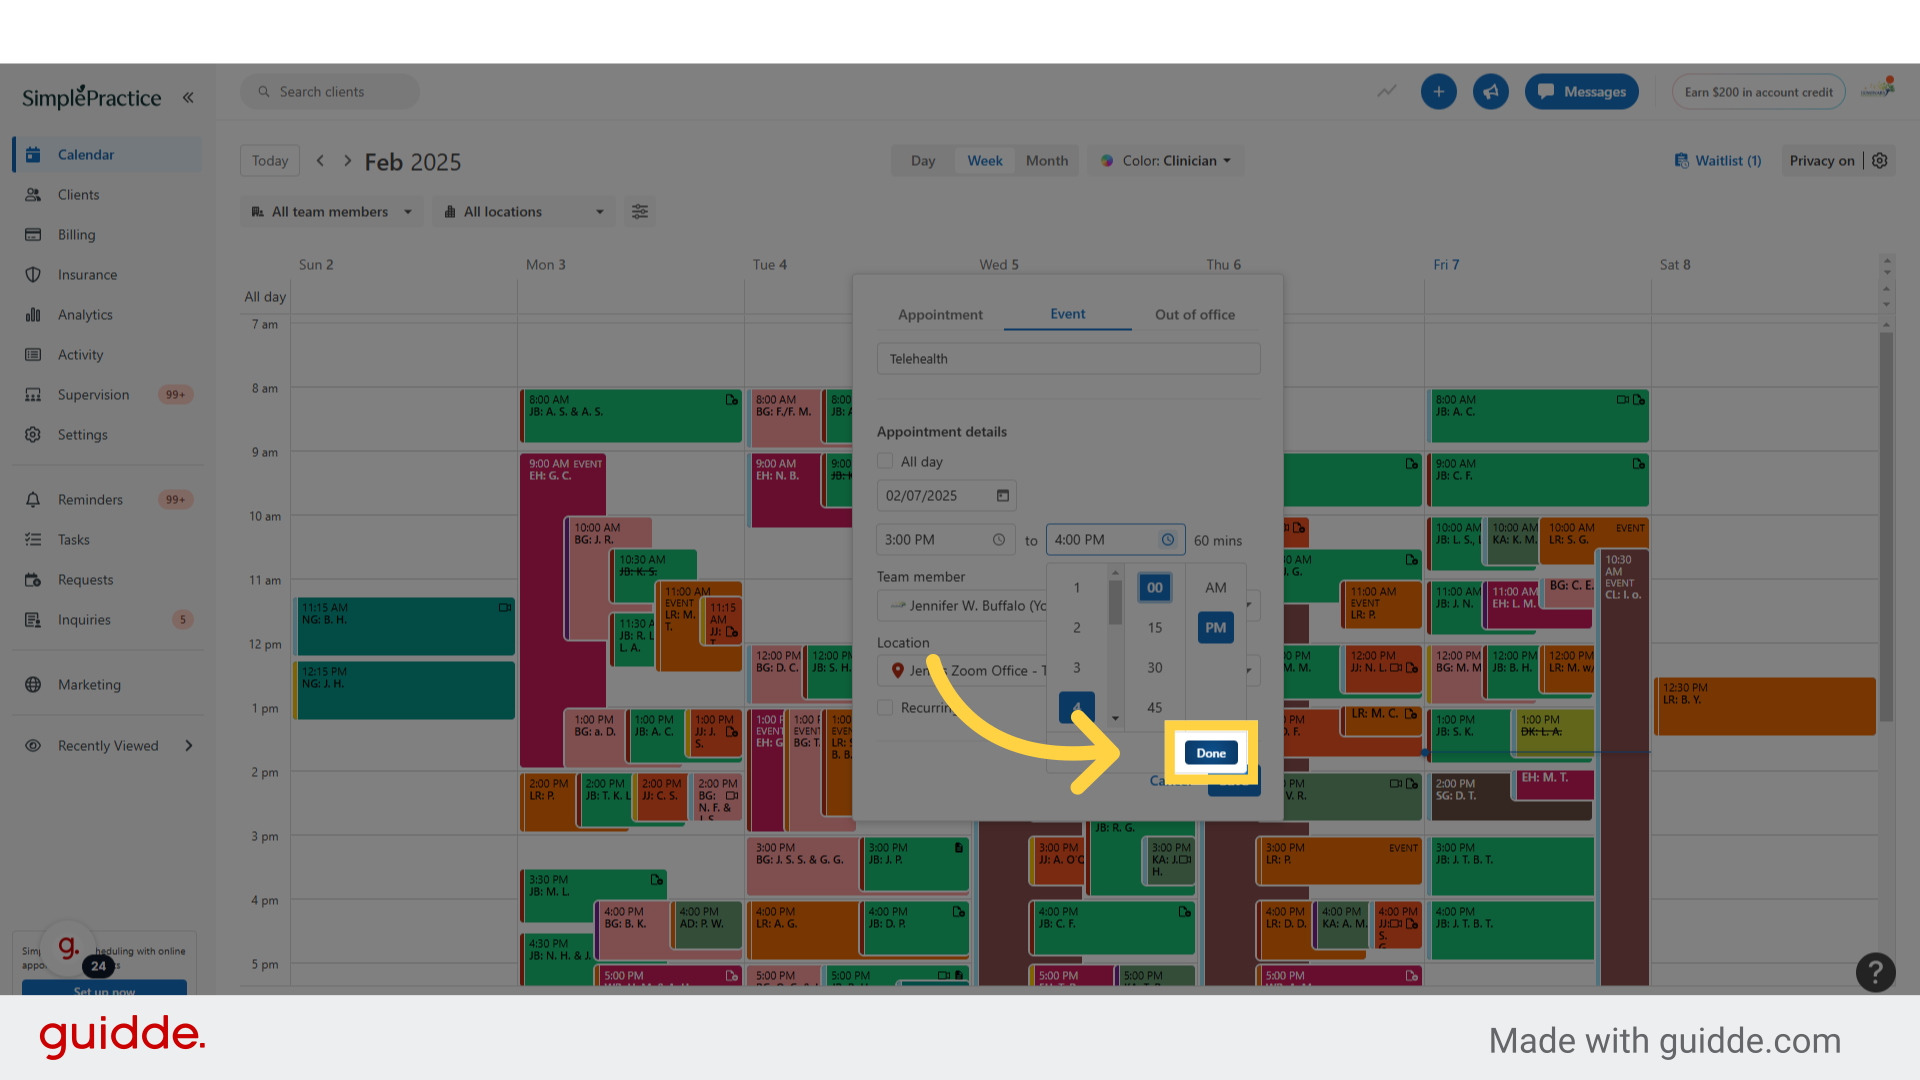
11. Chose the correct start time for the event
12. Click "Done"
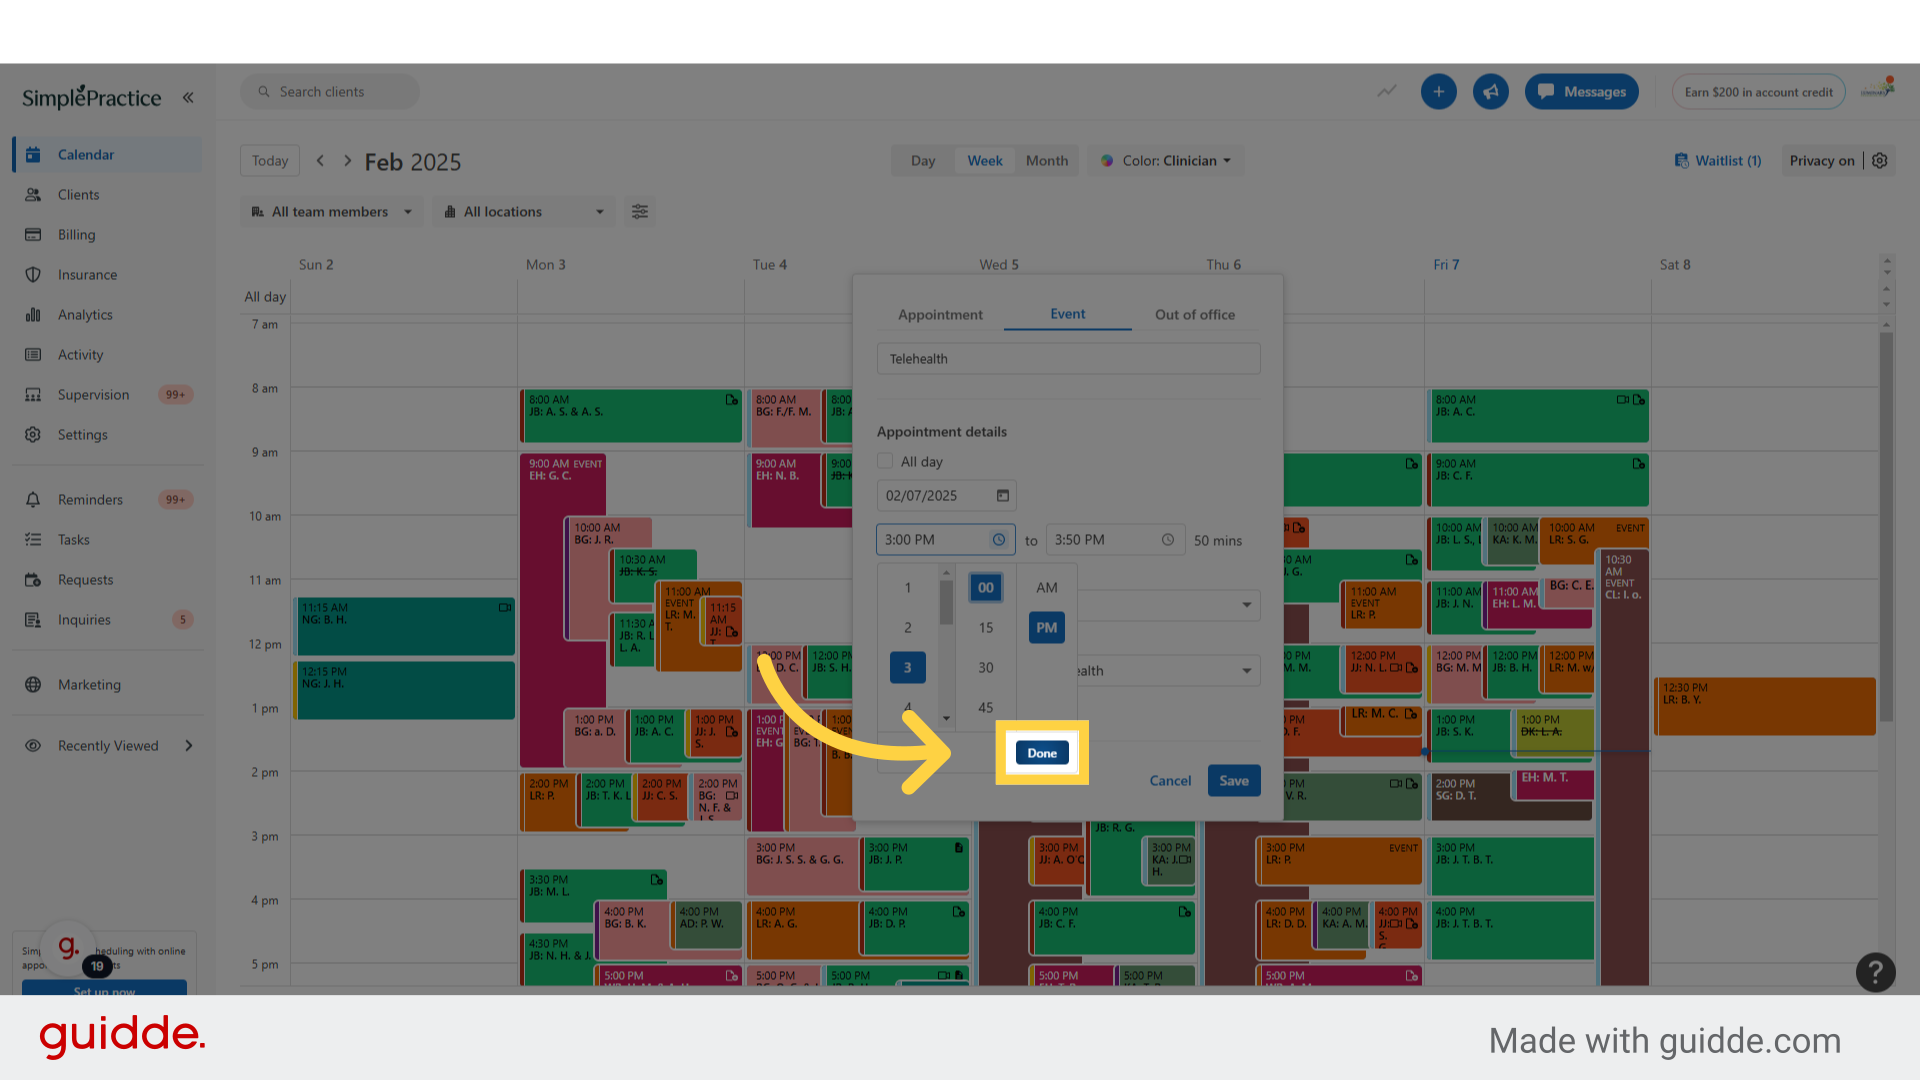
13. Chose the correct end time for the event

14. Click "Done"
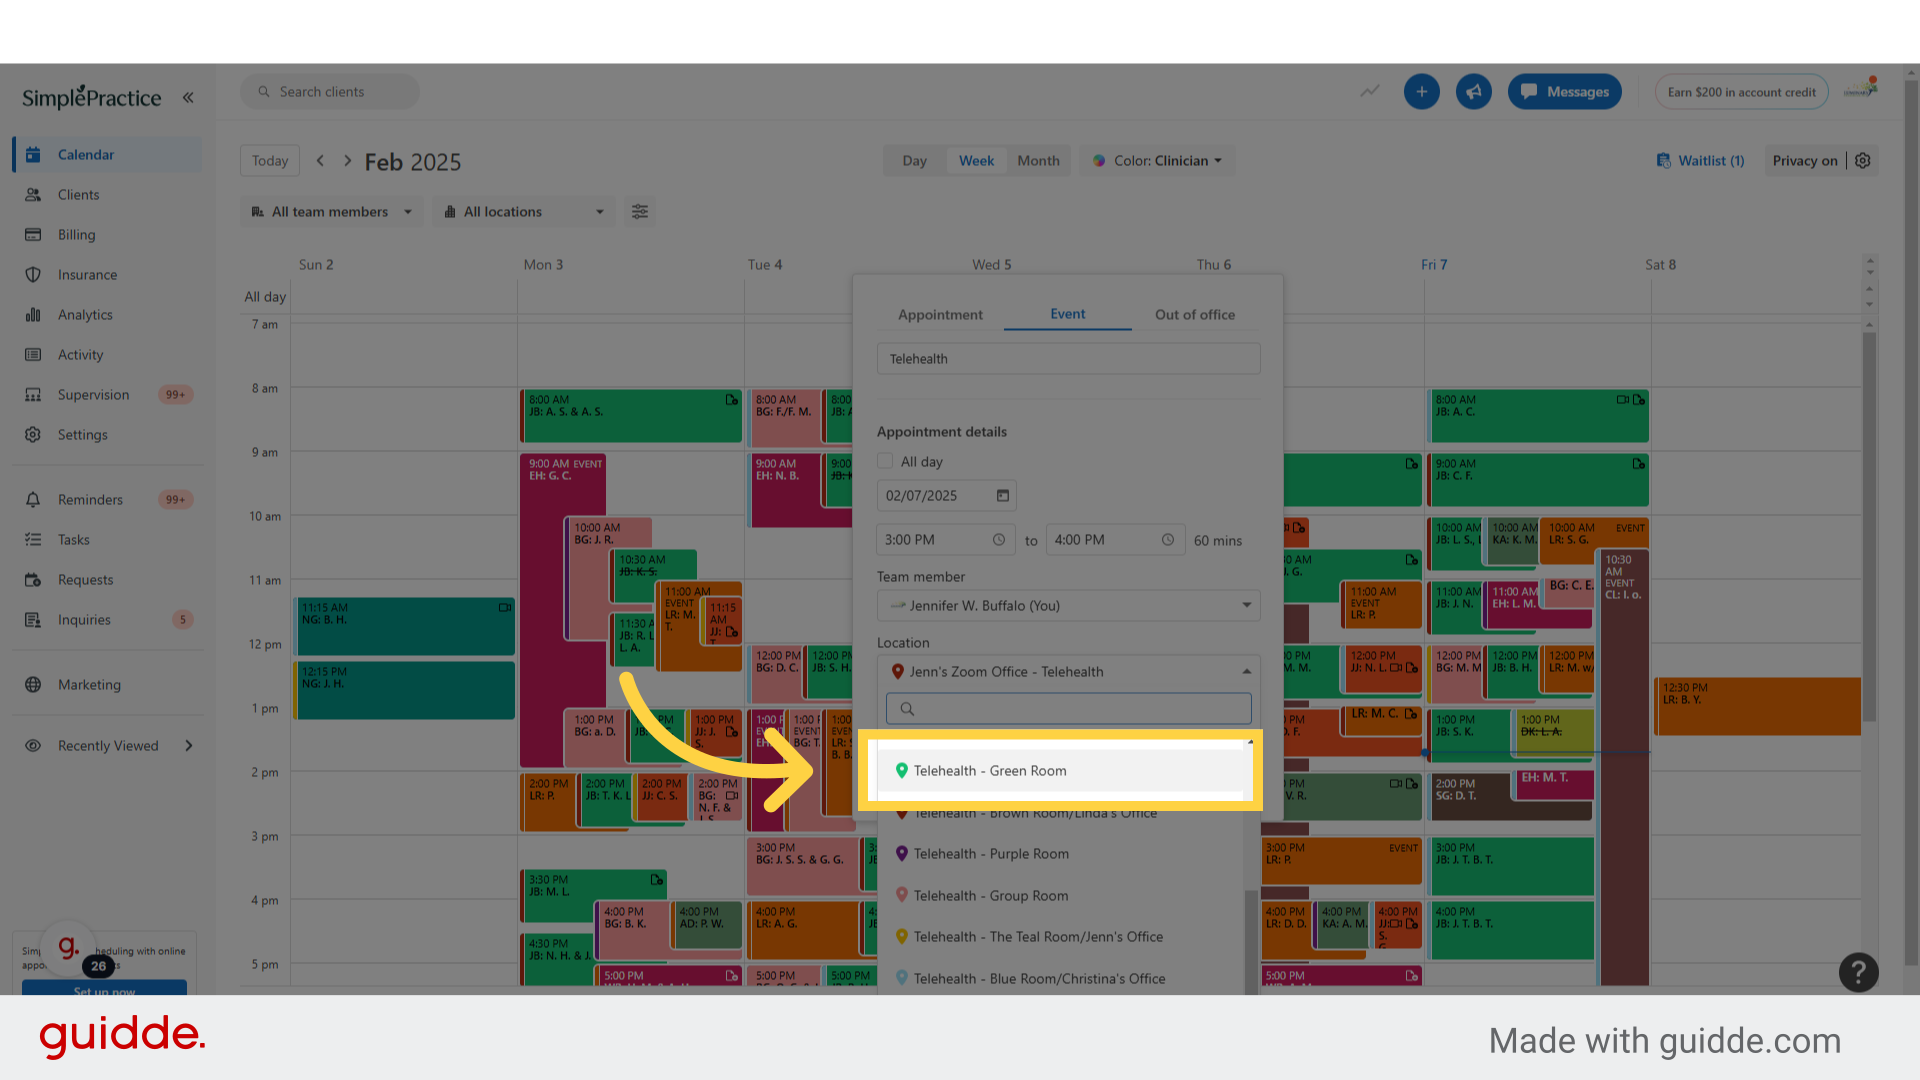
15. Click "Location" and scroll to select the telehealth room from the drop down
For this example we are using "Telehealth - Green Room." Note: you will need to confirm that the room you are creating an event for is available, prior to making your initial Video Office appointment.
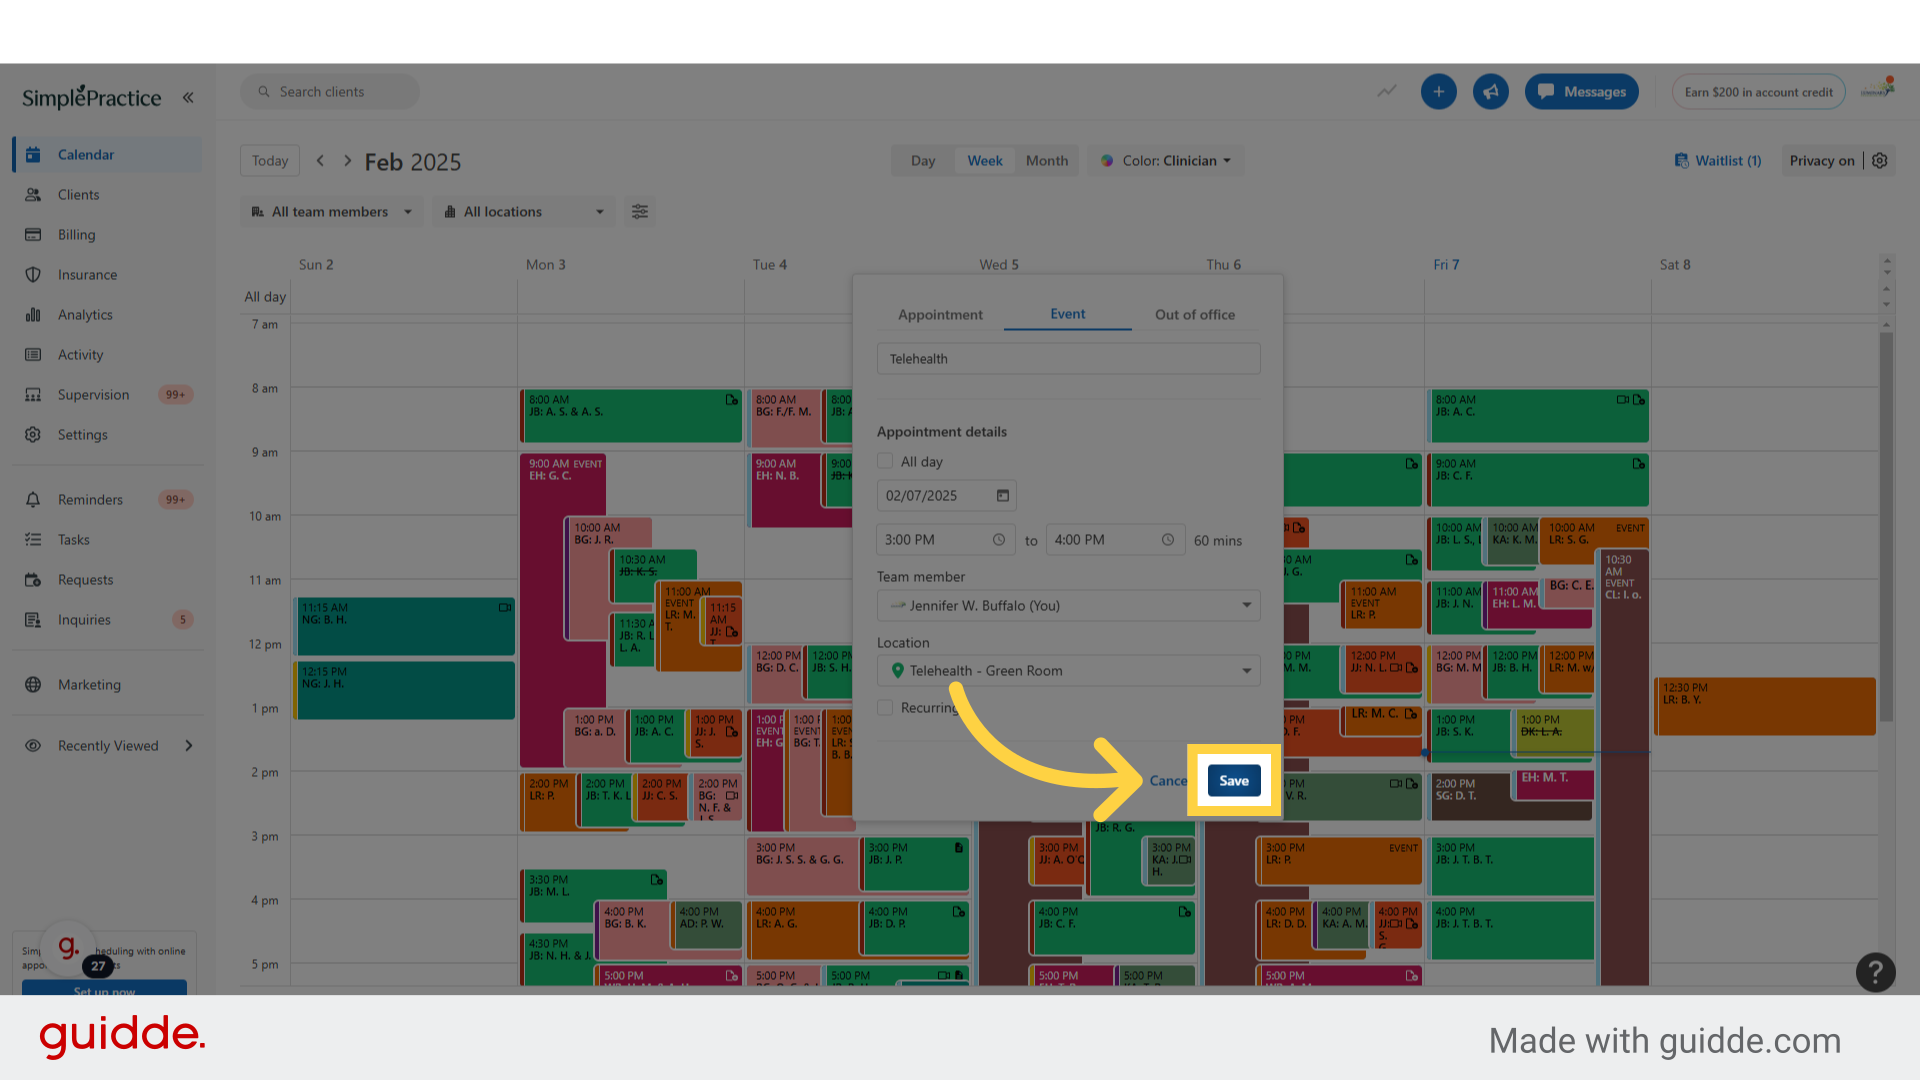
16. Click "Save" to finish
This will create the event for your appointment in the calendar. Please double check and make sure it is visible on the calendar.
Note: Please do not create time blocks for admin work, they are solely for back to back telehealth appointments in the same room. If you do not have multiple appointments back to back, please only create the event for the appointment time you will be using the room for.